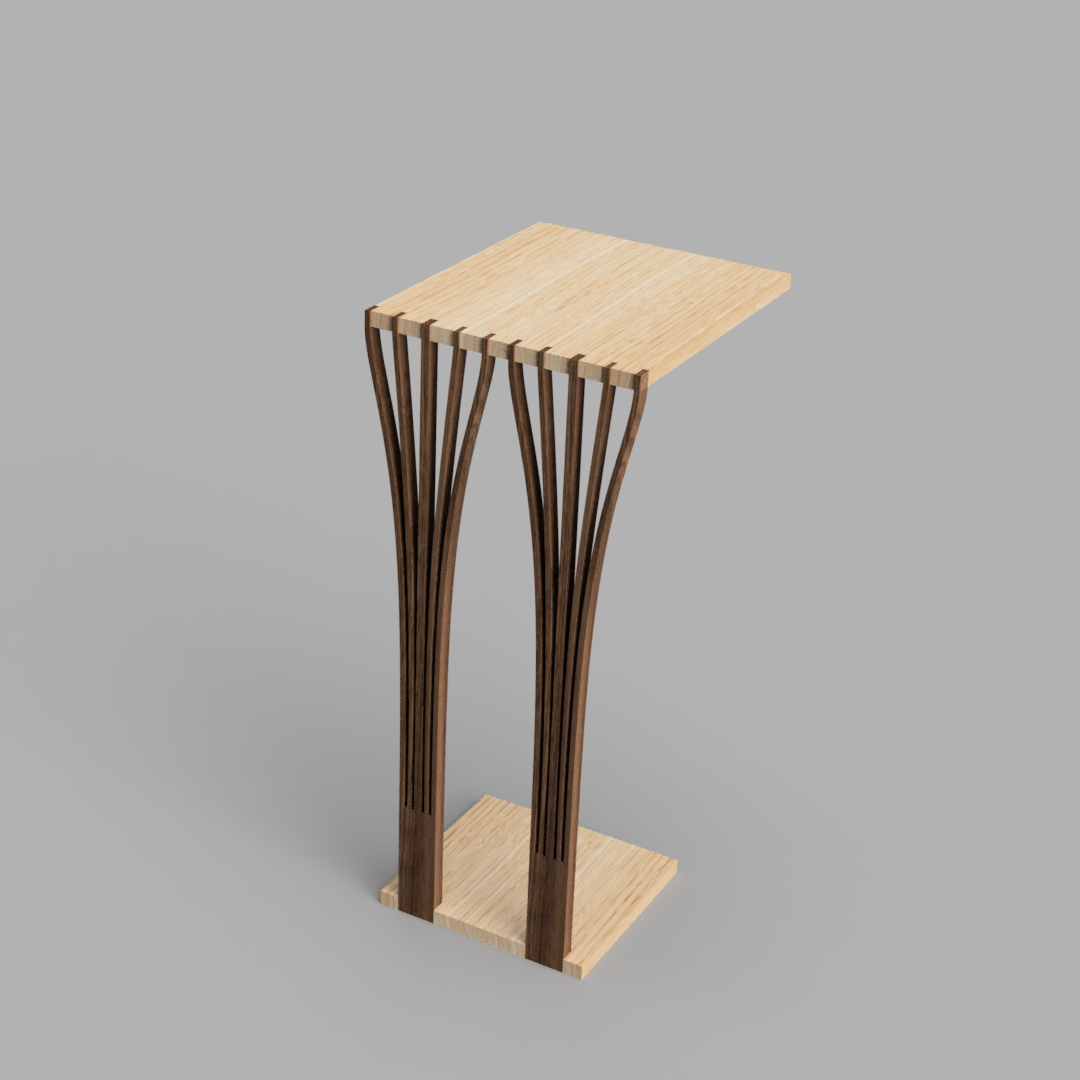
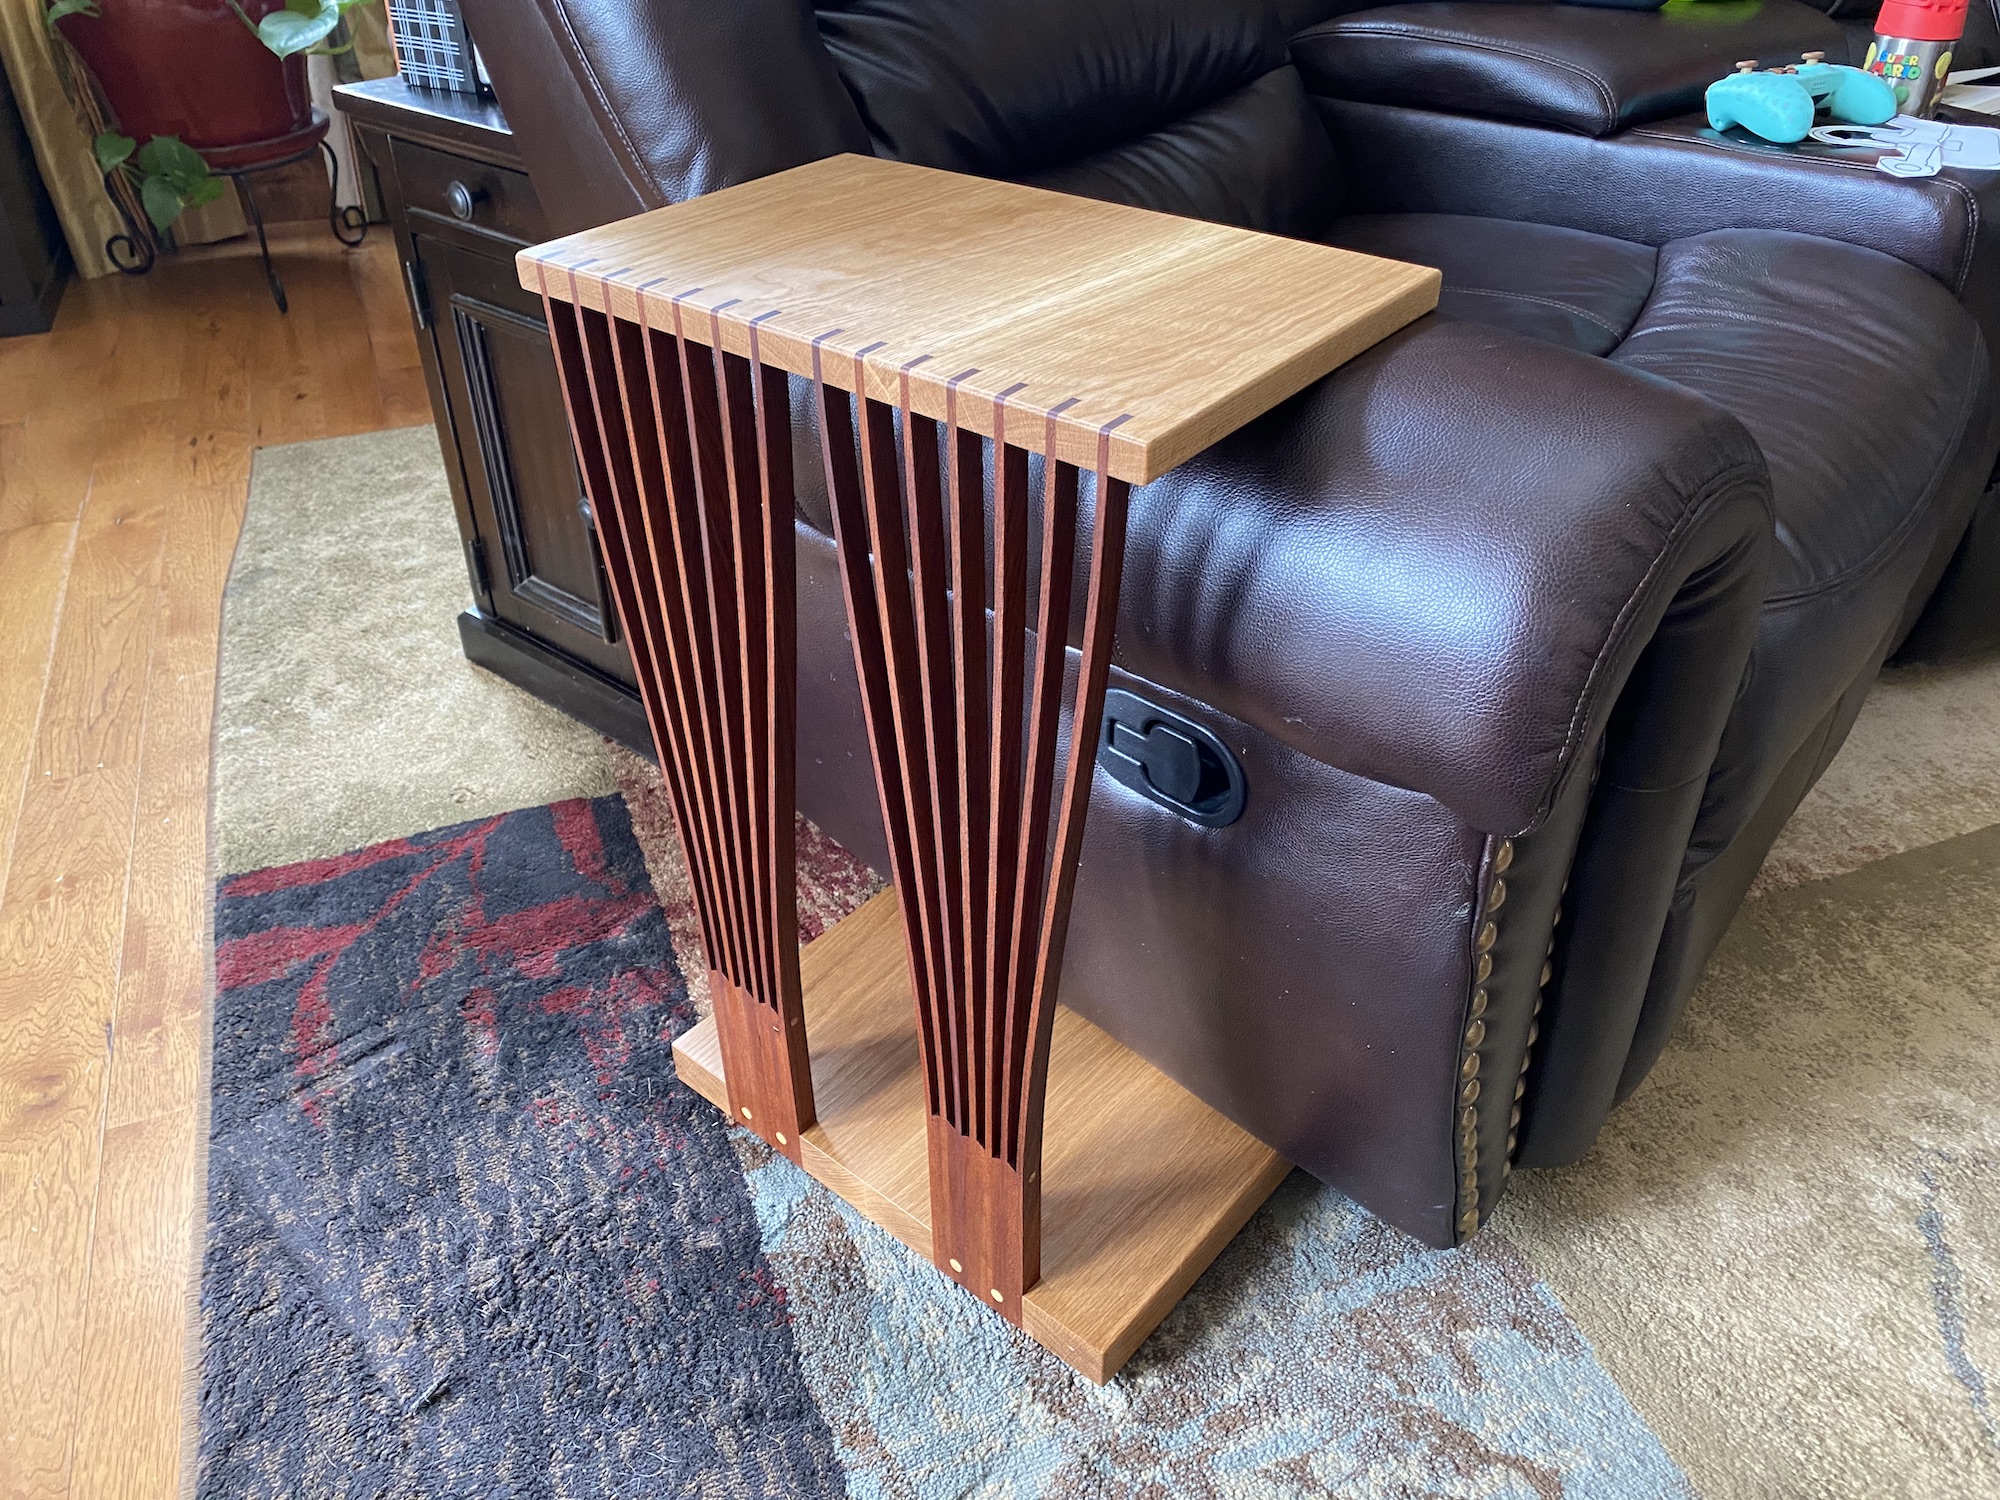
My new shop assistant Jon likes to dabble in design. He posted a cool little table idea to his Instagram feed and I thought it would make a fun experiment for TWW. We put our heads together and came up with a prototype. As you probably know by now, even prototypes can be beautiful and functional so Jon took the table home and put it to work. After that first proof of concept, I really wanted to take a second crack at the design with a few changes that put a slight Spag-spin on it and you’ll see that one at the end of the video.
If you try to build one of these, there are a couple of things we learned that I’d like to share with you.
- It turned out to be a lot easier to bend the strips than I anticipated and you saw that we removed the strip bundle from the holding jig. So there’s really no need for that holding jig. The strip bundle can simply be glued together on its own and the strips can be hammered into the slots during the glueup. The additional benefit here is that the glue joints aren’t stressed until well after the glue cures.
- We added dowels to reinforce the bundle of strips. Be sure to do this BEFORE you attach the bundles to the top.
- Sand your strips with a hard sanding block before assembly, or use a hand plane. If you have any mill marks on those surfaces, you don’t want to have to sand them away after the fans are glued up. But don’t use a power sander. A hard sanding block will maintain flatness.
Download the Plans