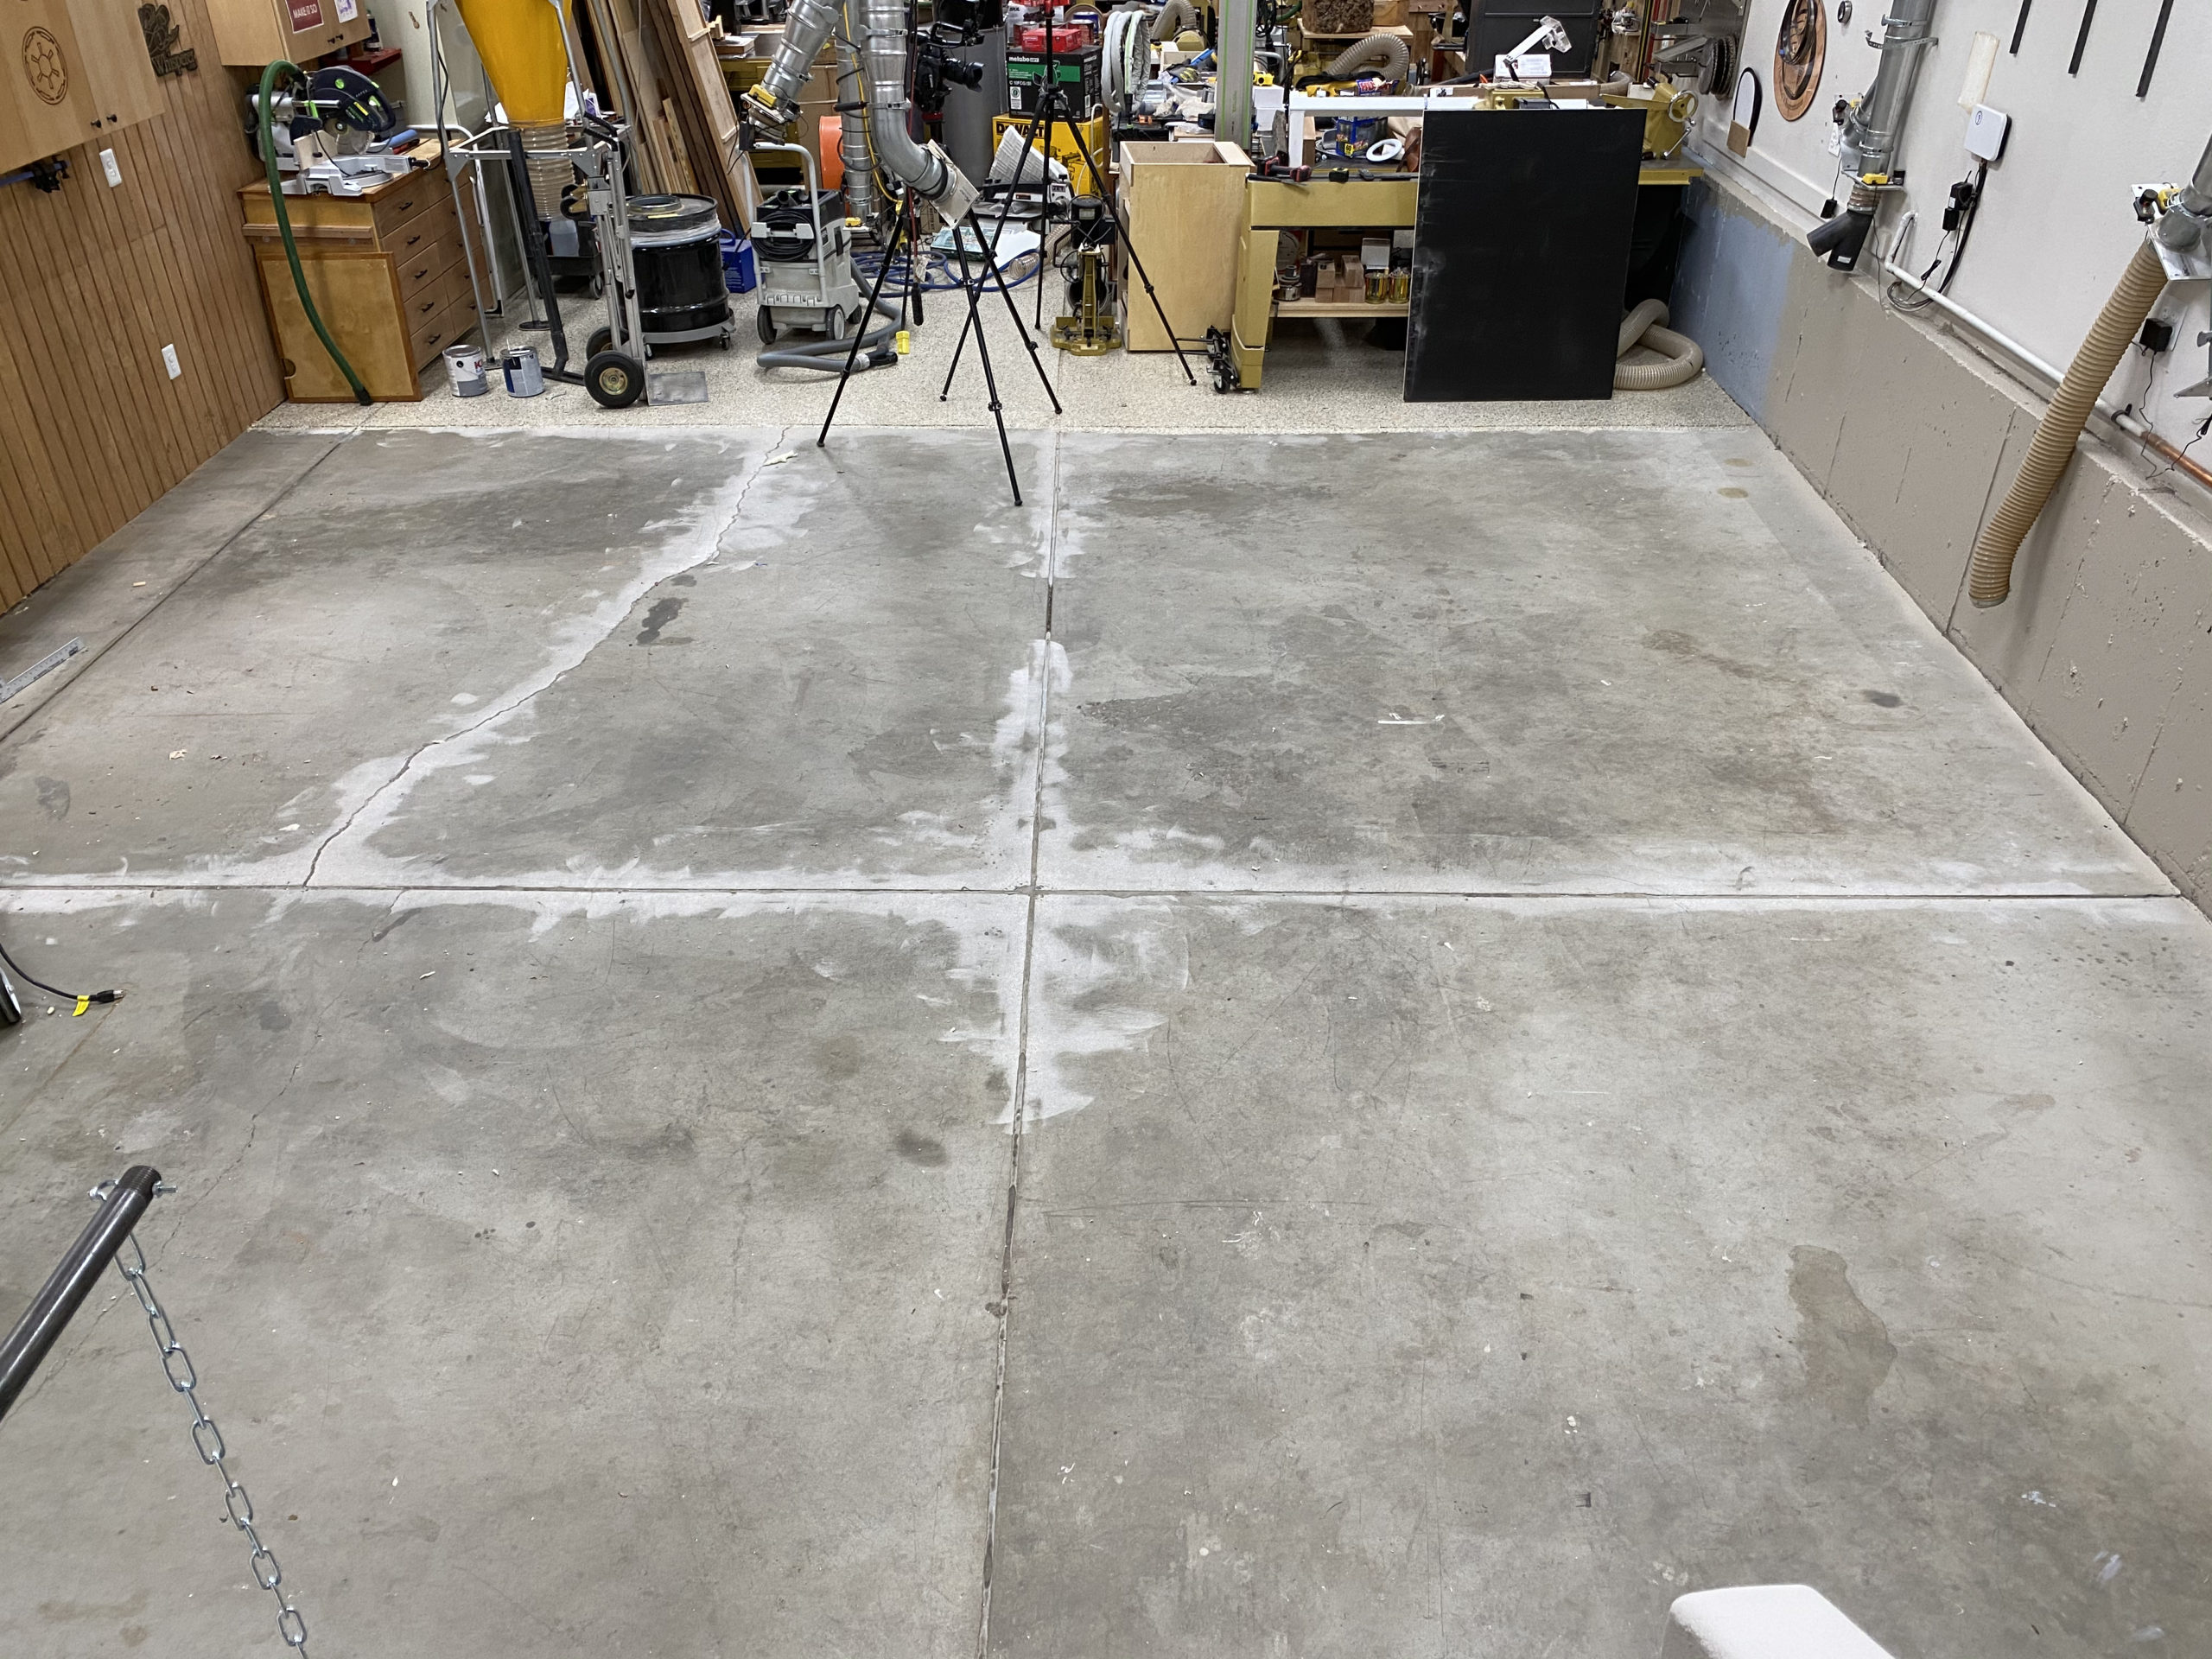
If you have concrete as ugly as mine, and epoxy floor makeover might be just what the doctor ordered. My Denver, CO shop has concrete floors that have moved quite a bit over the years and as a result it developed high spots and cracks that became trip hazards. My brother in law Jay rented a diamond grinder and took down the most offensive spots, but what was left was an ugly mess of a floor. So I decided it was time to apply an epoxy floor coating.
By the way, this isn’t my first rodeo with epoxy. When I built the “Dream Shop” in Arizona, I wrote two articles about shop flooring choices and ultimately decided to go with epoxy as a base level of protection with black rubber mats in the work areas for additional comfort.
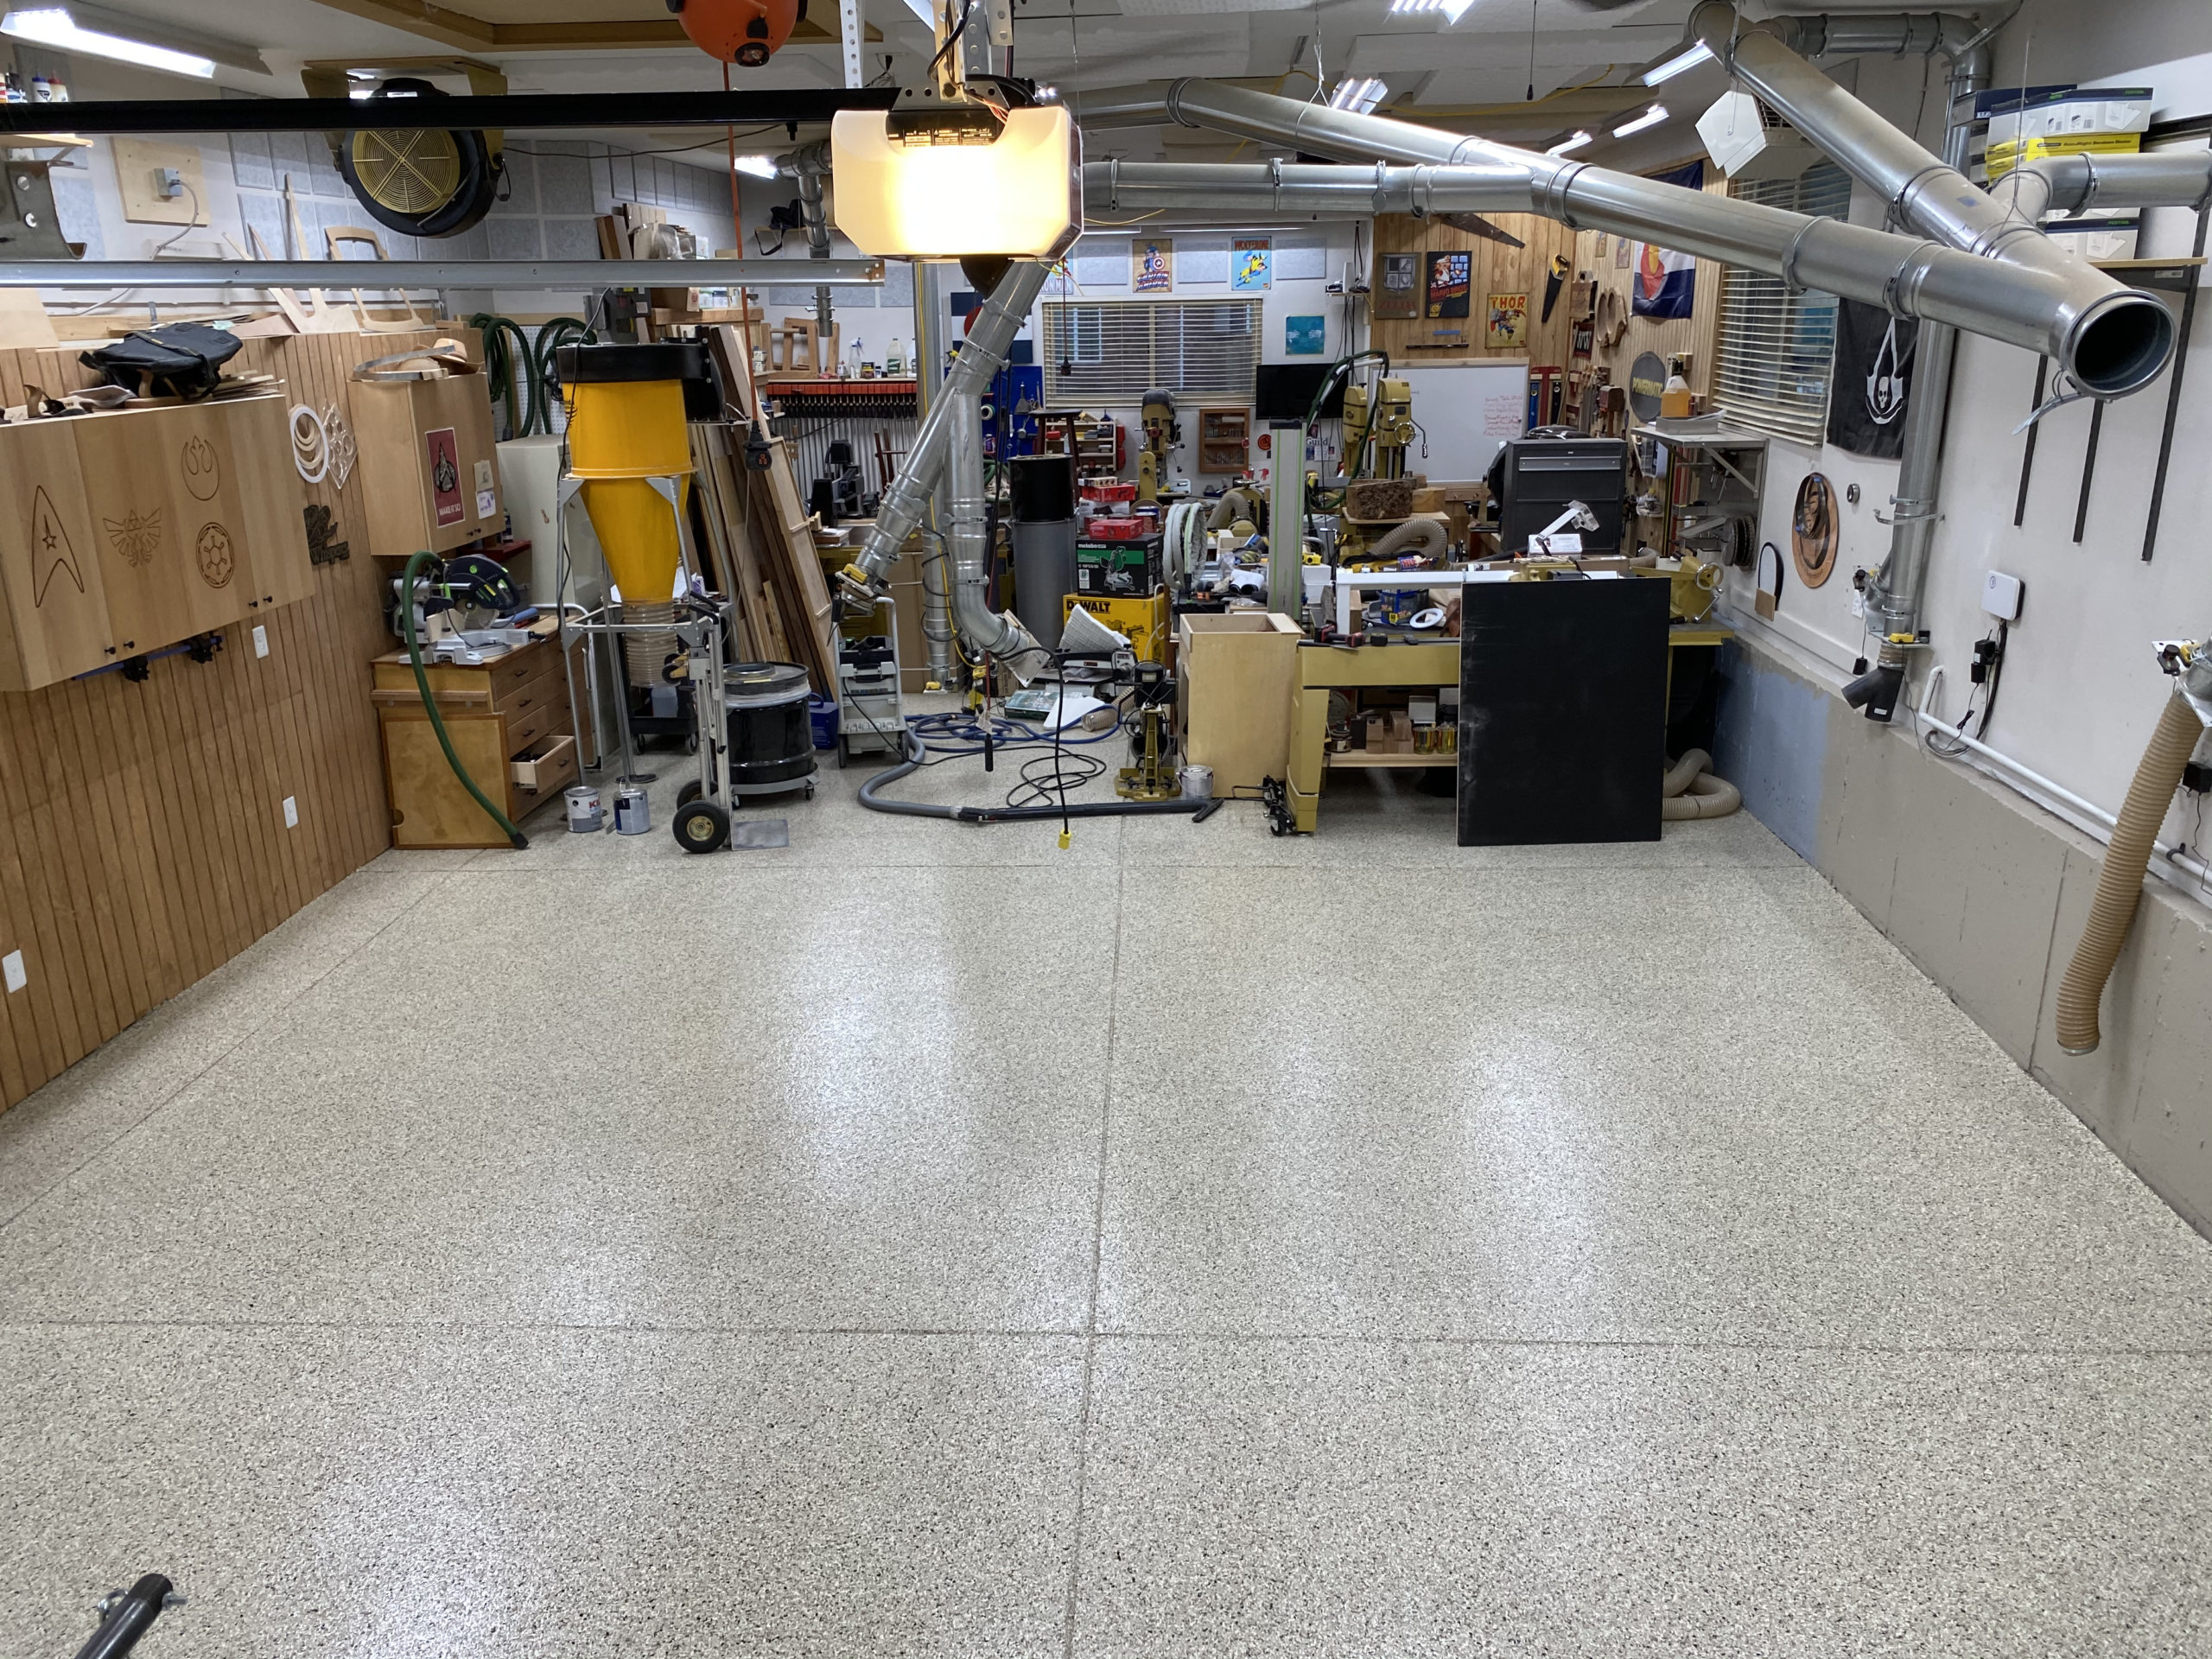
Below you can see the dramatic before and after:
What is an Epoxy Floor Coating?
Epoxy floor coatings are fundamentally similar to the epoxy we use in our shops as an adhesive or in epoxy pours. It’s a 2-part mixture that cures via a chemical reaction and bonds to the concrete providing an attractive and durable finish. Sometimes little chips (or other stuff) can be used as a broadcast medium that sit in the wet epoxy and provide texture and more color. After the epoxy dries, a topcoat can be applied for additional durability. That pretty much describes my floor: a light tan epoxy coating with a 1/4″ broadcast medium, with a polyaspartic topcoat.
DIY or Hire a Pro?
There are a lot of things to consider if you plan to go the DIY route. First, you will want to research the preparation process and decide if you’re up to the task. Old concrete is usually worn, stained, cracked and damaged so you’ll need to fill the cracks and remove the stains. In order for the epoxy to bond effectively, the pores need to be opened up and you can’t have anything contaminating the surface. Most DIY’ers will do an acid etch. This involves applying an acid solution to the concrete and then rinsing it away. In my shop, this was a no-go because two of my garage doors are sealed shut so there’s nowhere for the water to go. Also keep in mind that acid etching isn’t a perfect process and isn’t nearly as effective as what the pros do: diamond grinding. The grinding abrades the top layer of the concrete, cleaning it and opening up the pores all in one shot. You can rent these machines if you’re adventurous but be prepared for a dust party. Even with proper dust collection these tools can produce oodles of incredibly dangerous concrete dust particles. A respirator is mandatory if you plan on continuing to use your lungs for a while.
After the prep work is complete, the epoxy is mixed and applied. While it’s not incredibly difficult to do this work, there are tools and techniques that help the process go smoothly and I’m sure you can find all of that info and gear online. But there’s definitely a nuance to the process since it’s not quite as forgiving as painting a wall. And remember, the fumes from the epoxy are brutal. Once again, a respirator is mandatory. Speaking of the epoxy specifically, keep in mind that the pros have access to a higher quality epoxy than the stuff we can get at home centers.
For me, the choice was obvious: I hired a pro. Between the challenges in preparation, the safety issues involved, and the fact that I want the coating to last as long as possible, I couldn’t justify going DIY.
How to Apply Epoxy with a Shop Full of Tools?
If you have the budget and means, the easiest thing to do is to get the tools out of the shop completely. That means you need either a safe covered storage area or you’ll need to rent something like a POD. In my case, I don’t have the storage area and a POD was out of the question because they’re not flush with the ground. Many of my tools weigh in excess of 500 lbs and getting them up a 6″ step is a daunting task. So I opted to break the project up into two phases. This extended the total length of the project and required me to move my tools a total of THREE times, but in the end it worked out just fine. Thankfully, it’s Winter right now and it wasn’t difficult to find a flooring company willing to break the job up into two parts. It was also fortunate that I have a tool:space ratio that allows all of my tools to fit in one half of the shop when arranged like Tetris pieces.
What Does an Epoxy Floor Do For You?
A lot of folks will dismiss an epoxy coating as merely aesthetic. There’s no doubt it really dresses up the space nicely, but there are functional reasons for an Epoxy Floor Makeover. An epoxy floor is very easy to clean, whether by vacuum or broom. Since the surface is sealed, the floor is stain resistant and spills are easy to clean up. And because the floor is lighter in color and slightly reflective, the space becomes brighter and more inviting. Also consider that an epoxy floor coating with no additives can actually be quite slippery and hazardous. But with the addition of broadcast medium and grit, the floor takes on more of an “anti-slip” quality. Finally, while I don’t have plans to move any time soon, an epoxy floor can help boost resale value.
How Much Does it Cost?
I’m sure this is something that will vary dramatically depending in the company, the region, the materials they use, and maybe even the time of year. In my case the price was about $4.75/sq ft. Obviously if you go the DIY route it’s going to be much cheaper but make sure you factor in the potential equipment purchases and rentals.
In the end, I do feel an epoxy floor coating fits firmly into that “luxury” category. It is by no means a necessity. If you’re setting up a new shop and the budget is tight, I’d rather see you get the tools you need instead of improving the shop floor. But when the budget is there and your tool needs are satisfied, an epoxy floor coating can be a real nice shop upgrade.


