Planer Sled – Viewer Jig

October 27, 2009 by thewoodwhisperer
Filed under: Viewer Jigs 

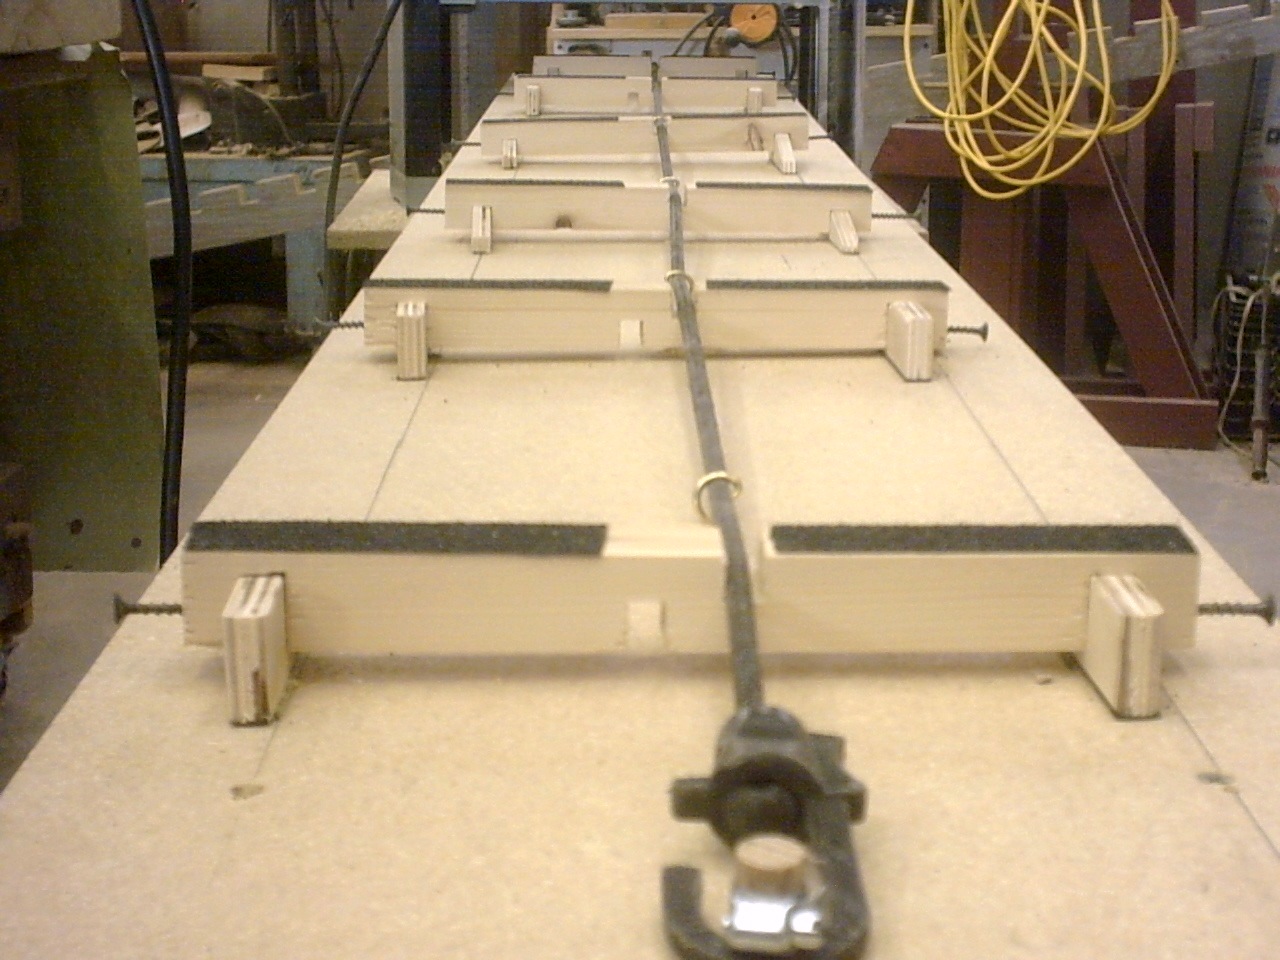
This jig was submitted by Charger, one of our chat room regulars. Its a great way to flatten a board that is too wide for your jointer!

IMG00005
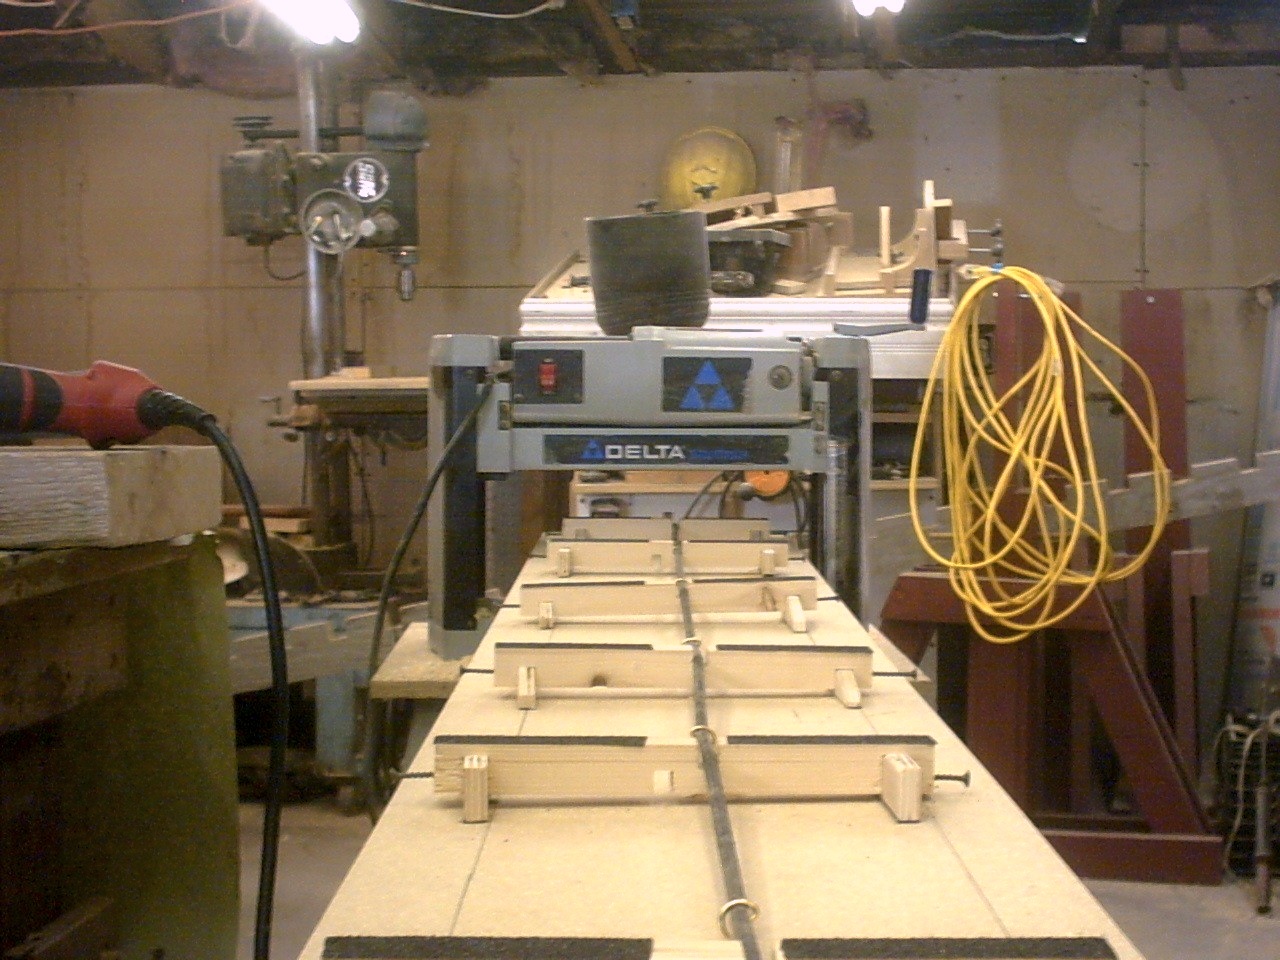
Well I am currently drying some White Oak for a Captains Canopy Bed for my daughter. The wood should be ready in about three weeks or so. The wood is 5/4″ x 11.5″ x 8′. It does show signs of twists and cupping. I don’t have a 12″ jointer so how do I flatten these? Answer: Build a planer sled that was showcased in Fine Woodworking. I had seen the video and was impressed with it’s simplicity. I decided to build it to flatten the boards.

IMG00004
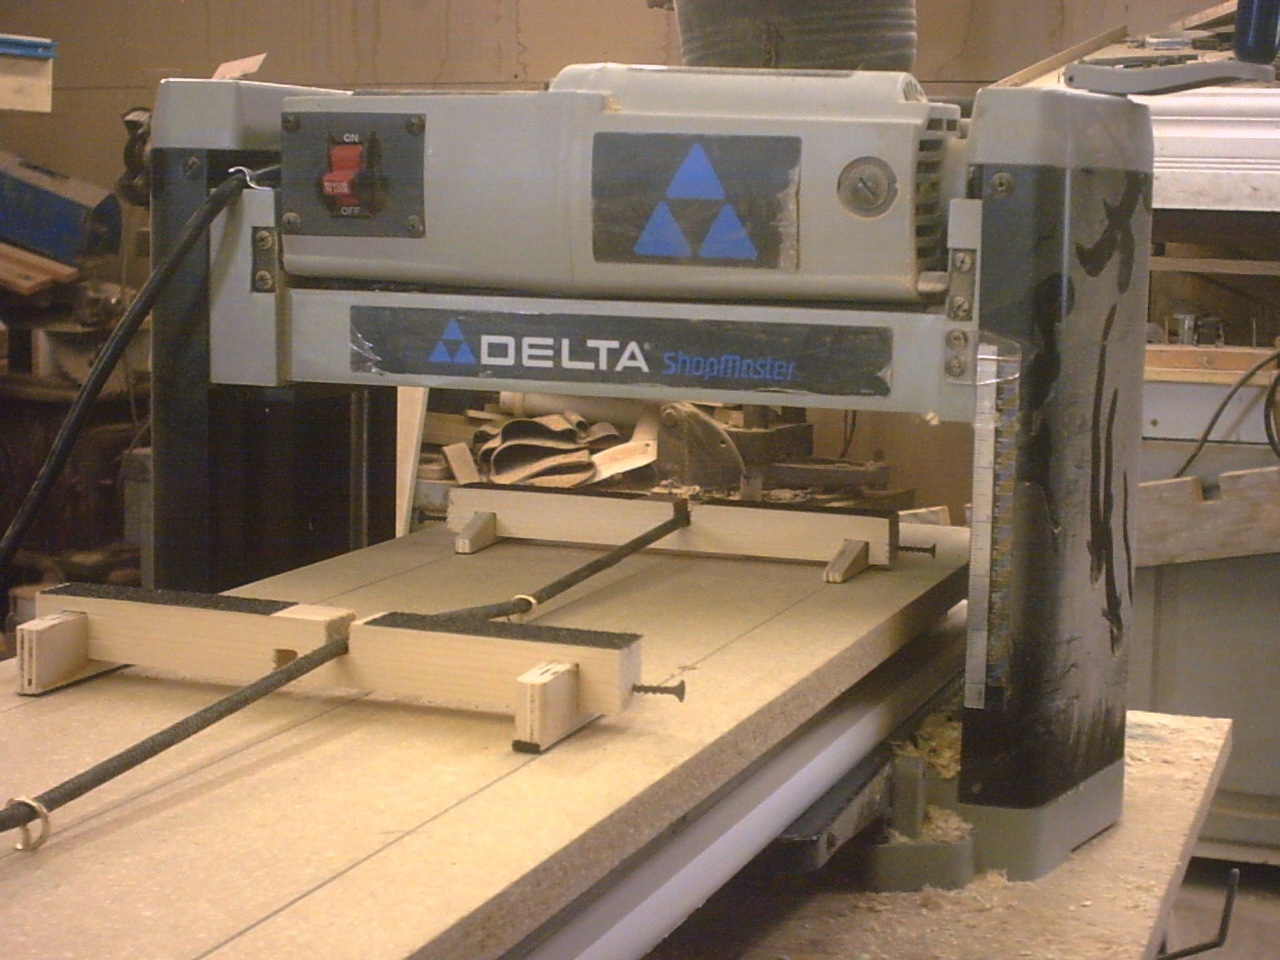
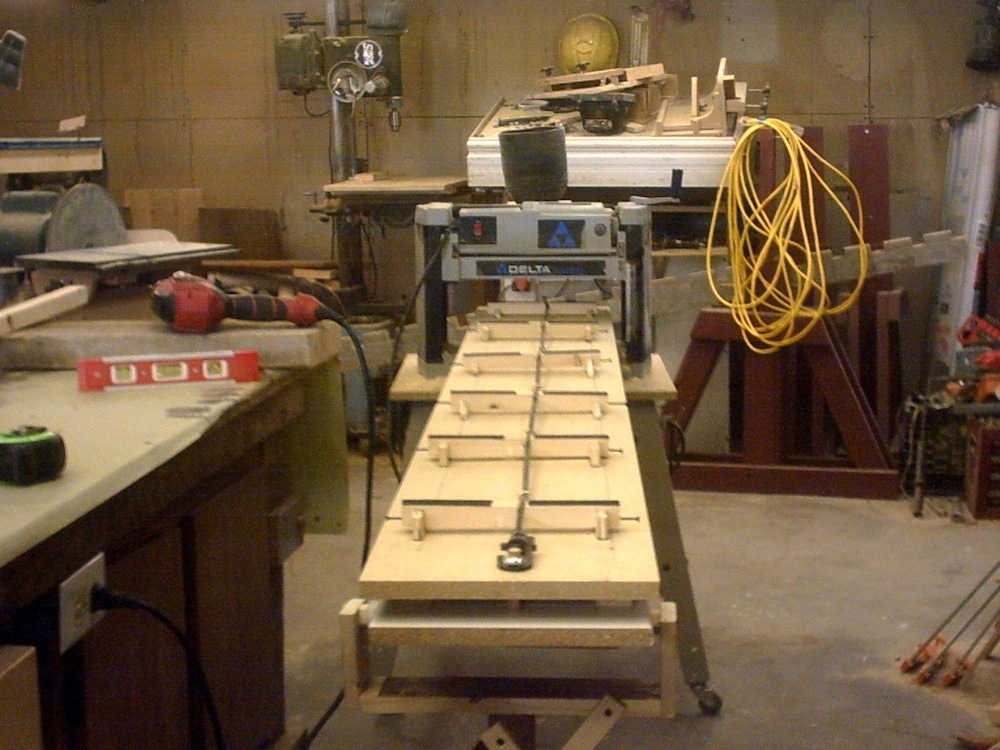
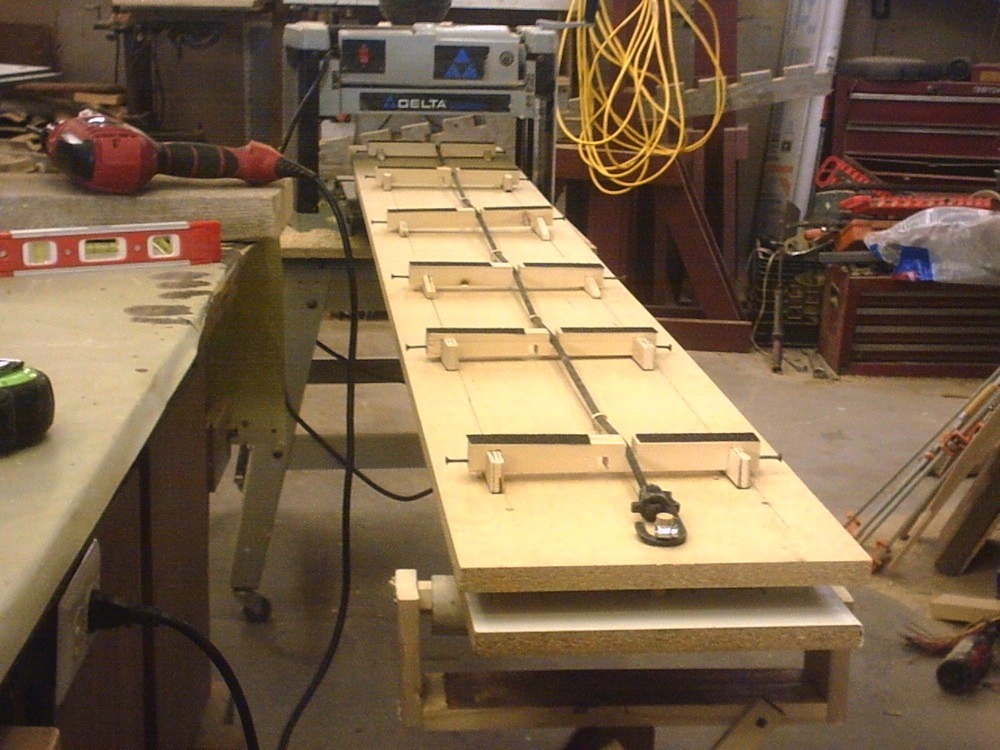
The plans called for 1/2″ plywood for the top and bottom of the sled and then plastic laminate on the very bottom of the ply to make it have less friction for the planer. I made a few changes in mine. First I bought Melamine Shelving that is 12″ x 8′ for the bottom. With that surface there would be no reason to laminate = savings of some dollars for me. Second thing I did was to buy a particle board shelf for the top = less $ then a sheet of 1/2″ plywood. I then made the rest of it like the plans called for. The wedges slide in and out of the supports to make the board stop wobbling and then it can be planed. I really like the jig and look forward to using it a lot in the future. I’ll update you all on the way it performed for me and ad any changes that may be needed. Thanks for looking, Lance Chase aka: Charger

IMG00003 IMG00002 IMG00001

Check out this FWW Video to see the jig in action.

Post to Twitter Post to Digg Post to Facebook

Comments

27 Responses to “Planer Sled – Viewer Jig”
  1. Charger says:

    Hey everyone, Well I promised an update on how this worked,well here it is. I used the sled this past Sunday and Basically it worked great, although I have found that the stair tread anti-slip material didn’t stay adhered to the supports. Also I found that the supports move very easily towards the planer. So I plan in pinning the supports with dowels so they can still be adjusted up and keep them in place. In a week or so I’ll be planing the rest of the wood so I’ll update again after that. Over all the sled does what it is designed to do. I highly recommend building one for those who don’t have a wide jointer.
    Keep making that saw dust, Lance

  2. Critterman says:

    Charger! Hey definitely let us know how she works. I must have read that article a dozen times and every time I’m ripping down a board to fit my 6″ jointer I curse myself for not trying it. Let us know, and thanks for sharing.

  3. Dan says:

    Charger,

    I do not subscribe to Fine Woodworking magazine so could you let me know which issue the article was in? Looks like you’ve made some recent changes to your shop (i.e. the dust shadows on the wall) and the shop looks well used.

    Thanks,

    Dan

  4. MikeB says:

    cool, will add this to my to-do list

  5. Aggie83 says:

    I’ve seen that article before and it is nice to know that it is replicable.

  6. I built one of those awhile ago too. It works really well.

    http://lumberjocks.com/projects/7978

    Mike

  7. Rob Cottle says:

    Very interesting – new to woodworking so this might sound not so smart. If i am understanding correctly once you have the one side done it is perfectly flat and then you just flip it over and finish the otherside? If that is the case that mat be something to build once I get a planer.

    • Germain says:

      Yes. Once you have one side flat from planing with the sled, it’s just as if you’ve run it across a large jointer. Then you flip the piece over and plane it without the sled.

  8. Jim 2 says:

    Awesome. Now I just need a planer :(

  9. Dean says:

    Great idea! I had to look at the video to truly appreciate what this jig does. After seeing that it’s a multi-point support for a non-planar surface I could really see the value.

    Yet another thing to add to my want list.

  10. Germain says:

    For those without a planer, I highly recommend starting with a lunchbox model. I have Delta lunchbox planer and it works great. I’ve heard good things about the DeWalt, which is what the guy in the video is running, but they are a little more expensive. The Ridgid lunchbox planers are also solid and a very good buy.

    Be aware it’s almost a requirement to have a dust collector for any kind of planer. Otherwise, the planer will create a snowstorm of shavings in your shop. (Unless you’re planing outside.) I have heard some people report acceptable results from connecting a large shop vac to a planer with a chip collector in-line. However, I would recommend picking up a cheap, Harbor Freight dust collector if the fancier models are not in your budget. Apparently, those are among the few gems at Harbor Freight.

    • Tom Buhl says:

      re: dust collection. I have a DeWalt735. which actually has a fan blowing the chips out. Great for covering your entire driveway if you don’t hook up anything. I hook mine up to a dust collector, but don’t turn the beast one. Chips are projected into the D.C. unit. An very thick wood (or on edge) some chips are left behind, but in general I suspect anything to catch the chips would work pretty well.

  11. Andy says:

    This is pretty cool, I just use a sheet of melamine and put shims underneath the high parts and then hot glue them and the board down

  12. Tom Buhl says:

    Charger or anyone else: Have you tried the gluing/taping runners/ears on edges of the board and flattening that way? Compare and contrast please. I did that one time and worked. Not much setup, but seems maybe that is best for one or two board. After that the investment of making a good sled becomes better option? Thoughts?
    Hey, Charger, that was a nicely done video and I appreciate your followup evaluation. Cool.

  13. Mark Williams says:

    What is a “lunch box” model? Is that a bench top? Also this may sound dumb, but I thought a jointer was only for making the edge’s of stock square? (I am novie and don’t have either a planer or jointer yet) You can use it on the face as well??? The sled looks cool!

    • Shaun Harper says:

      Look up videos on squaring up rough stock. I think Marc has a video on this topic.

      Sequence:
      1. Joint face
      2. Joint edge for 90 degree corner
      3. Plane opposite face
      4. Rip to width

    • Paul-Marcel ST-ONGE says:

      A lunchbox planer is a benchtop planer. Both names imply they are quite portable until you try moving one :) A jointer is called a surface planer in other countries, which seems much clearer to me than ‘jointer’. That said, the beds on the jointer allow you to flatten the surface pressed to the bed. The flat side of a board is certainly a candidate. To do an edge, you press it simultaneously to the 90* fence and the beds.

      This sled lets you flatten one surface; you’d have to use a table saw or router to square up an edge.

  14. rgdaniel says:

    The latest issue of Fine Woodworking has a reader-submitted item about gluing a pair of basswood runners to the side of an uneven board and running it through that way, then just ripping them off afterward. Seems a lot simpler, as Tom Buhl suggested, unless you have a lot to do. The other drawback maybe is you reduce the maximum width of the board you can handle by an inch or two. On the plus side, no metal going through the planer… those screws make me nervous…

  15. Shaun Harper says:

    Please don’t laugh but I don’t understand the need for two boards for this sled. Why can’t you just use a 3/4″ piece of plywood with melamine and put the shims on top of that? Why do you need two boards on top of each other seperated by an inch? Just to have a place to tie the bungi-cord? Seems like a waste and it just makes the whole thing that much heavier.
    PS I really like the dowel idea to hold the shims in place. I would probably use a 3/8″ dowel inside a 1/2″ hole so there is just a little wiggle room.

    • Paul-Marcel ST-ONGE says:

      Shaun,

      The base of the sled was made like a torsion box so it remains flat as a reference. True, when a piece of plywood is in a planer, the part under the pressure/power-rollers is flat, but the part hanging outside the planer would sag. Sagging would drop the shims and let the part under the blades potentially move from where it was shimmed.

  16. Charger says:

    Hello again everyone, Well I made some changes to the sled after it’s debut. The supports kept sliding towards the front of the sled and changing the way they were supporting the work piece. So I took and pinned them with 1/2″ Dowels. I drilled and installed 2 per support and made them float up and down. I also found that you can’t skimp on the wood for the supports. The plans say make them out of a Hardwood, Do it. I made mine out of 2x material and they broke. So I ended up reinforcing all of them with plywood strips. Ok so how did it work after the changes you ask. Well in one word, “”Fantastic”". This jig is a “Need to have jig ” in your shop if you do allot of Building with wide boards and don’t have a wide Jointer. Keep Making that sawdust, Lance

  17. Mark Conde says:

    I also saw a technique that called for using a 6″ jointer on a board that was greater than 6″. Joint as much of the board that the jointer can handle. You are left with 6″ being jointed and the balance being raised.

    Then take a piece of MDF (dead flat) that is the same size as the jointed width of the board and use double faced tape to attached it. Run the MDF down on the lunch box planer and you result if the wide board being jointed on one side. Remove the MDF board and tape. Run that side thru the planer and voila you have a quick way to joint wide boards.

  18. Leed says:

    I don’t subscribe any longer so this is the first we’ve seen this jig. I like the ideas presented by the design… not sure about the weight but we may just have to try this on some of this qtr sawn syc. Thanks for sharing your results with the jig!

  19. Ray says:

    Hey Charger,
    I too have build this sled, but only recently. I have only the 15 degree cut outs to do to be finished. For those of you wondering about the weight, don’t wonder…it’s not light. It is a manageable factor and not so heavy to be unmovable or anything. Just don’t plan to swing it around your shop like a 2×4. I’ll let you know how it works out since I have a pile of wide cherry waiting on the sled’s completion.

  20. Brad says:

    I’m late to this conversation, but I thought I’d throw in a comment to agree with some of the folks here using MDF. I figure the beginners, like myself, would also benefit.

    The torsion box/wedge design is like a Ferrari and the MDF with a stop at one end, shims, and just a few bucks is like a Honda. One is way cooler than the other but both will get you there. I doubled up two layers of MDF to combat the flex and have had no problems. Makes funky boards flat as a pancake so long as you have your shims placed well. Tape your shims to keep them in place.

Speak Your Mind and Win a Prize!

Leave a comment and you could be a winner in our Wood Whisperer Giveaway!

  • Latest Video

  • Browse By Category

  • Proud To Be Sponsored By!


  • Support our Advertisers


  • Community

    Loading the LumberJocks Widget