This video is a live demonstration I did for The Wood Whisperer Guild. If you like this sort of deep dive content, consider purchasing a course or joining Guild Stream!
Before SketchUp, before CAD, before 3D printing, woodworkers had pencil and paper. And honestly? That still works.
Don’t get me wrong. I’m not anti-technology. I use SketchUp. I have a CNC, a laser, and even a 3D printer all within arm’s reach. Those tools are powerful, and in some cases they can save you a ton of time. But there are certain design problems that, at least for me, still make a lot more sense when I use full-size furniture drawing.
A full-size drawing forces you to deal with the piece in the real world. Not the floating, zoomable, orbit-around-it-from-any-angle world of 3D software. The real world. The one where a table is viewed from normal human height, where proportions either feel right or they don’t, and where a “small” design decision can suddenly become very obvious once it’s sitting there in front of you at actual size.
That’s the part I sometimes struggle with in digital design. I can make something look pretty good on screen, but I’ve also had plenty of moments where I built the thing and thought, “Huh. That looked better in SketchUp.” The proportions were technically correct, but the piece didn’t feel right. That disconnect is exactly why I still reach for a big sheet of paper.
The project that kicked off this conversation is a large table I’m designing for a friend. The initial idea started in SketchUp, just enough to get the basic shape out of my head and communicate the concept. I even took that rough model and used AI to generate a more realistic image of the table in walnut, which was both impressive and completely useless for actually building the thing.
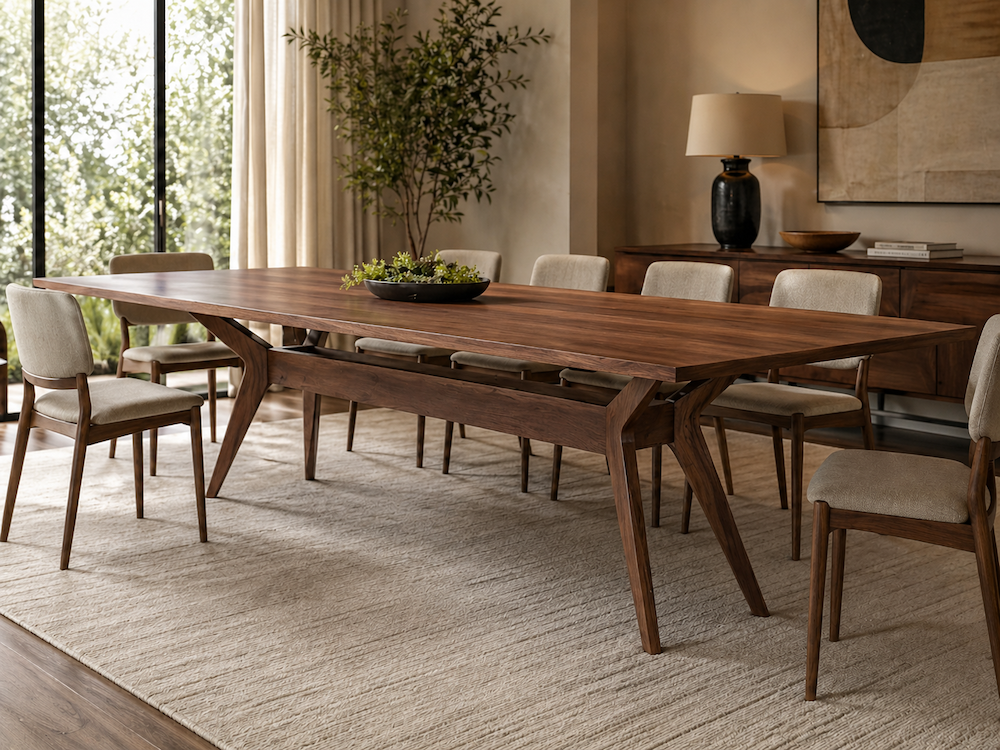
It looked cool. It helped sell the idea. But it didn’t give me the numbers. And eventually, woodworking needs numbers.
That’s where full-size furniture drawing comes in. Once I know a few fixed values, like the height of the table, the thickness of the top, and the general footprint, I can start building the design around those constraints. I’m not guessing in space anymore. I’m working at full scale. I can draw a leg, step back, look at the proportions, adjust the angle, and immediately see whether I’m heading in the right direction.
For this table, the legs have some pretty funky geometry. They angle out, they relate to the rails in a specific way, and the whole thing has to fit under a specified tabletop size. That sounds simple until you start trying to make one angled part meet another angled part at a 45-degree angle. Suddenly, what looked like a clean design becomes a real joinery challenge. And that’s the beauty of this process. The drawing exposes the problems before we even touch the expensive lumber.
In this case, I started working through the leg angles, the height, the rail location, and the way the leg would connect to the rest of the base. Then I made a prototype from scrap 2×4 material just to see whether the shapes made sense in three dimensions. That little prototype immediately showed me things the flat drawing could only suggest.
One of the interesting discoveries was how the rail and leg connection changed depending on where I made the cut. One version put the design problem on the rail and required material to be removed there. Another version shifted the problem to the leg, which opened up the possibility of using a tapered bevel. And that’s the kind of thing I love about design: sometimes a cool-looking detail is really just a clever solution to a problem.
That tapered bevel might look intentional and decorative in the final piece, and it is. But it also exists because the geometry demanded a solution. Good design often lives in that space where function, construction, and appearance all start talking to each other.
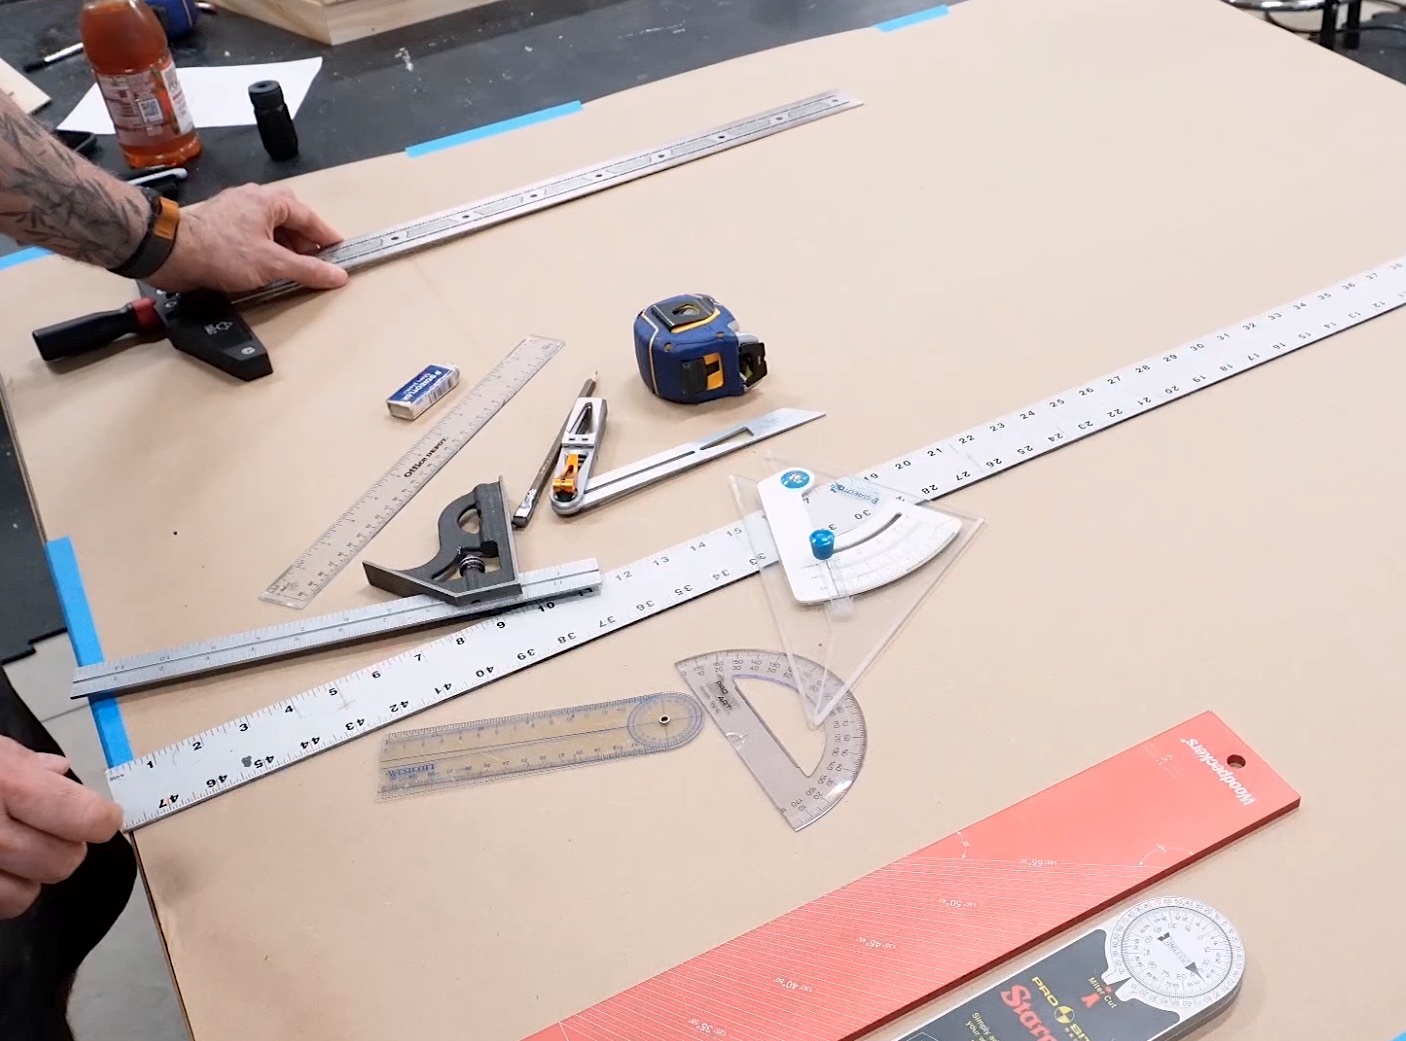
You don’t need a lot of fancy tools to do this. A T-square, a straightedge, a clear ruler, a combination square, a bevel gauge, a protractor or angle finder, and a big piece of paper will get you a long way. The clear ruler is especially handy because you can see the lines underneath it, which matters a lot once the drawing starts getting busy.
The goal isn’t to make a museum-quality technical drawing. The goal is to understand the project before you start committing to wood. Draw it full-size. Find the fixed dimensions. Play with the angles. Look for whole-number relationships when they make sense. Make a quick prototype if the geometry gets weird. And most importantly, give yourself the chance to see the problem before it becomes a problem.
There’s a lot of pressure these days to jump straight into digital tools. And again, if that’s your thing, all the power to you. Digital design can be incredibly useful. But don’t let the existence of modern tools convince you that pencil and paper are somehow obsolete.
Full-size drawings train your eye. They help you understand proportion. They reveal construction problems. And they make you slow down just enough to think through what you’re actually building.
So grab a big piece of paper, a few basic layout tools, and start drawing at full scale. You might be surprised how much easier the build becomes once the design has already had a chance to argue with you on paper.
Resources:


