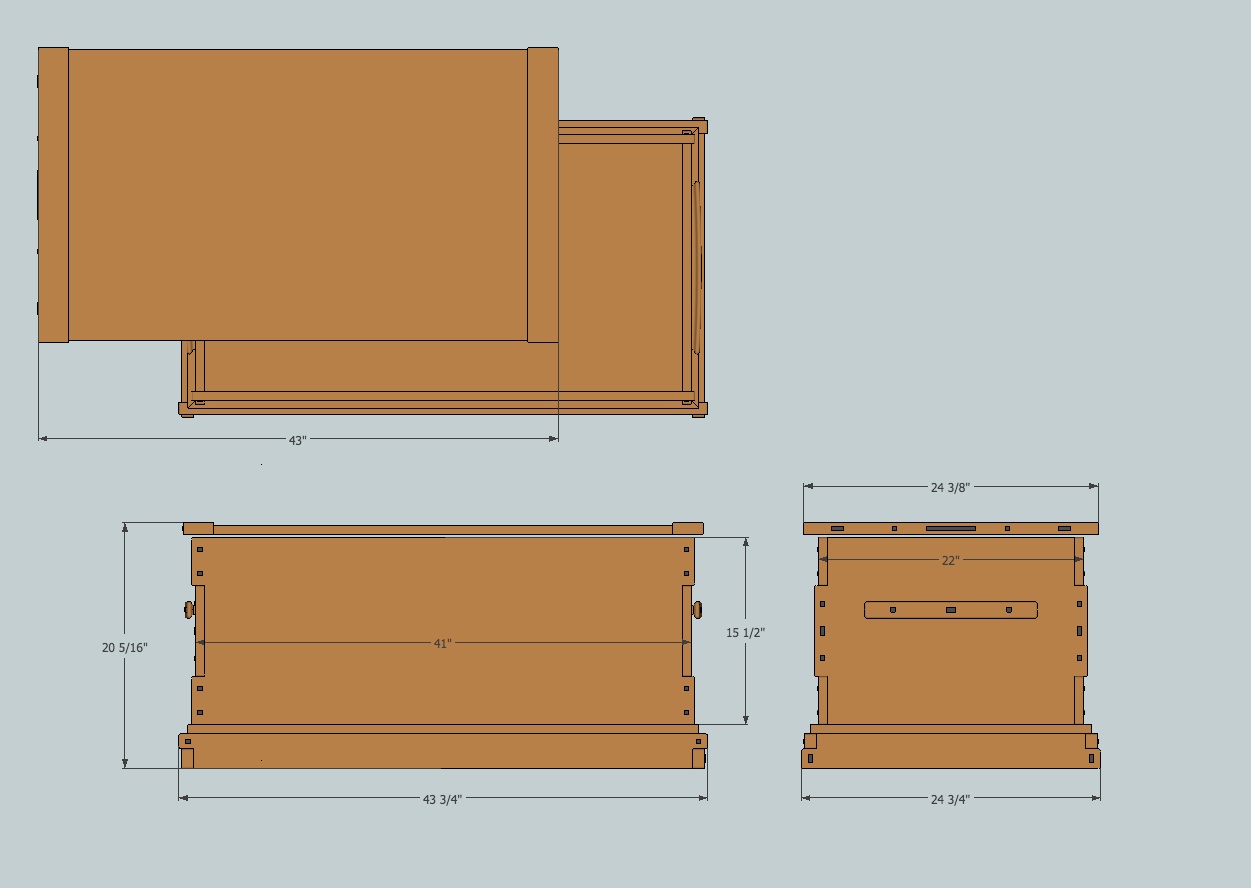
 Right now in the Wood Whisperer Guild, we’re building a Greene & Greene Blanket Chest. As designed, the interior of the chest only has 13 1/2″ in depth even though the entire piece stands at about 20″. The reason for this is the fact that the case is propped up on a substantial base consisting of a deck and a finger jointed frame. So in essence, there’s a lot of wasted space under this bad boy.
Even though I provide a finished plan for Guild members to build from, everyone is encouraged to make modifications that suit their needs and tastes. It was pretty clear from the start that lots of folks wanted to redesign the piece slightly to recover some of that lost space.
I thought it over for a while and decided that a hidden drawer would be a fun alternative to more drastic solutions that might modify the look to some degree. My initial thought was to have a drawer placed in the back which would result in an obvious “drawer” to anyone who inspects the rear of the case. Not ideal. Thankfully, my buddy Aaron offered the perfect solution: use an entire side base piece as the drawer front. I quickly hopped into SketchUp and made it happen, virtually anyway. Here are some of the highlights from the hidden drawer build.
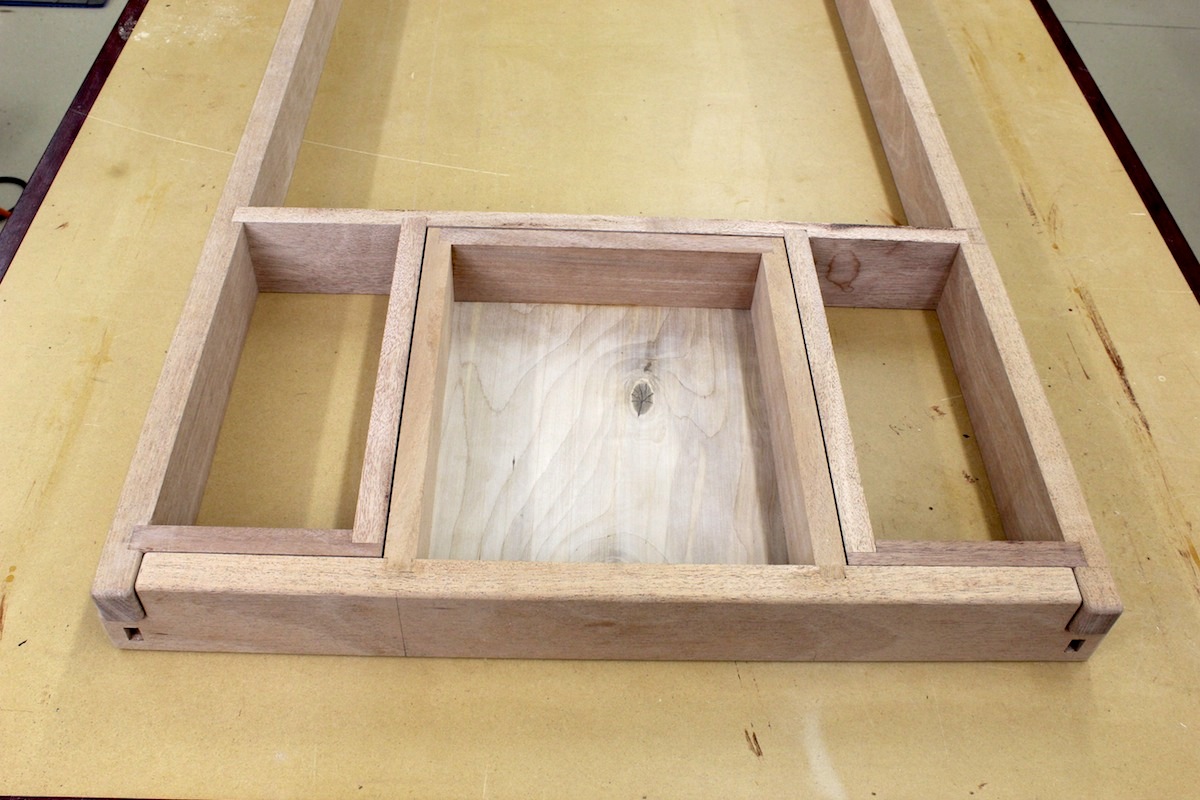
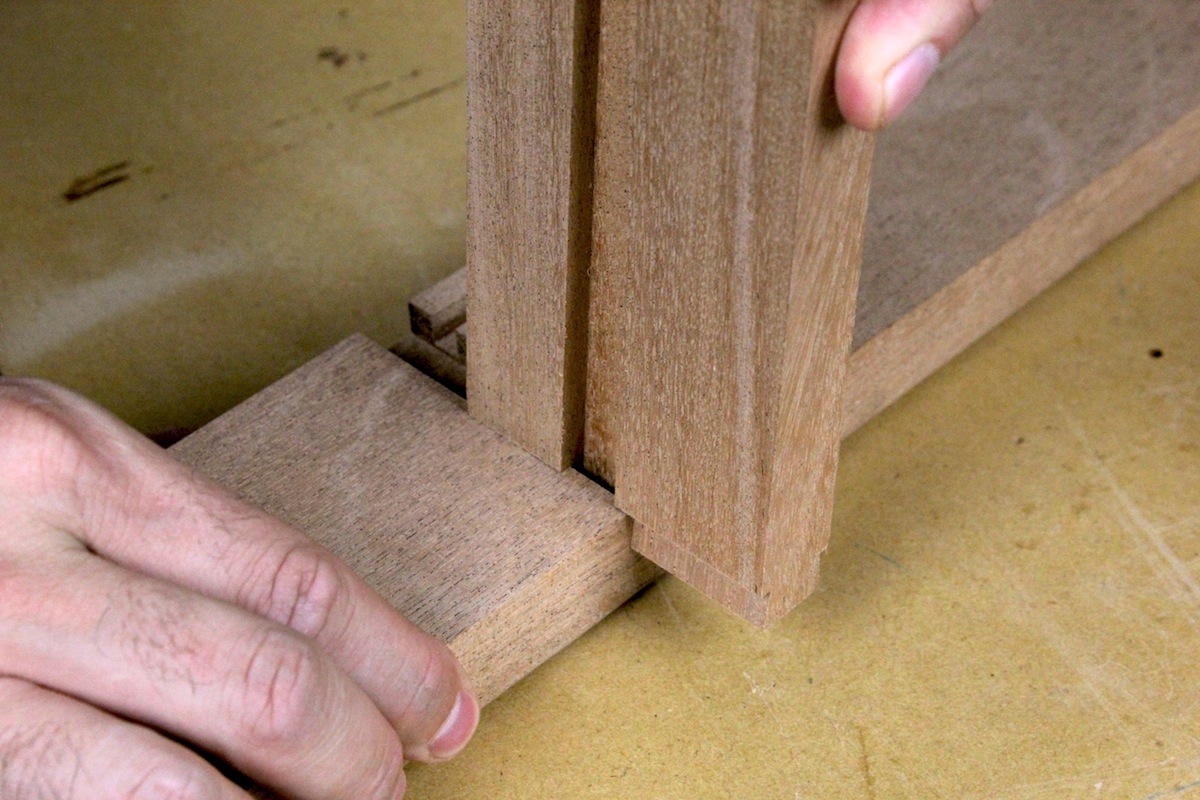
 I started by creating the drawer. Since the drawer front is a pre-existing piece from the project, I needed to come up with a strong joint that wouldn’t change the look on the outside face or require making a new part. Sliding dovetails were the answer. Using the router, I created both the male and female parts of the joint.

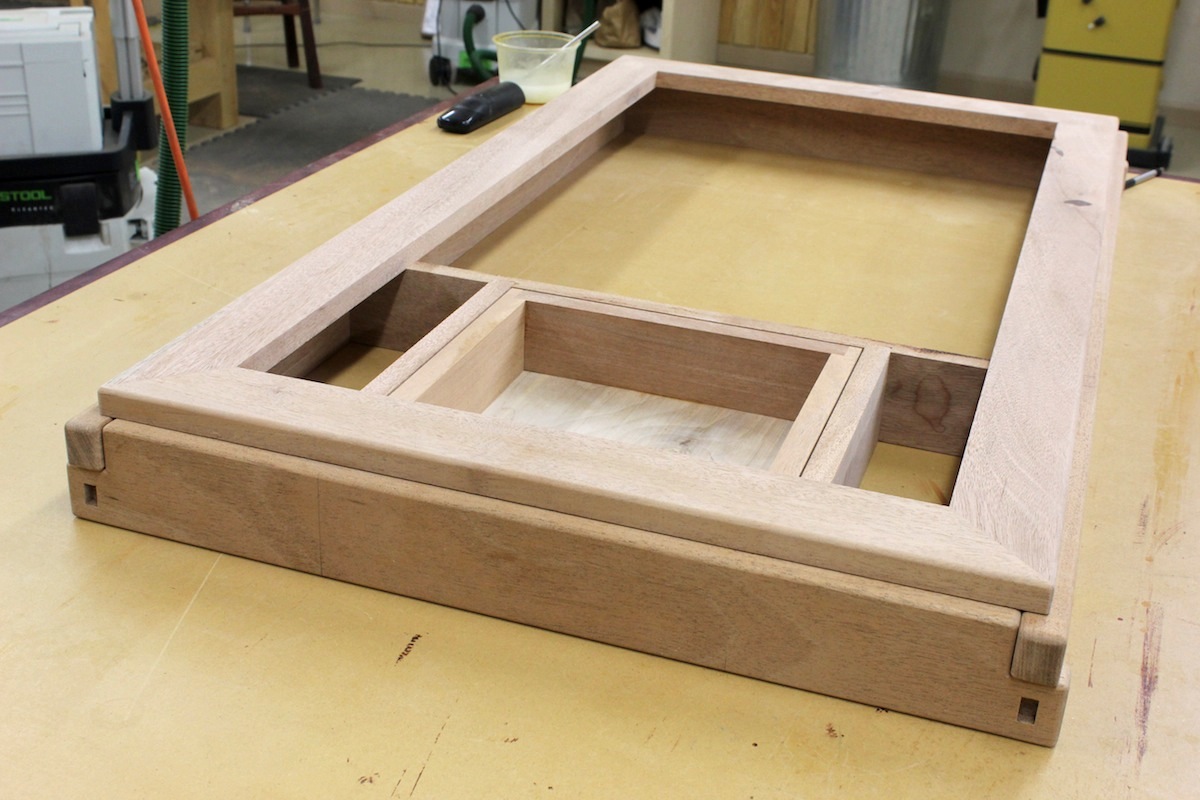
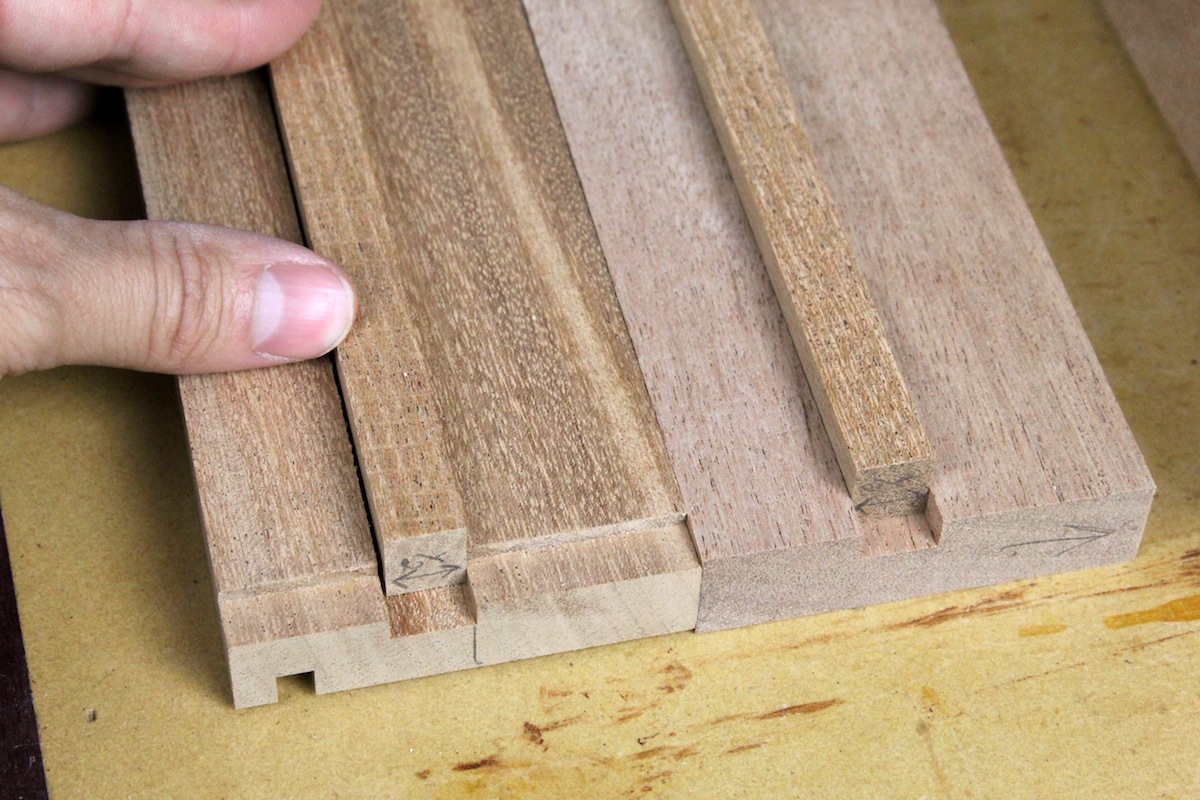 Wooden drawer runners were installed without the need for screws by gluing the runner stock into a groove that runs down the length of the framework. A similar groove is cut into the drawer side. Because a perfect fitting slide would actually be too tight for a drawer, the groove on the drawer side was cut slightly wider by 1/32″ to allow for smooth travel now and in the future. In the picture you’ll see the drawer side on the left and the frame piece on the right.
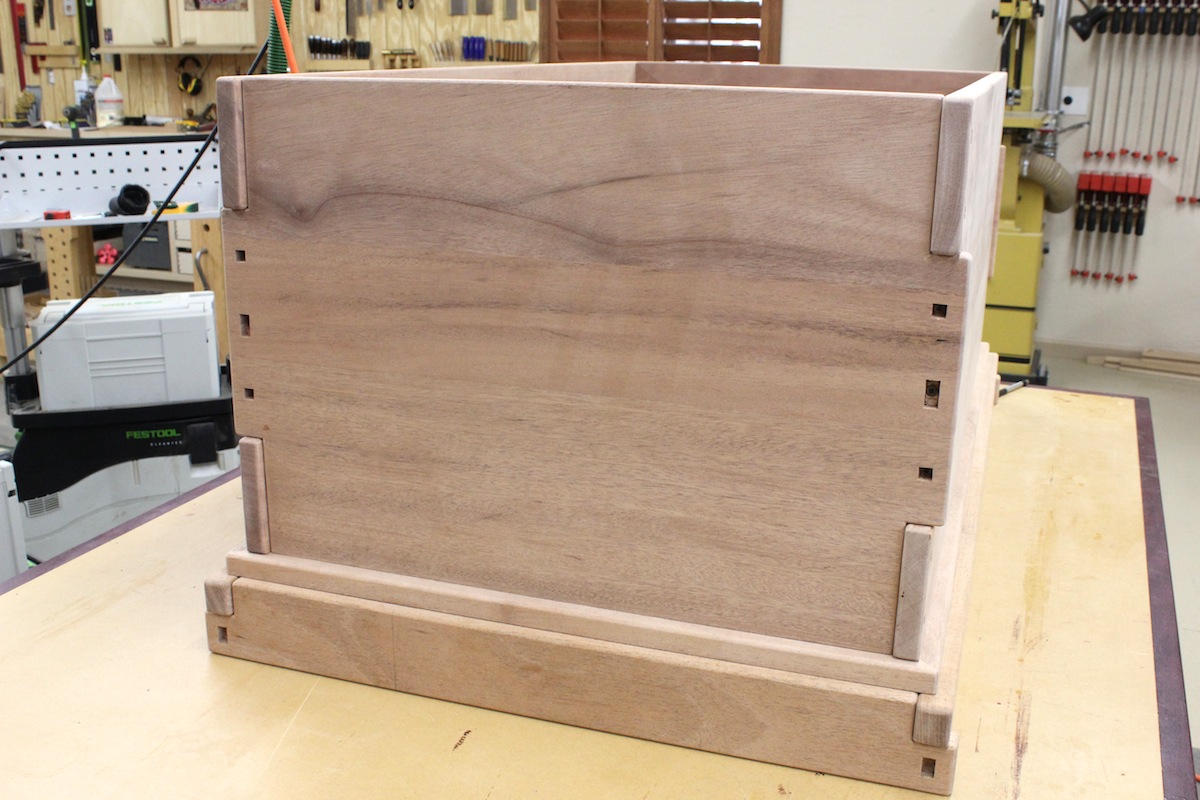
All that was left was assembly. I glued each part in phases, making sure each part was nice and square. Because this hidden drawer was not planned, I really didn’t want to lose additional time to do-overs. Fortunately, the glueup went quite well. Below you’ll see the finished assembly, open and closed.