The Desk by Brian
Viewer Project
-
By Brian Luczkiewicz from Briarcliff Manor, NY
Added on April 14, 2016
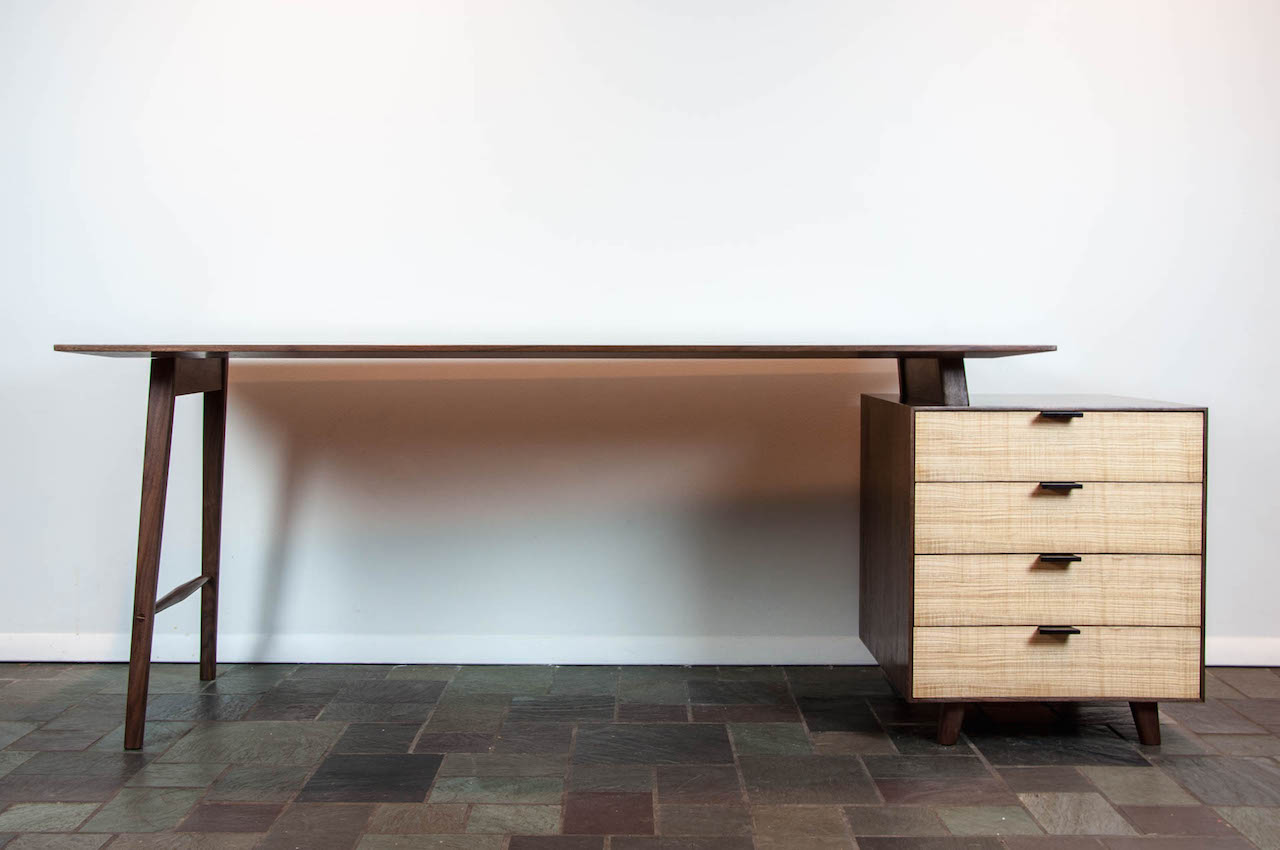
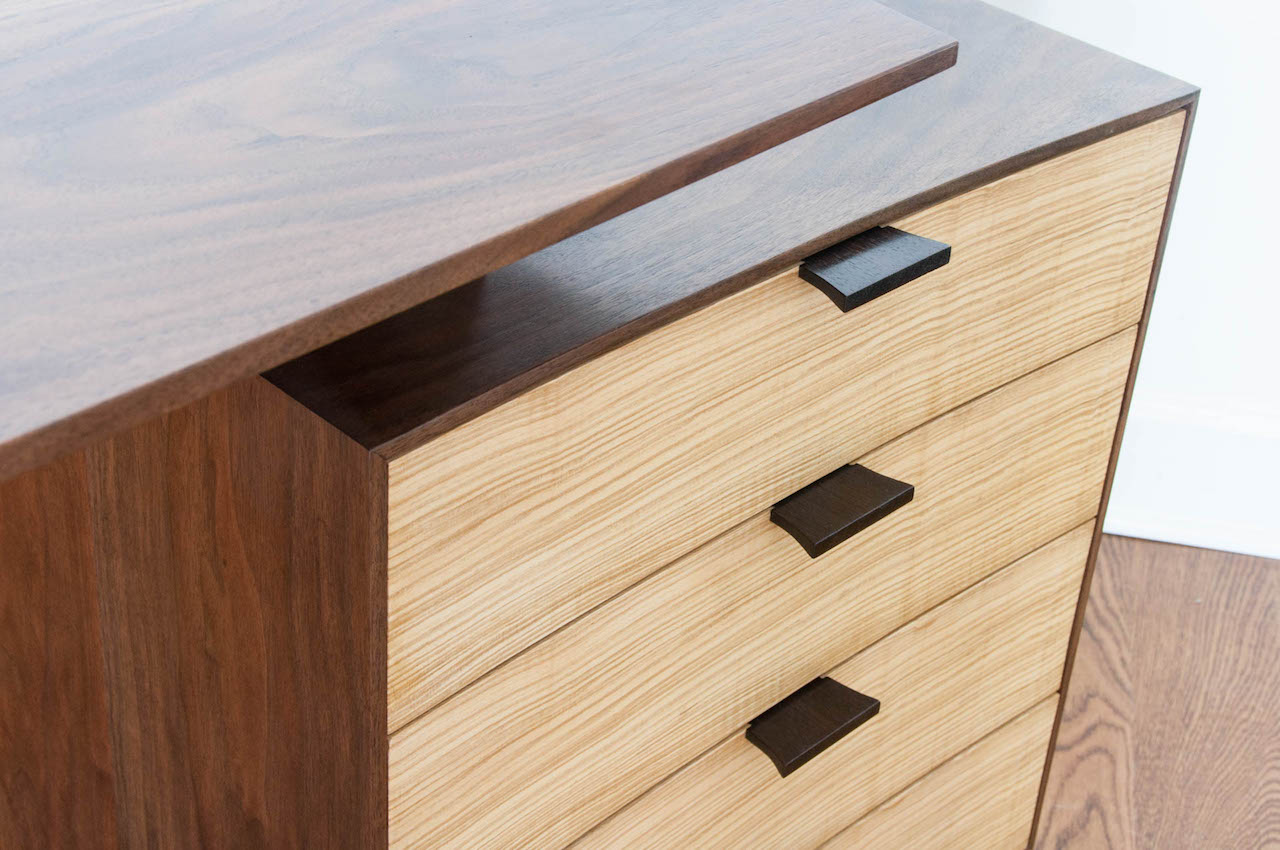
About 2 years ago I started sketching ideas for a desk to go in my home office. My earliest designs called for quartersawn Zebrawood on the drawer fronts to contrast the Walnut’s chaos. I was really worried that the Zebrawood would come off as tacky, so I stalled, and stalled. About 6 months later, I saw a picture of a desk that used a cabinet in place of one of the legs. I really liked how that created a second semi-hidden surface that could provide some pressure relief when the top of the desk became crowded. A few months after that, I was perusing my veneer supplier and found this beautiful curly ash veneer. The last piece of the puzzle had fallen into place. This was the non-tacky Zebrawood substitute that I didn’t know I needed. I bought the flitch and felt ready to begin what would be a three-month long project.
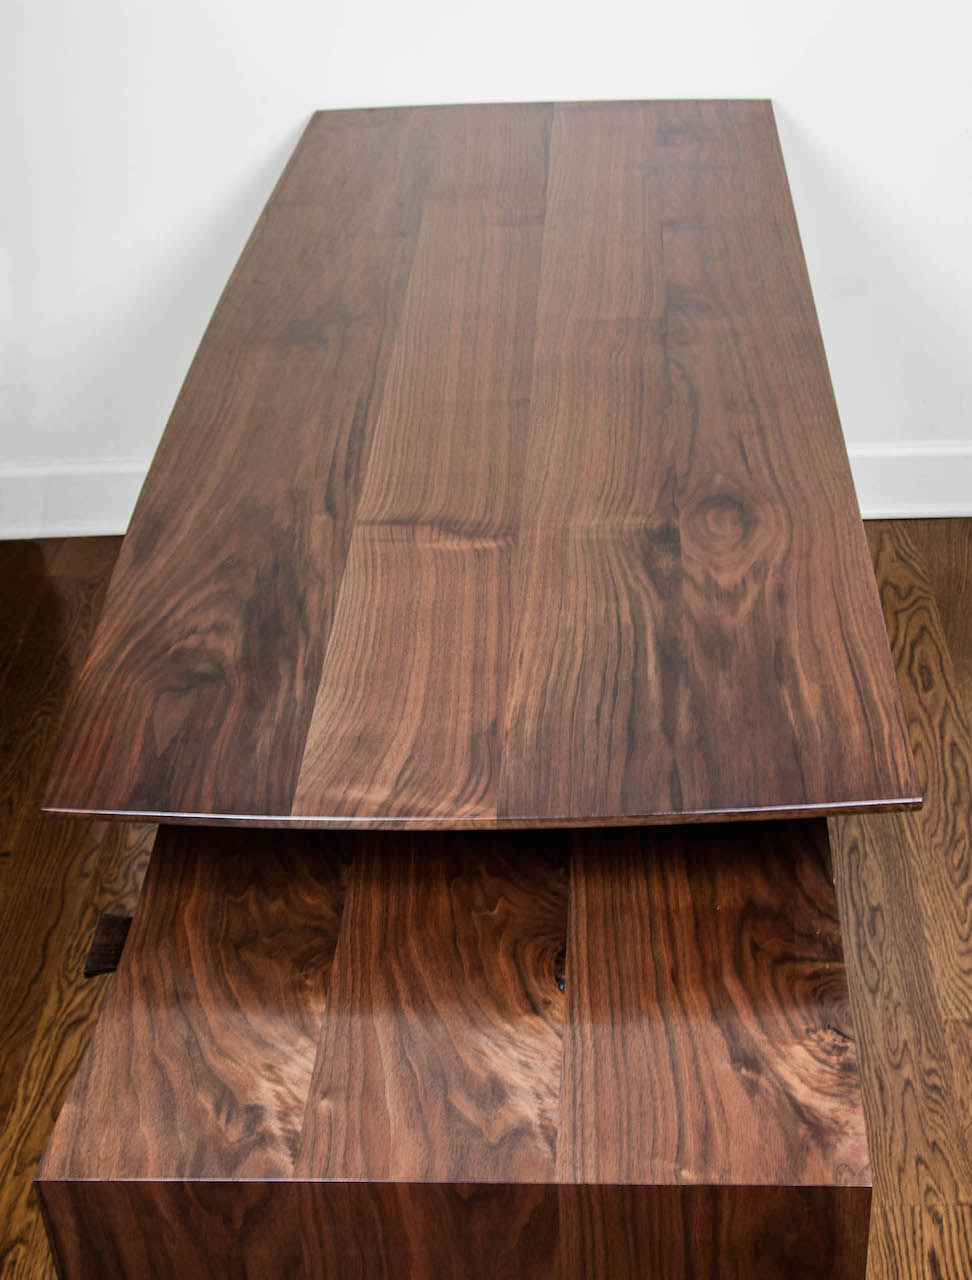
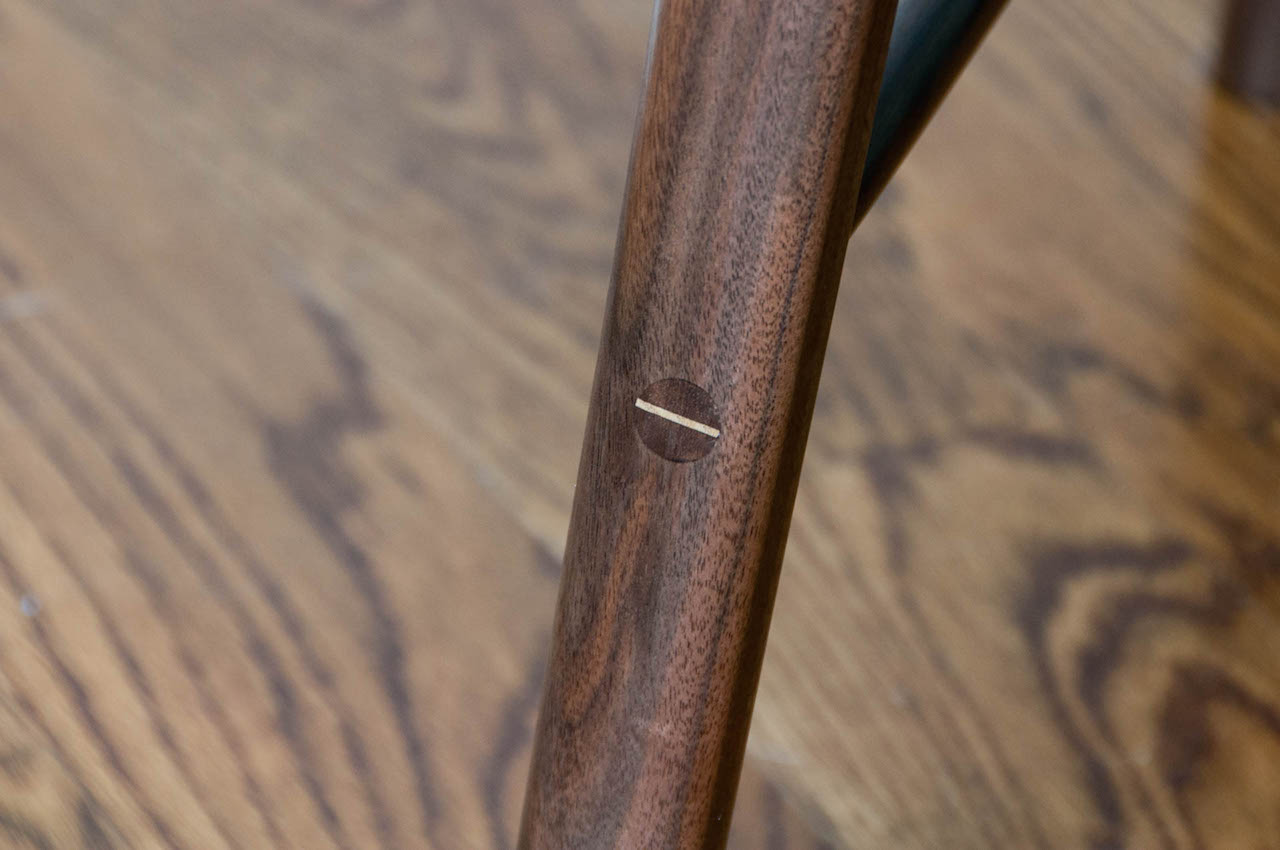
All of the veneering in this project was performed traditionally, using hot hide glue and a veneer hammer. Four drawer bottoms, the back of the cabinet, and the four drawer fronts. The front of the cabinet, the drawer fronts, and the table top sport gentle curves. The legs are tapered ovals, shaped with a rasp and inspired by Tage Frid’s three-legged stool.
The joinery in this project is varied. The drawers were dovetailed by hand, the legs are put together with wedged through tenons and dominoes. The mitered case was assembled with dominoes. The drawer pulls are attached to the drawer fronts with dovetail half-laps. The drawers ride on Blum Tandem slides, and the whole thing knocks down into three pieces and is assembled with threaded inserts and bolts.
Air-dried Walnut, American Ash, Curly Quartersawn Air-Dried Walnut Veneer, European Ash Veneer, Wenge, Plywood, and Blum Hardware. Ash and Wenge parts were pore-filled and finished with Ultra-Blonde Shellac rubbed out to a satin sheen. Walnut parts were finished with Satin Arm-r-seal.
My shop is right around 200 sq ft, so this project leaked all over the house. I turned the garage into a finishing area, used the kitchen table for assembly, and stored the top in the living room on a pair of sawhorses for a month while I completed the rest of the pieces. This was a big project and a huge learning experience for me, and I couldn’t be happier with the result. The build is documented in detail on my website.
Advertisers


