Jeremy’s Cigar Humidor
Viewer Project
-
By Jeremy Pastin from Niles, IL
Added on January 28, 2016
I wanted to build a new cigar humidor to replace my old, undersized one. I figured if I was going to do it, I wanted it to look nice too.
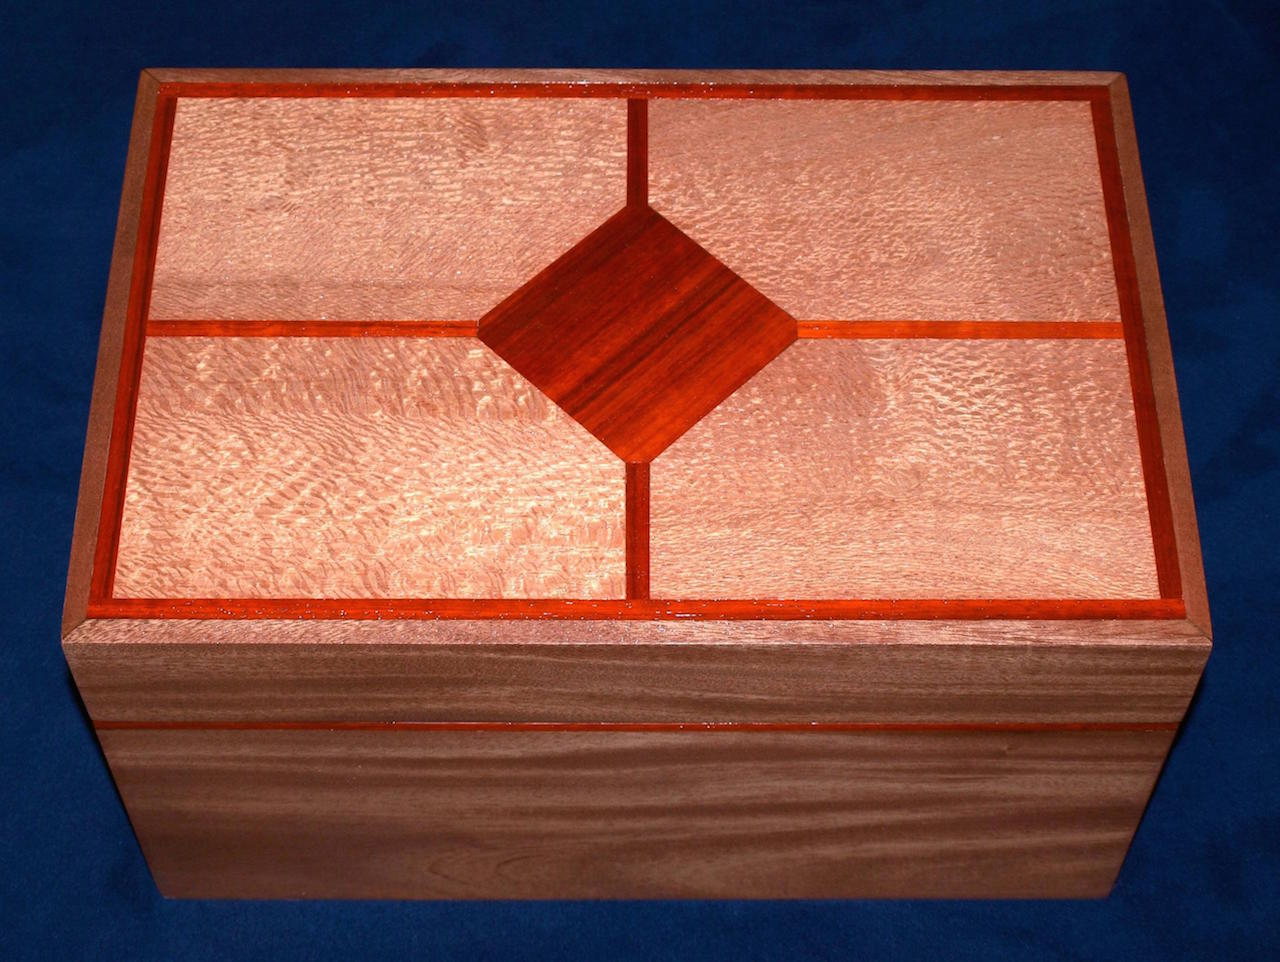
This is basically a box in a box design. The outer box is made of African mahogany, with lacewood and padauk inlays. The vertical corners are hidden spline miters while the top and bottom sit in rabbets. The bottom was covered with felt, and the top sat low enough that the inlays are flush with the top of the sides. The whole thing was then finished inside and out with General Finishes High Performance Top Coat. I actually ran a small bead of glue on all of the inside corners to create an airtight seal so that the moisture wouldn’t all leak out of any small cracks.
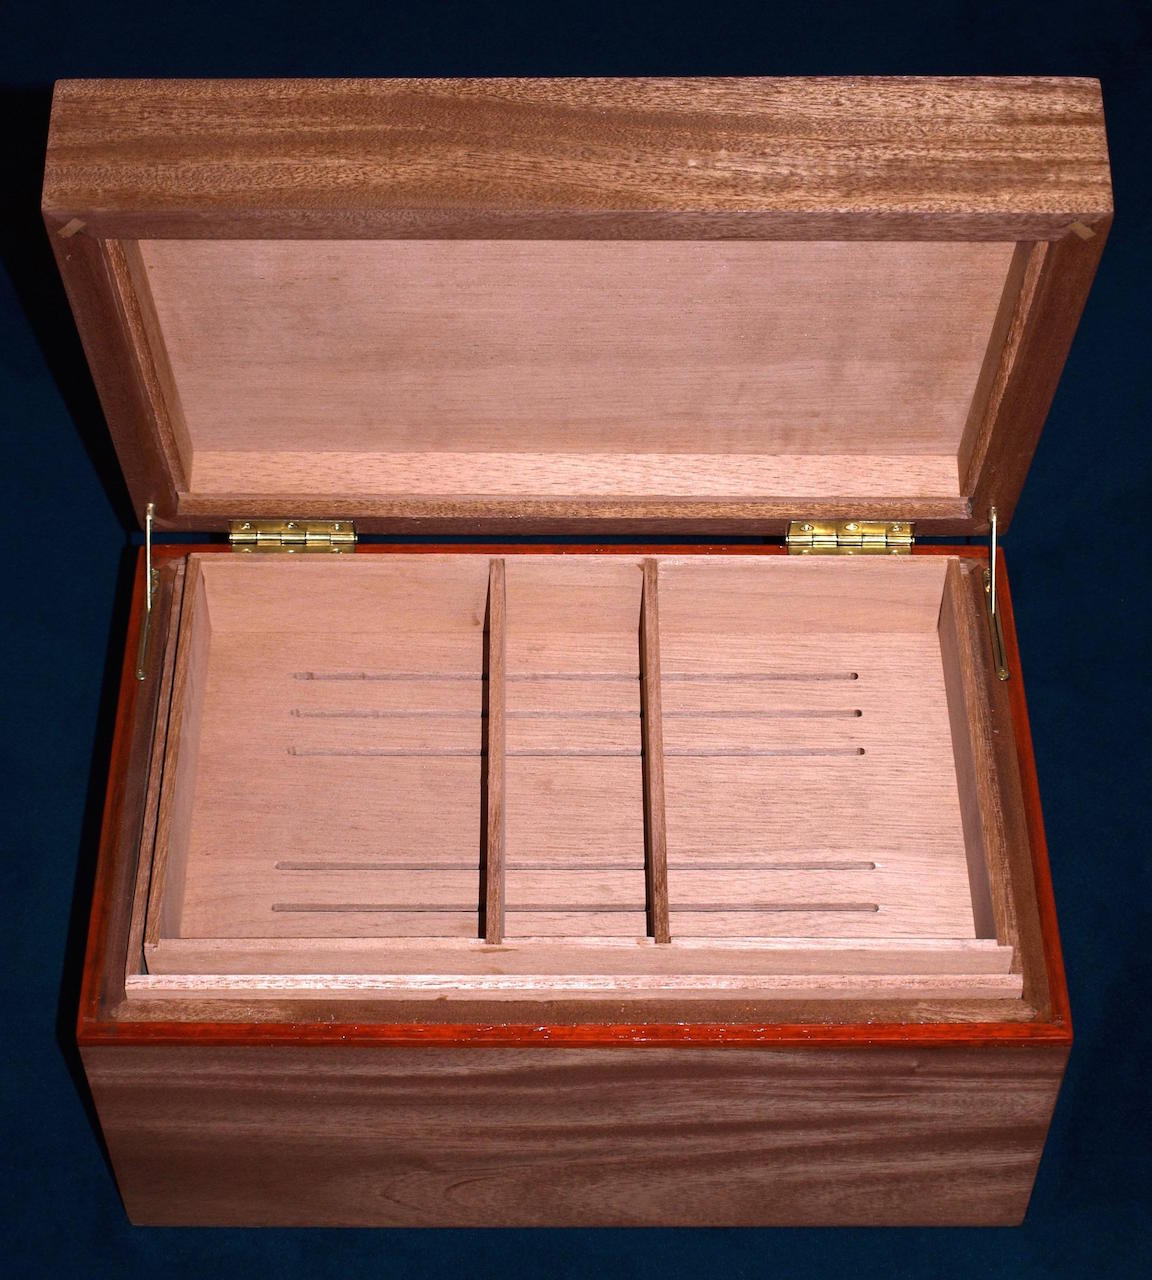
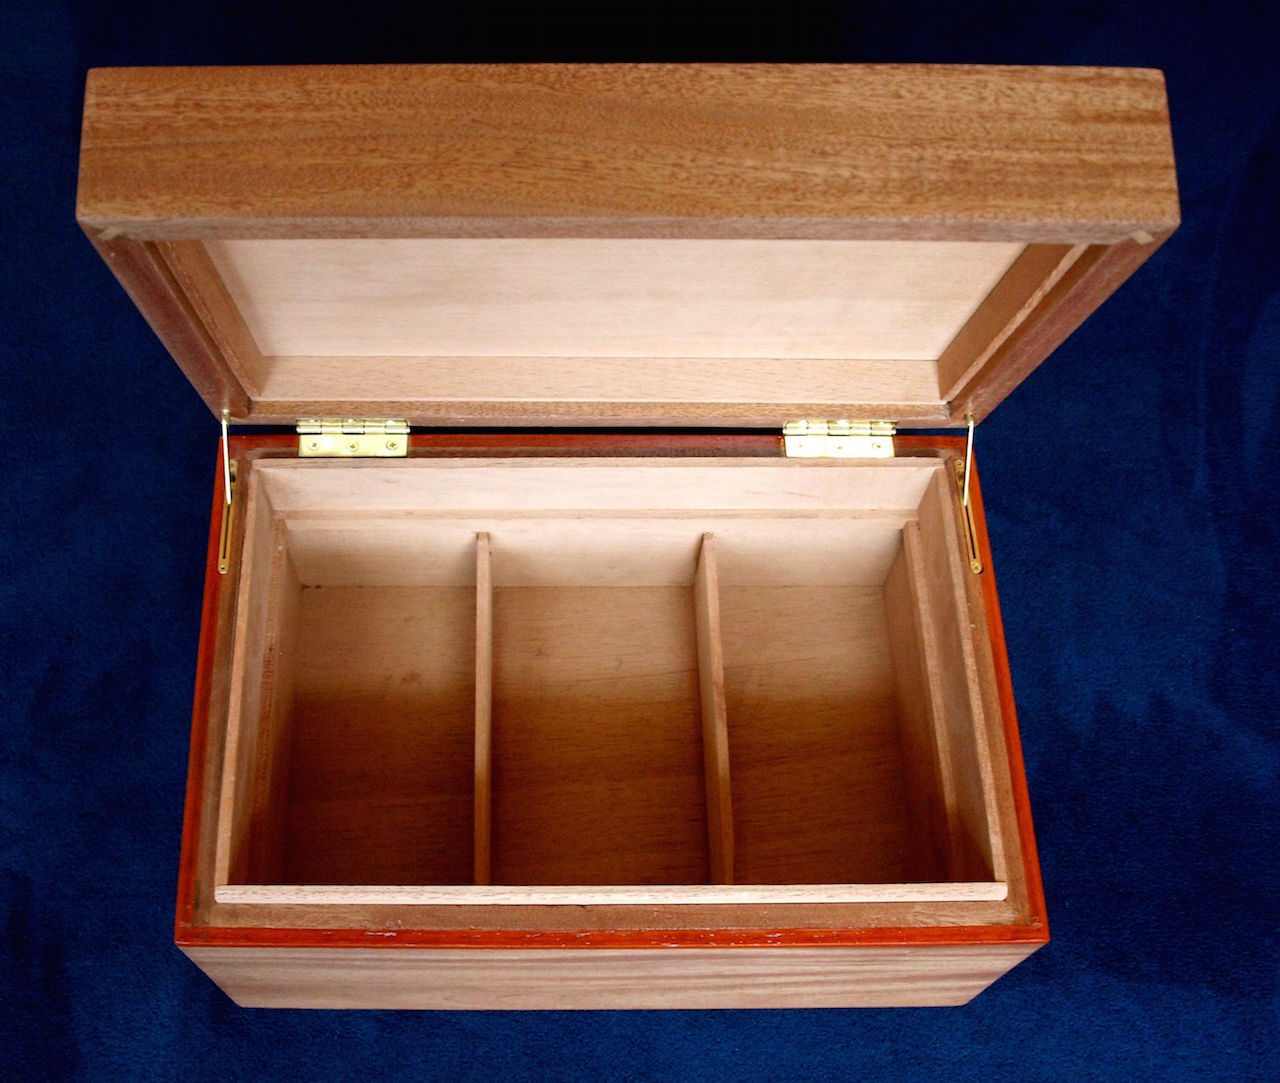
The inner box is all unfinished, kiln-dried Spanish cedar. That particular species is the preferred species for humidors. The pieces were all press fit and only held with a small amount of glue in the center to accommodate wood movement. The upper edge of the bottom of the inner box extends beyond the upper edge of the bottom of the outer box, and the lower edge of the top inner box is recessed into the lid of the outer box. This means that when the lid is shut, the line where the tops meet the bottoms are offset. Again, this was done to create a better seal, and prevent moisture loss.
I also created a removable tray of Spanish cedar with channels cut on the router table for ventilation between levels. All of the dividers, both top and bottom, are fixed and sit in dadoes.
I had to make a couple of interesting jigs for this project. In order to cut the mortise for the hidden spline in the miters, I created a jig that held each piece of wood at a 45 degree angle. I was then able to drop it on the router bit on the table. Stop blocks at either end prevented me from cutting too far. To cut the corners off of the square of padauk on the inlay at the top, I created a jig by attaching two pieces of wood to a sled. They two pieces formed a 90 degree angle at a 45 degree angle from the blade. I then nibbled away at the corner until my strips of padauk would just fit in the gap. Then it was a simple matter of just cutting off the four corners.
Overall it was a very technically demanding project, there was very little room for error. But it was incredibly rewarding to see the finished product. After a couple of years the padauk has changed to a nice burnished red and the mahogany has started to darken and redden.
Advertisers


