Fishing Reel Seat Inserts
Viewer Project
-
By Jeff
Added on February 3, 2010
I love featuring unique stuff like this on the site. My grandpa used to own a fishing tackle store back in Jersey, so I know my way around a tackle box, although I never got into fly fishing. I did, however, pack my share of night crawlers! Jeff makes some beautiful reel seat inserts, but is also looking for some input on finishing. Let’s see what he has to say:
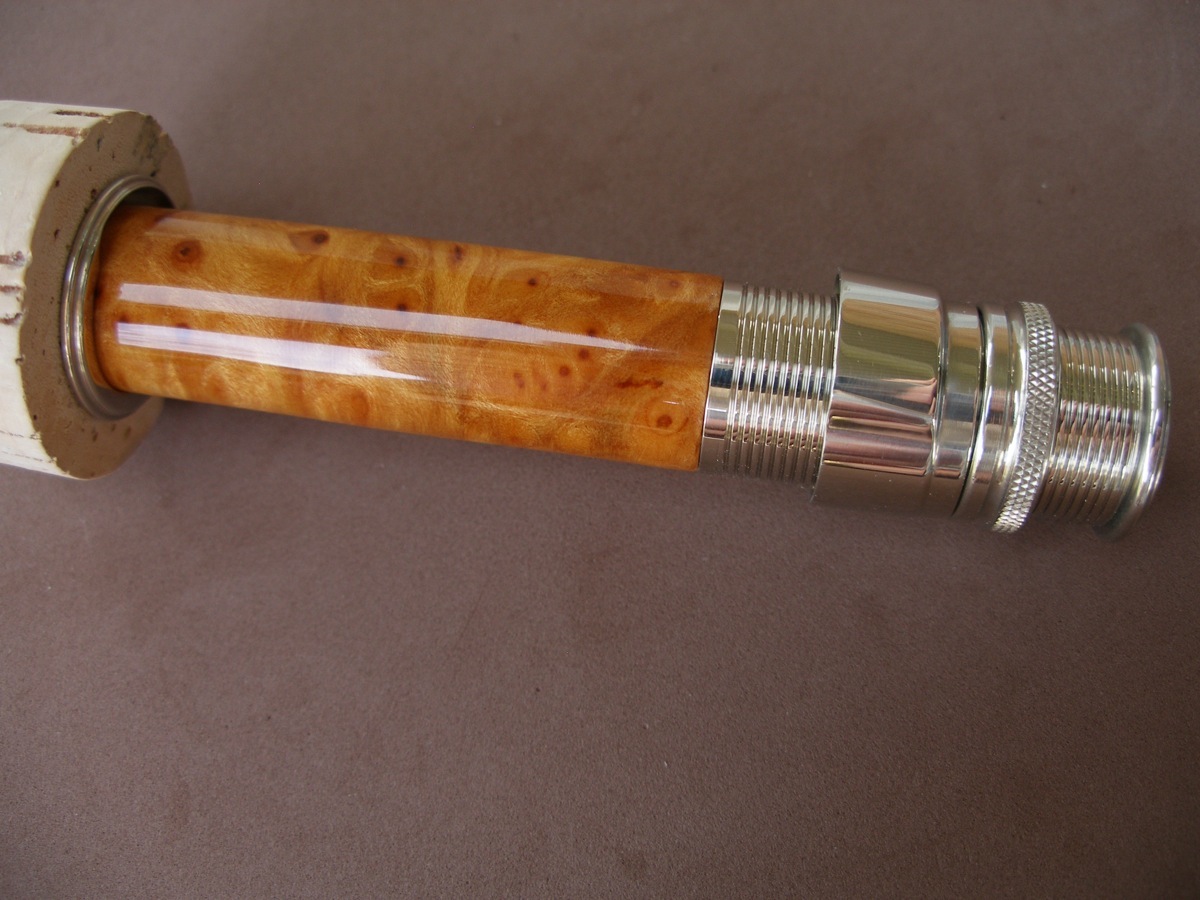
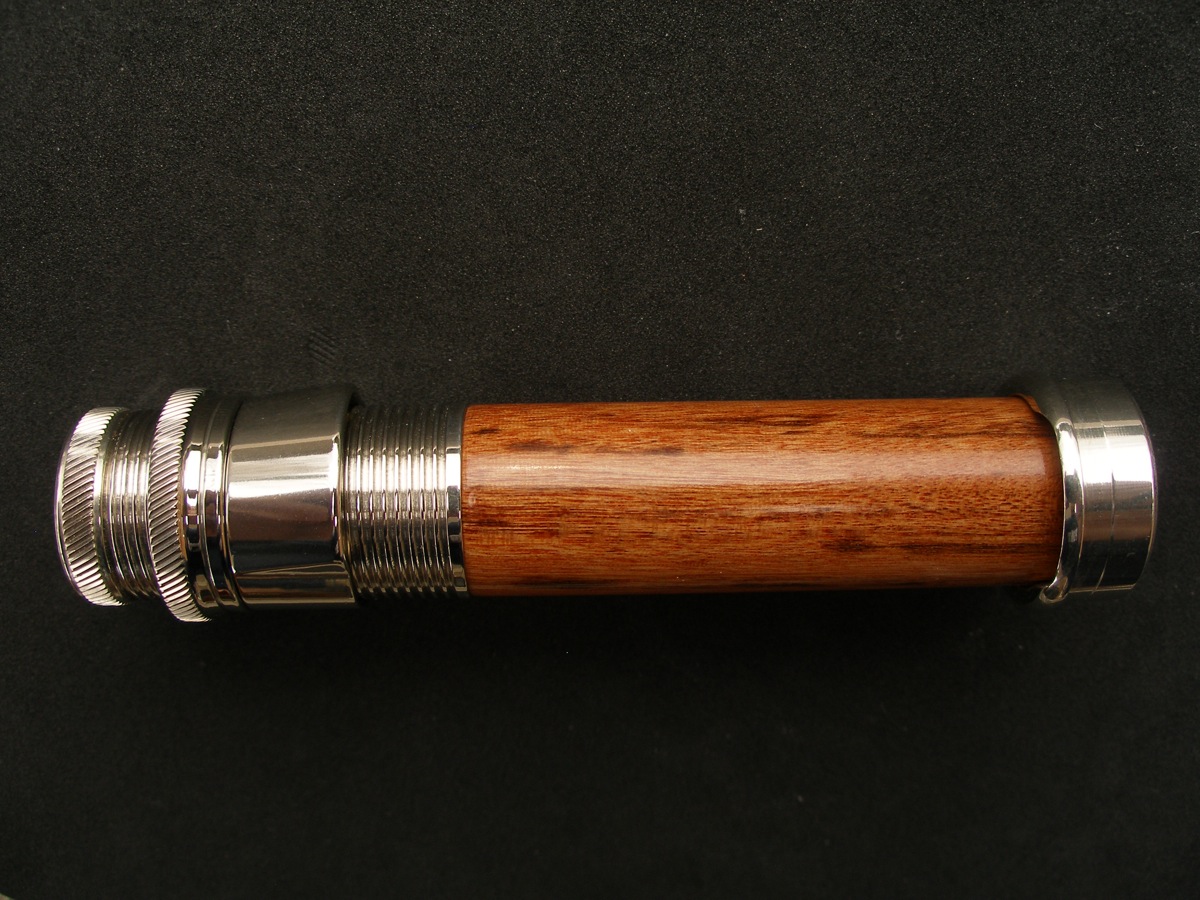
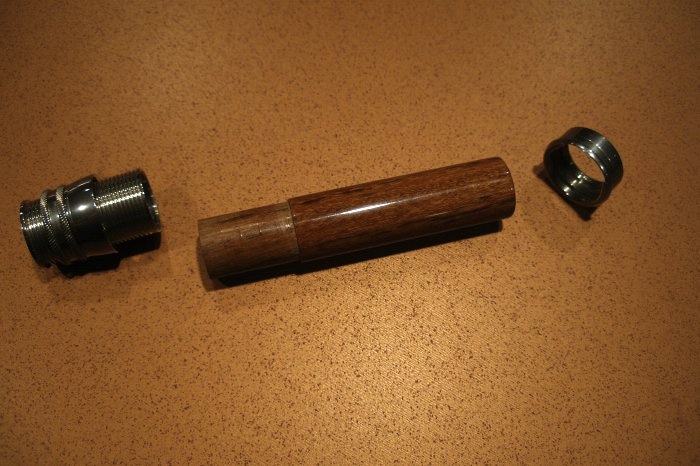
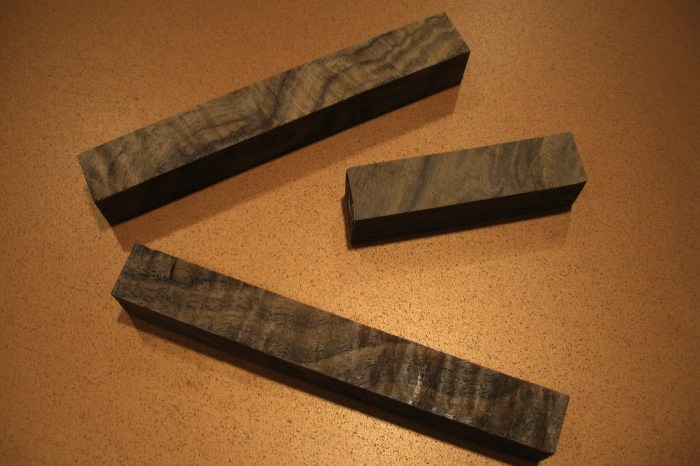
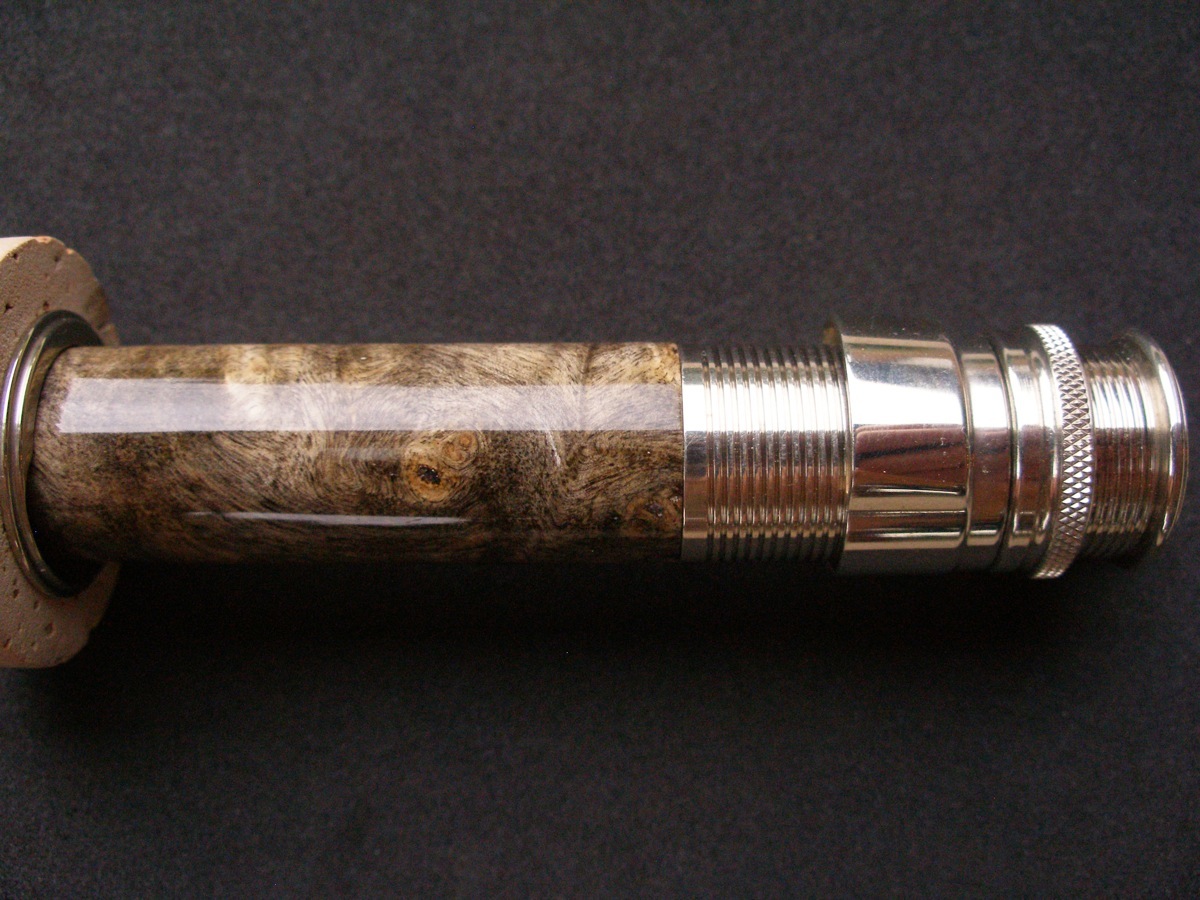
I turn wood cylinders known as reel seat inserts. These inserts are installed into nickel silver hardware and installed on fly fishing rods. The reel seat holds the fly reel on the base of the fly rod. I start with “blanks” that are ideally 7/8″ square by about five inches (as little as 3.5″ is acceptable, but after turning, it helps if you can select the best grain for the exposed barrel). On the lathe I bore a 3/8″ hole lengthwise and mount the blank on a mandrel. The mandrel is locked into a four jaw chuck on the headstock, and the other end of the mandrel is mounted onto a 60 degree live center mounted into the tailstock. Conventional turning tools and sandpaper are used to turn the wood down to a specified diameter. A parting tool is used to make a square cut down to the #4 diameter.
Note that I didn’t mention the diameter the barrel is turned to. This is because I’ve been using techniques where I build up finish with successive coats of CA, moisture cure urethane (MCU), spar urethane, specific epoxy, etc. So I turn well beyond the #2 diameter, then wet sand and polish back down to #2 diameter.
Rod building component companies sell the nickel hardware in the photos. They also sell wooden inserts made from various woods. The standard wood inserts are around $8 and up. My problem with OEM inserts is that they’re sometimes bland, and their finishes mar easily when reels are put on and taken off of the reel seat, and they don’t repel water especially well. Thus the desire to make my own. Though there are quite a few people doing this, there doesn’t seem to be a “best” finish technique. I’m a bit of a perfectionist, so I seek a process that is attractive, and very durable. I want the rod to wear out before my woodworking does. And I want the finish to repel water very well.
Problems encountered:
With CA, any inadvertent introduction of moisture causes blushing. CA sands and polishes nicely, but its hardness can be a problem. With moisture cure urethane (MCU), any failure to remove all bubbles results in tiny white craters when sanded, but MCU remains somewhat flexible.Initially I made the #3 cut prior to doing any finishing. This worked fairly well, but getting a even finish buildup at the cut was difficult. Then I tried finishing the entire length of the turned piece, then cut the #3 cut. With softer finishes a clean #3 cut was difficult as the finish heated easily and sometimes separated from the exposed surface. Not desirable. Even making the final length cut with a parting tool left a bad edge. Ideally the finish would tolerate cutting the #3 edge after the finish is applied and finish sanded.
While I have some acceptable inserts on my fly rods, I can’t say that I’ve developed what I feel is a foolproof, relatively easy repeatable finishing technique. My goal is a finish that doesn’t show grain dimples when I’m finished, has a nice square #3 shoulder cut, doesn’t scuff easily and won’t crack if the wood changes shape (as in adding or losing moisture). As you see in the images, finishes continue (even CA) shrinking after final shaping even though I generally wait at least five days after finishes are applied.
So folks, what do you think? Any opinions to help Jeff find an option that will work for him?
Advertisers


