Colin’s Chess Set
Viewer Project
-
By Colin Linerode from Irvine, CA
Added on May 13, 2014
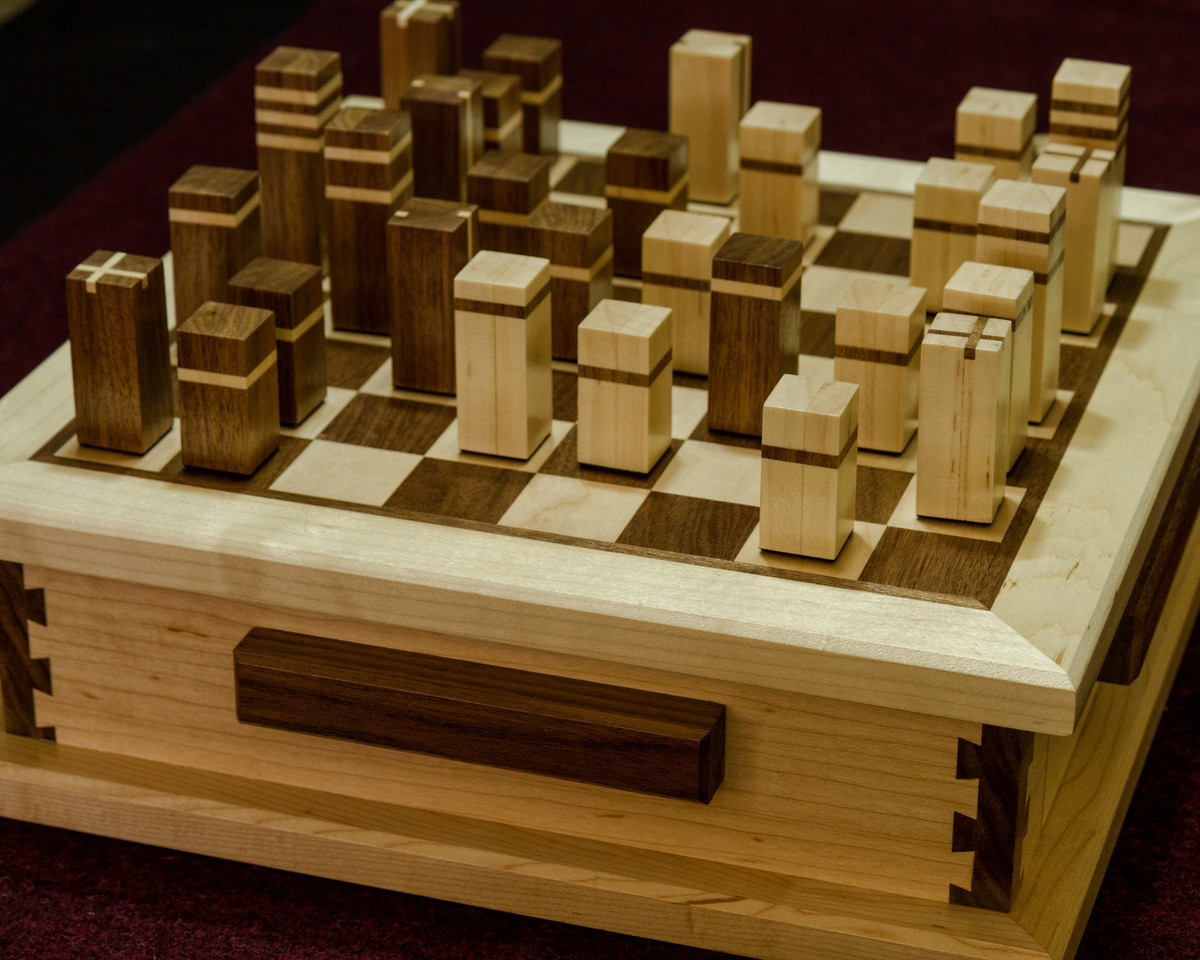
For the past three Christmases I have built small toys for my nephews and a Sudoku set for my sister-in-law. This past year was finally my brother’s turn. It took me a while to decide what to build for him and then I figured out—by epiphany—that a chess set was in order. I immediately began to research how to build one when I came across Steve Ramsey’s YouTube series. I have to give Steve credit as his step-by-step process showed me that a chess set is within my skill-set range. I chose the very classic maple/walnut pairing because I love the contrasting woods and they are easy woods to find and work with.
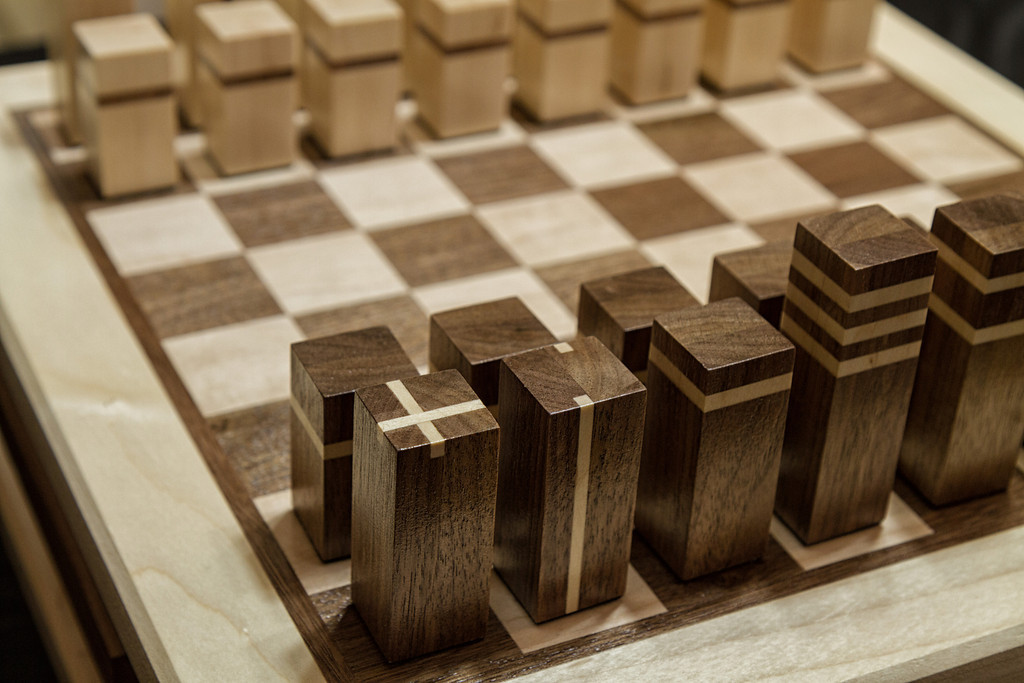
The field itself is 12″ x 12″; each unique square is 1 1/2″. The walnut strip and maple band around the outside together are another 1 1/2″, which makes the total top 15″ by 15″. The top is 3/4″ thick and has a small chamfer to ease the edge.
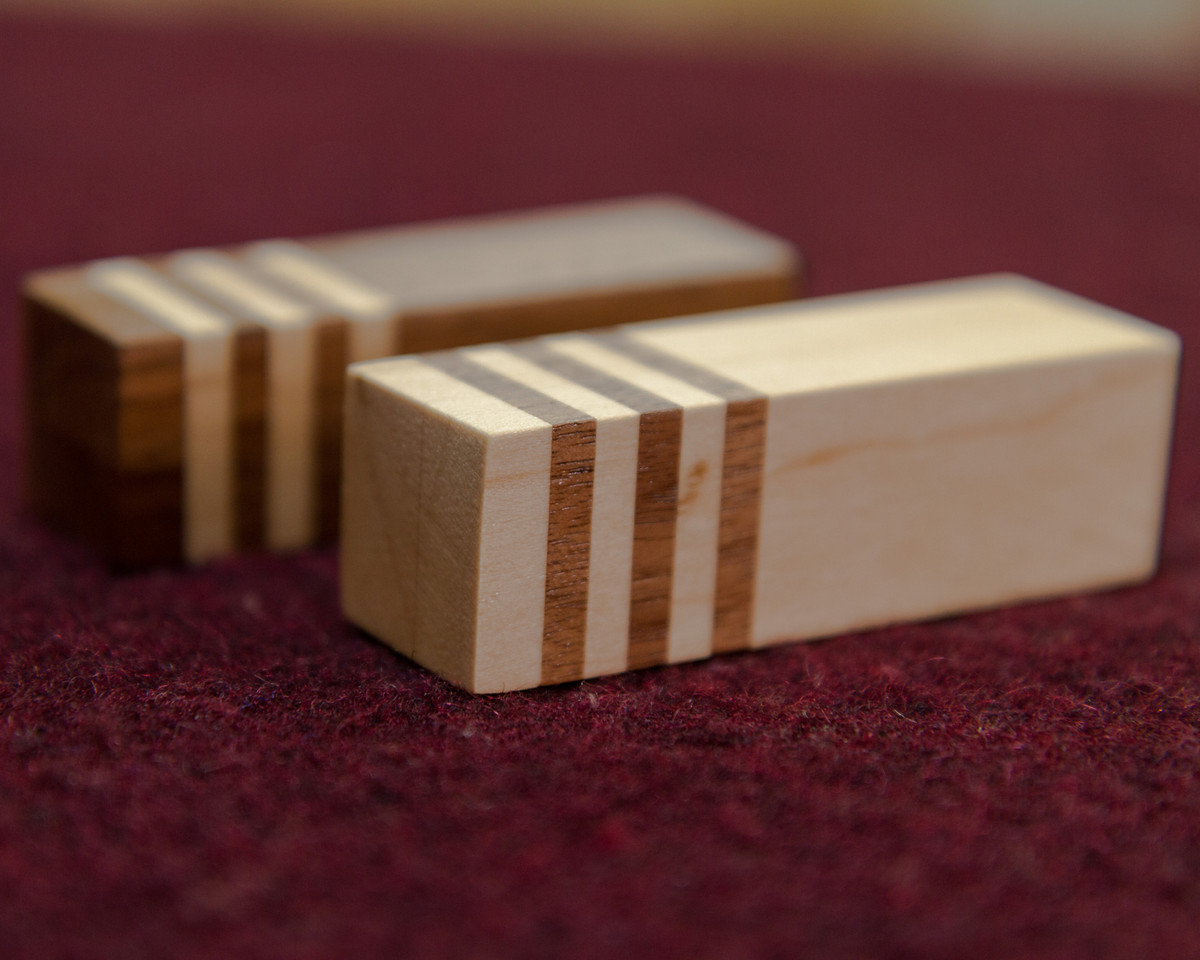
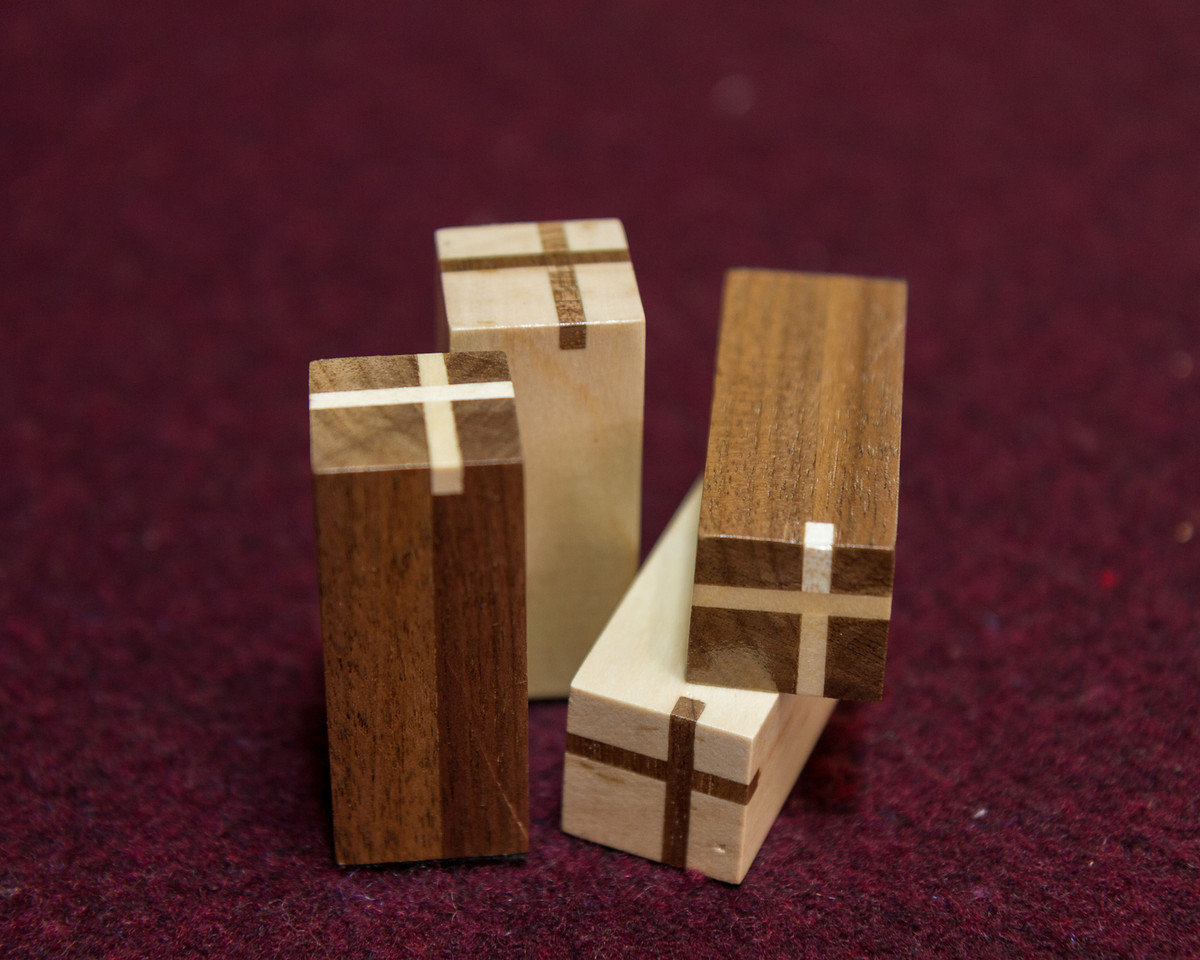
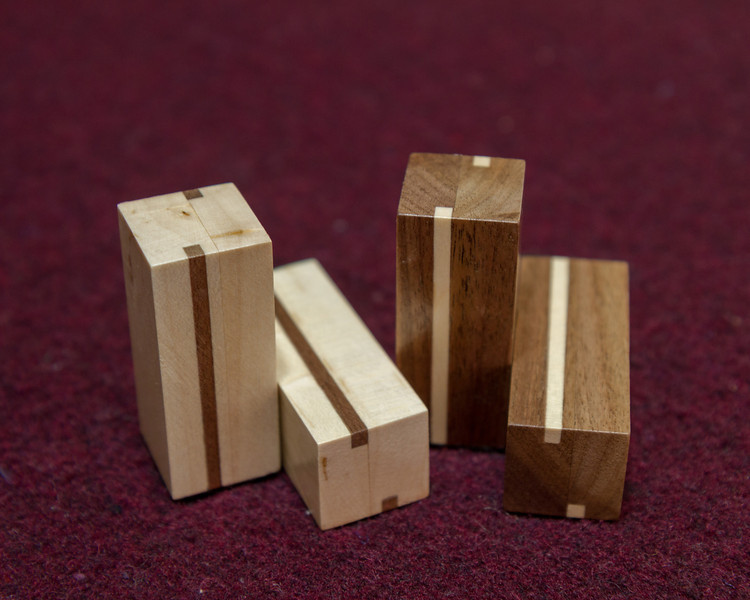
A lot of thought was given to specific design details. I knew that I wanted to build the board, a full case, and the pieces. The pieces were fun and challenging to build. They are matching sets—just flipped woods. Each piece is 1″ square, varying in height. The accent “stripe” on each piece is 1/8″. The pawns are 1 3/4″ tall with a single horizontal stripe 1/2″ down from the top. The bishops, knights, and rooks are each 2 1/4″ tall. The bishop is pretty much a blown-up pawn, but with the stripe just 1/4″ down from the top. The knight (my personal favorite) has two vertical stripes on opposite faces, 1/4″ in from the edge. The rooks have the stripe on the top, in an offset cross, starting 1/4″ in from the short edge. The queen is 2 7/8″ tall with two horizontal stripes, starting 1/4″ down from the top. The king is 3″ tall with 3 horizontal stripes, starting 1/4″ down from the top. The horizontal striping was done through a series of sandwiching very thin pieces together to build up the height. The striping on the knight and rook are from a 1/8″ router bit. Each piece is bottom-lined with felt.
For the case I wanted to add elements to make the piece stand out. Impressed with the Incra positioner system that enables you to build very fancy dovetails, I was immediately struck by the beauty of the corner-post dovetail, but didn’t think I had the ability to create it. As I continued to research the corner-post, I realized that it is actually a simple joint, just adjoining half-blind dovetails. I was thrilled! I used my dovetailing jig to create the corner-post. This element is my favorite across the entirety of the piece. The drawers also use dovetail joinery—half-blinds. They “attach” themselves to the case through runners. I debated about a runner underneath the drawer instead of in the side. I chose the latter because I did not have the confidence that I could set the runner high enough to get me the desired 1/16″ gap on all four sides. The last detail are the 6″ pulls on all four sides. The side two are for lifting the whole unit (so you aren’t lifting from the lip of the board) and the two on the drawers are for opening the drawer.
The one drawback to my design is that I did not have sufficient space within the drawer to create a framework to store each piece. Had I expanded the width of the drawer I may have been able to accomplish this, but it would have taken away from the impact of the corner-post. The pieces just lay inside the felt-lined drawer.
The finish is spray lacquer. I really wanted that mirrored-finish. Marc’s recent video about “rubbing out a finish” was very aptly timed as it gave me great insight on how I could accomplish this. I ultimately decided that a more satin look was sufficient for this project. Frankly, I was getting anxious that it took as long as it did to get it finished and I really wanted to get it to my brother.
I have a friend who took the pictures I am sharing. As we were shooting I kept noticing the nuances in the grain patterns. I am amazed at how many languages wood speaks. I’ve been a hobbyist for 3 1/2″ years and with each successive project, I see my skill set increasing. I believe this to be my best work to-date. I have shared pictures and videos with friends and family and everyone has been very complimentary of the work. Many, including my wife, have called it “professional” looking. If that isn’t a confidence booster to a hobbyist, I don’t know what is! I have even had several folks, jokingly or non-jokingly (I can’t tell), suggest they’d consider commissioning me to build one for them. I might be all for that, I just need to review Marc’s article “Pricing Your Work”.
I appreciate the opportunity to share with TWW community!
Advertisers


