Chad’s Shut The Box Game
Viewer Project
-
By Chad Brake from Westfield, IN
Added on May 2, 2013
I only have a few months under my belt in woodworking. It is something I always wanted to do but the presumed barrier to entry in tool cost kept me out of it. Of course in my head, I needed a “dream shop” full of every large power tool known to man to even consider the prospect of being a woodworker. Once I got that misconception out of my head, I was able to get started with a borrowed table saw and a few hand tools.
I’m sure like other new woodworkers, my first project was a very simple recipe box with mitered joints and I was positive that it was the most perfect recipe box ever made! OK, so it was far from perfect, but making it was enough fun that a new woodworker was born. I just kept expanding on that simple box idea and before I knew it, I was convinced I could build anything I saw. However, despite countless “oh, I could build that” conversations with my fiancé, what I continued to build were little “box-like” projects. The inspiration for this particular project came from a game I bought awhile back for my office called, “Shut the Box”. It was made of cheap materials and not particularly well done, but it looked like it would be fun to make so I gave it a shot.
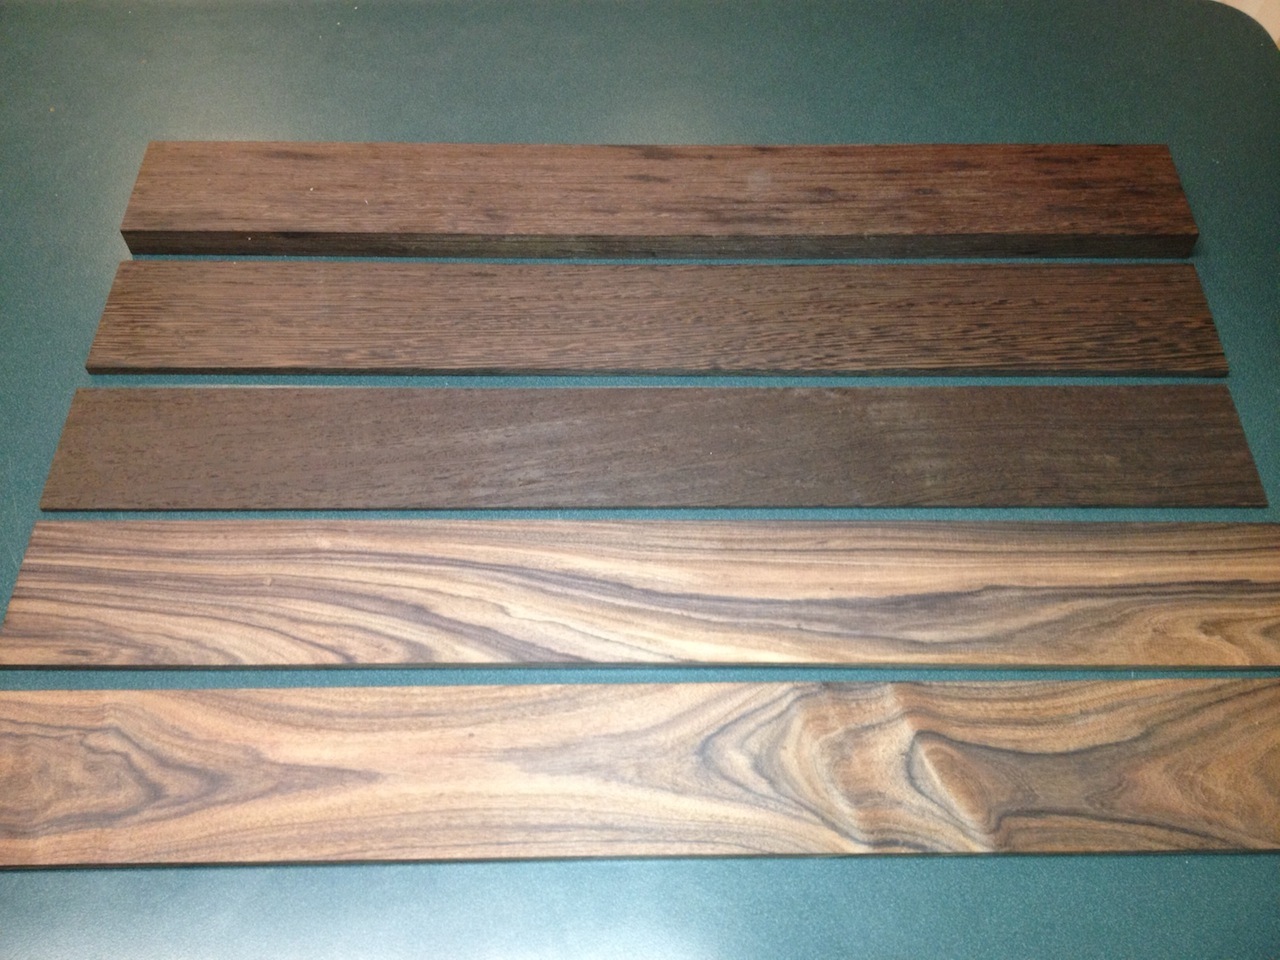
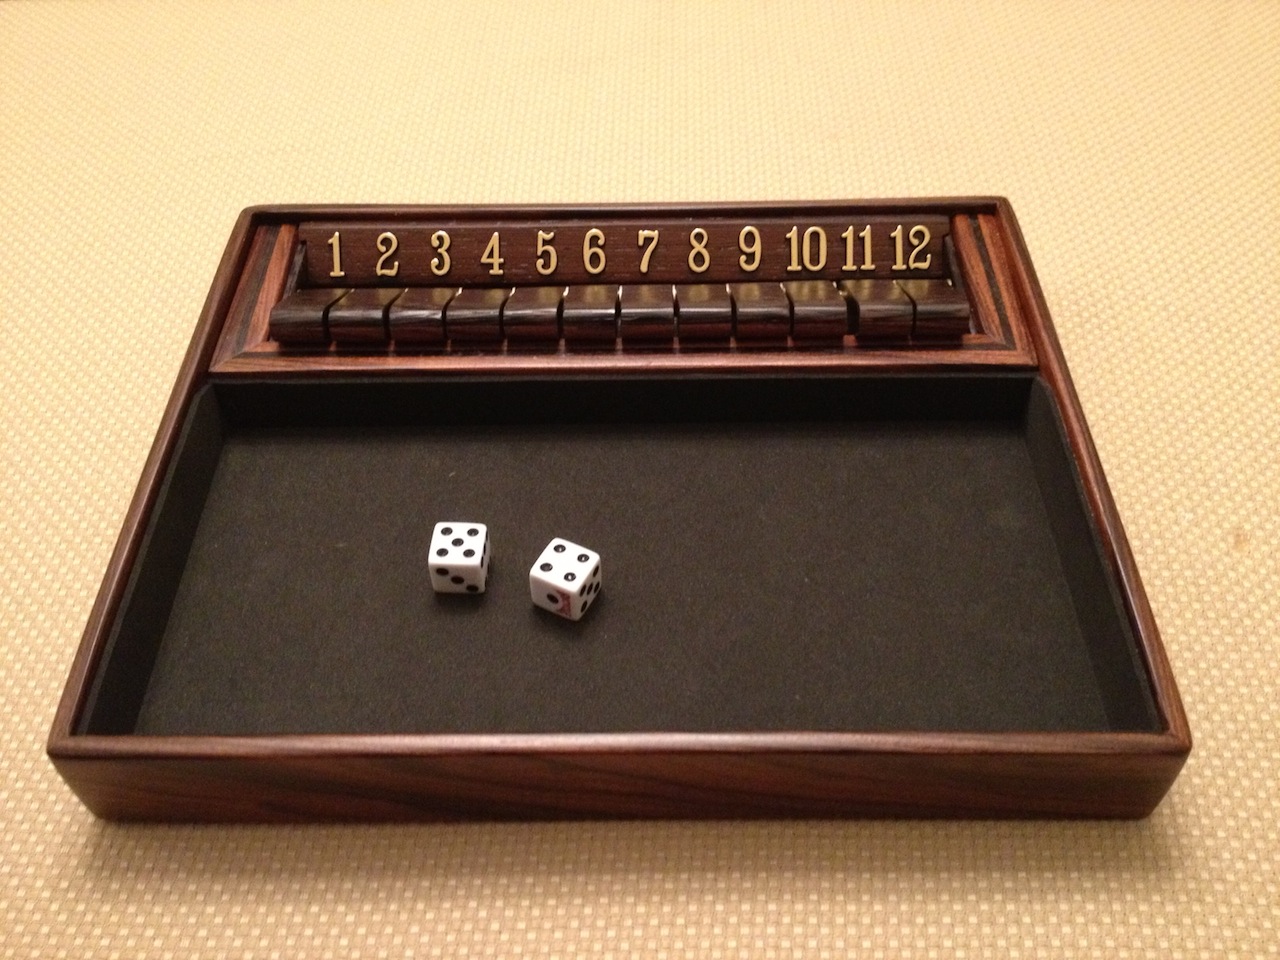
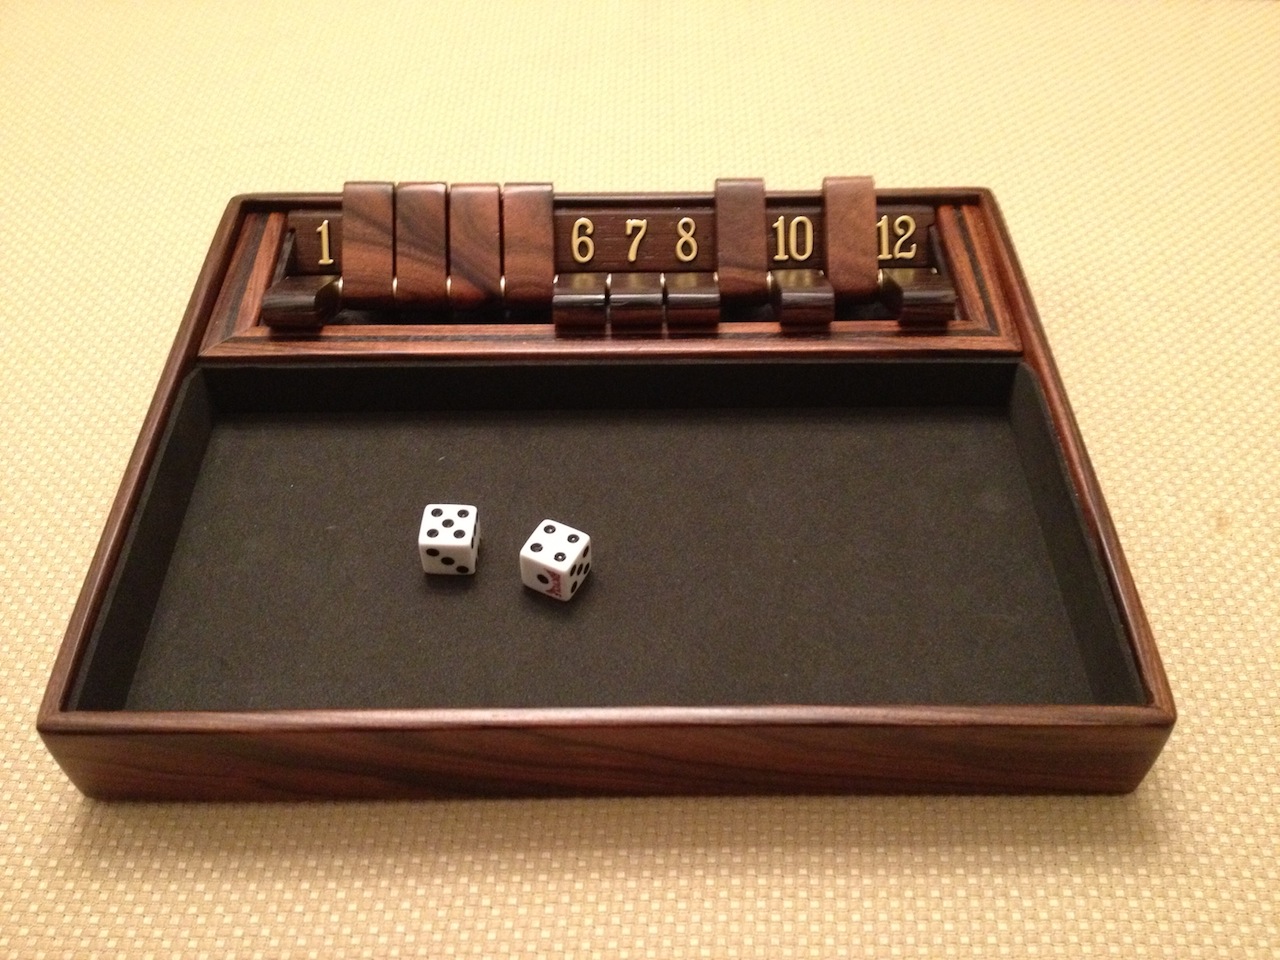
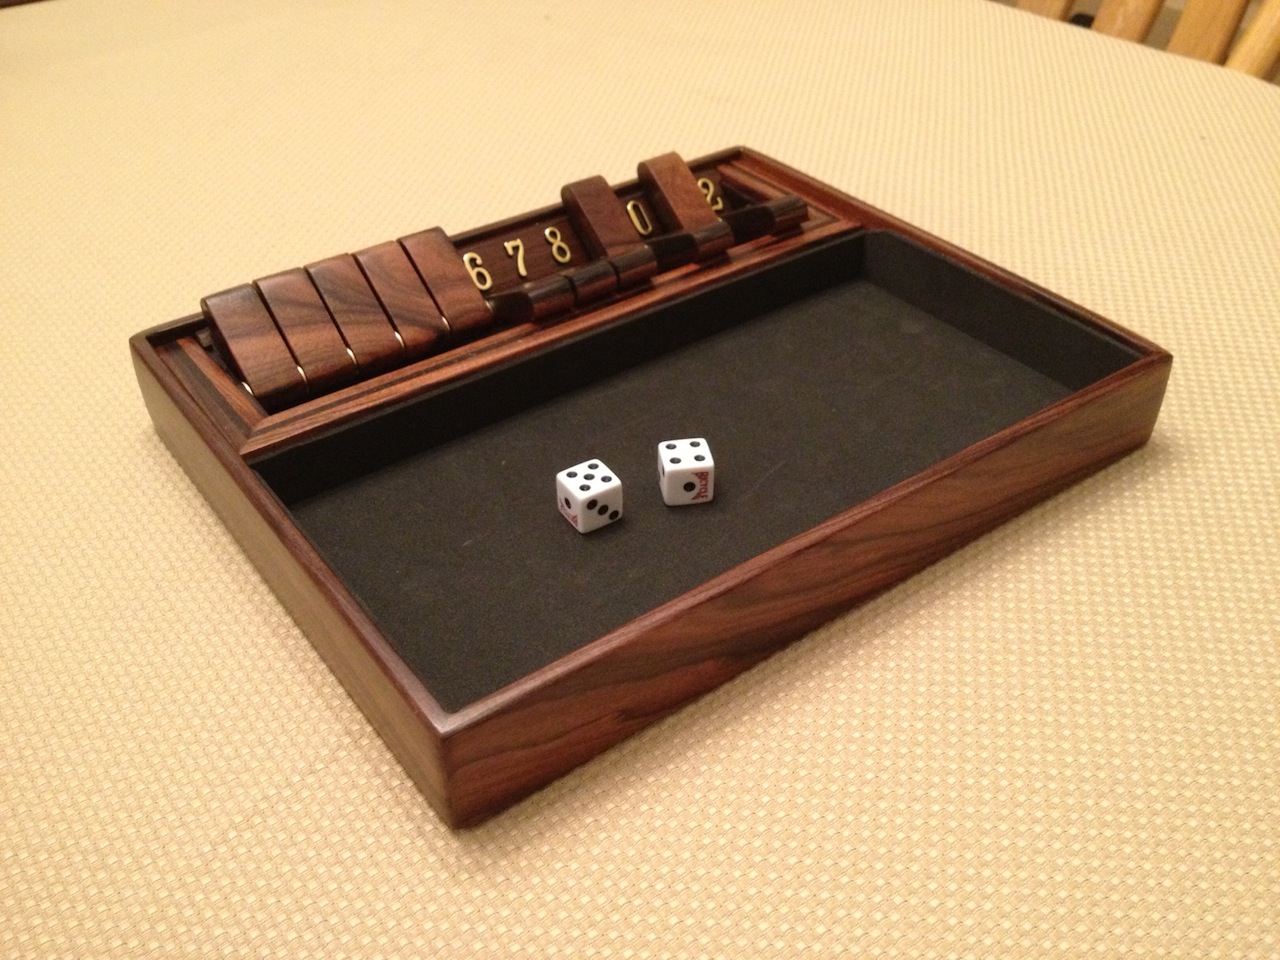
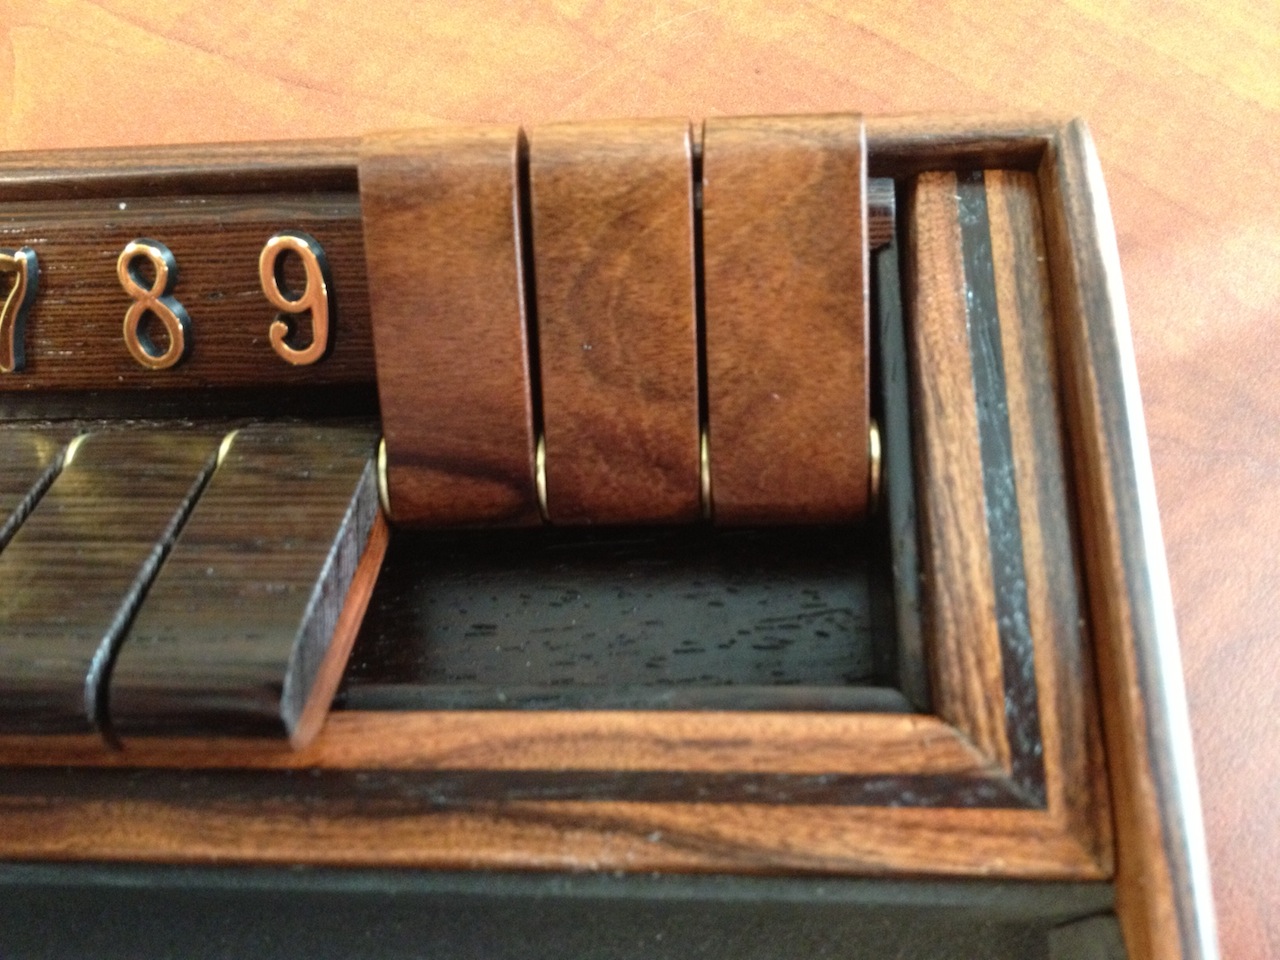
To start with, the wood used in this project is Bolivian Rosewood and Wenge. I’ve found a big part of the enjoyment in my projects is the wood selection. I like finding interesting wood combinations and with exotic woods a simple clear finish lets the natural color and beauty of the wood speak for itself. Speaking of finishing, I’m even more of a novice at that than I am in basic woodworking (the more I learn the less I know kind of situation), so to keep it simple, I used Lasco semi-gloss aerosol lacquer.
Part of the challenge in a project like this is the assembly order and keeping things straight, more so than the actual cutting and joinery. For example, I used simple miter joinery but if you aren’t paying attention when you make the flippers, the wood grain will not flow together across the individual pieces. Another example would be if you glue in the sides that hold the flipper rod without actually putting in the flipper rod and flippers first, you just did a dumb thing. I may or may not know that from experience! What I am willing to admit from experience is Titebond III glue takes longer than a minute or so to dry. *wink, wink*
In addition to the visible Bolivian Rosewood and Wenge, the bottom that can’t be seen is made from a scrap piece of maple-covered MDF. The bottom side is covered with black felt. The flippers are on a brass rod and are separated by brass washers. The self-adhesive numbers are from a small clock kit. The dice rolling area is covered with kid’s crafting foam (2mm thick). It can be found at any craft store in the kid section. I first used that stuff on a dice tower and it does a great job of softening the sound of dice hitting wood. The dice tower is a pretty cool project too but if you don’t know what that is (most don’t), here is a very short video of a dice tower I made in action:
I suppose this project write up would be lacking without an explanation of how to play “Shut the Box”. The premise of the game is simple, you roll the dice and “shut” out the number you roll or any two numbers that add up to the number you rolled. An example would be if you roll a 5, you can shut out 5, 4+1, or 3+2. The goal is to “shut the box” by closing out all numbers. If you can’t close out all numbers (you roll a number that no combination of remaining numbers adds up to), you add up the numbers left showing for a final score. The lower the score the better.
Advertisers


