Adam’s Tea Box
Viewer Project
-
By Adam Reemts from Cedar Park, TX
Added on June 9, 2013
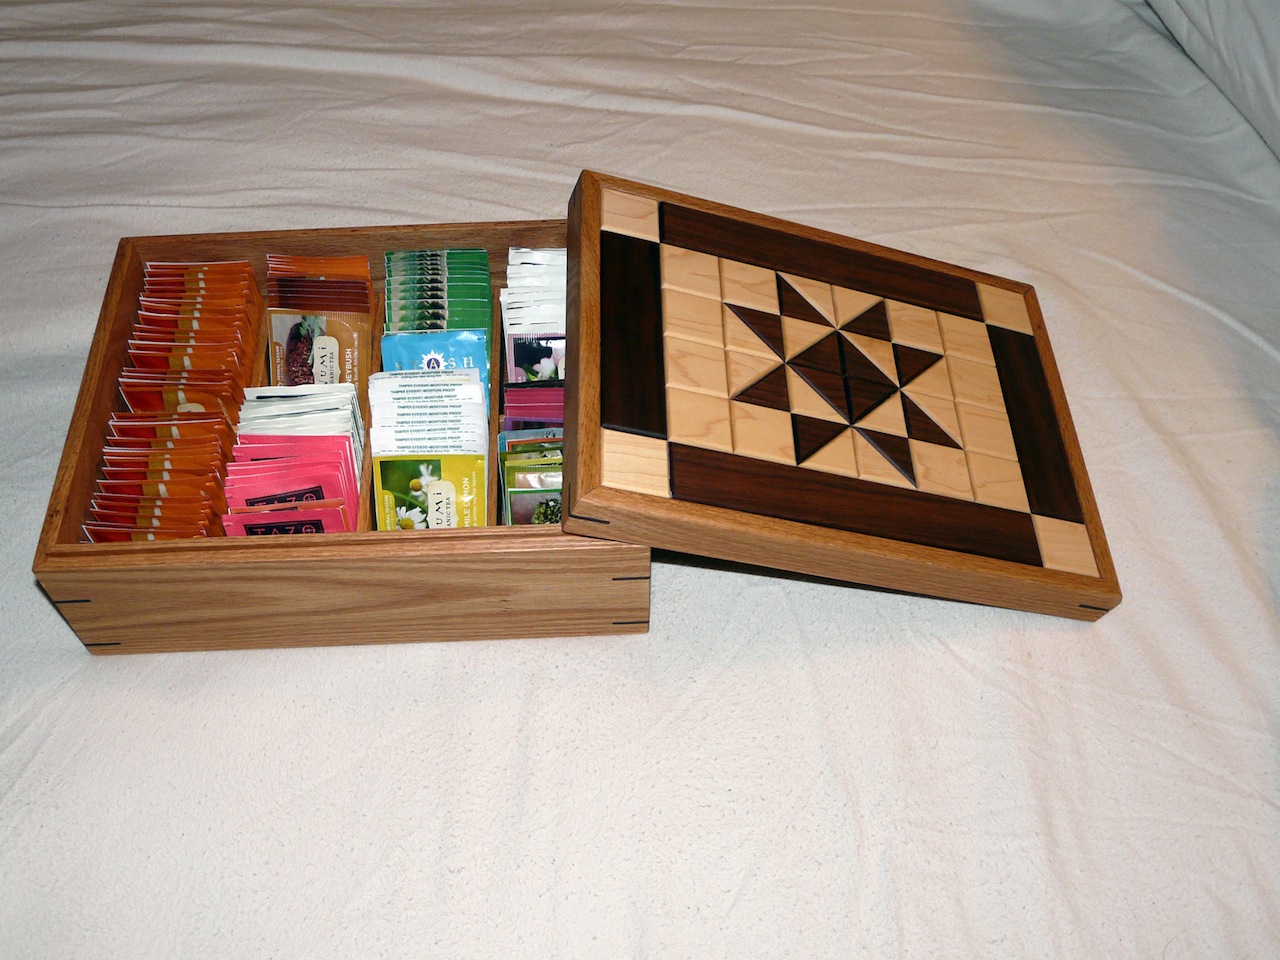
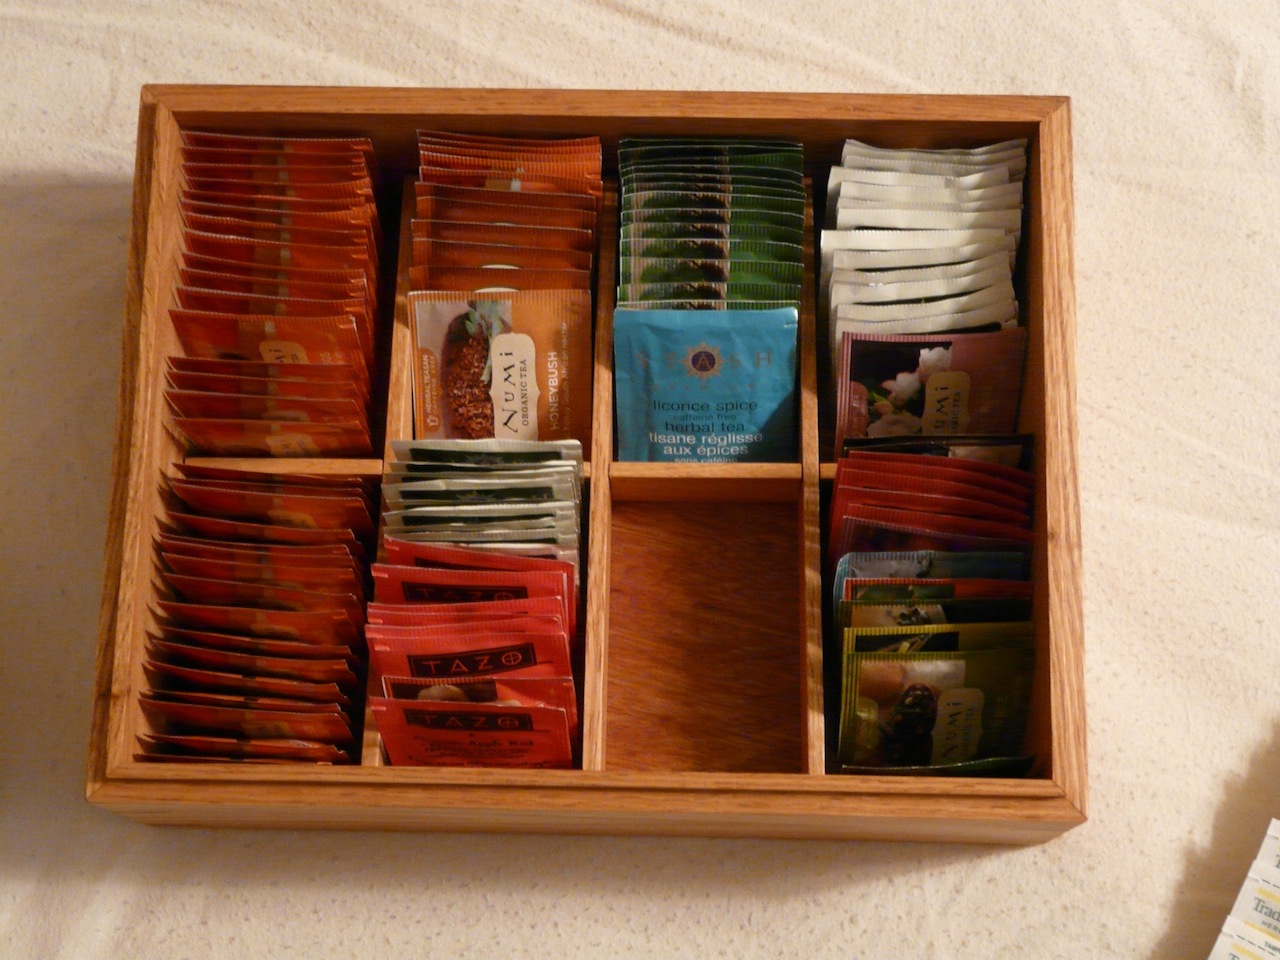
My wife really enjoys drinking tea, and up until now she’s been keeping her tea bags in an old shoe box in the cupboard. When I told her that I was thinking about making her a tea box for Christmas, she said, “Well, you might as well make one for my mom and my sister as well, because they’ll want one, too.” Then I tacked on one for my mother and one for my brother-in-law’s wife, and before I knew it one box had turned into five!
I couldn’t find a tea box plan that I liked, so I just adapted a Woodsmith Magazine plan (August 2010 – Issue 190) I had. I basically just followed the plan with two adjustments. I increased the height of the box to provide enough clearance for the tea bags, and I simplified the decorative top pattern for four of the five boxes. The one you see here is my wife’s box, it follows the quilt-top pattern from the original design. The other four boxes used a simplified pattern made up of nothing but rectangles to save time. I forgot to take pictures of those boxes before we sent them out.
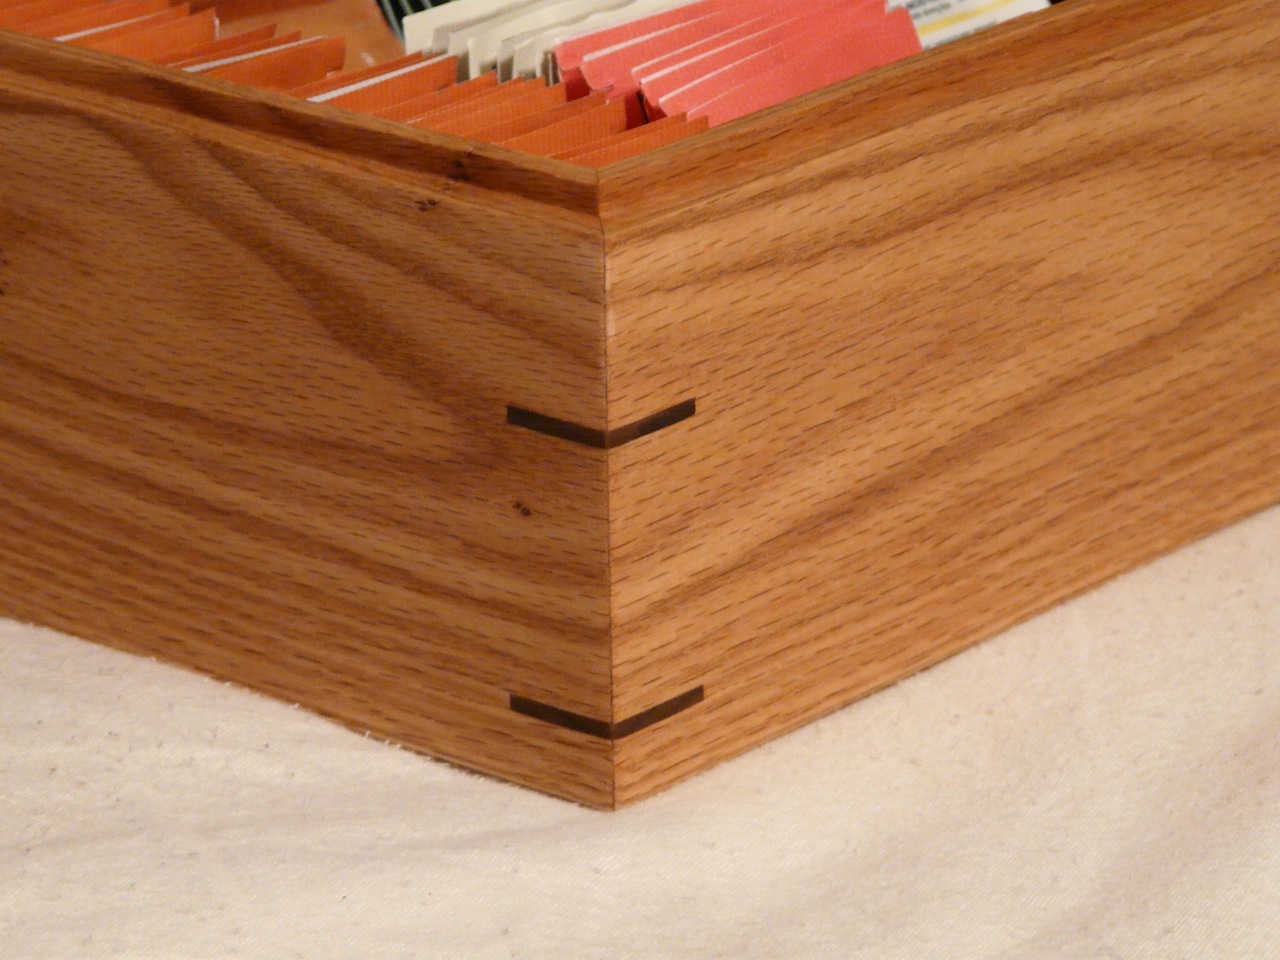
The box is pretty straight forward. You assemble the box with the plywood top and bottom captured in dadoes. The lip for the lid is formed by two dadoes, one on either side of the workpiece, separated by a very thin piece of wood holding the box together. Once the box is assembled and the glue has dried, you cut away the top on the tablesaw. At least that was how it was supposed to go–somehow my two dadoes got spaced a bit too far apart, so I had extra wood left on the lids to cut away. I ended up having to build a jig something like a tenoning jig to hold the lid steady while I trimmed away the remaining wood. Then some work with a hand plane to finish cleaning things up.
The pattern on the lid is 1/4″thick pieces of red oak, walnut, and maple glued onto the plywood top. I spent a lot of time with a shooting board trimming those pieces to fit! Each of the pieces has a 1/8″ roundover on it. These create shadow lines to help hide any small gaps, and actually the plan recommends having just a tiny bit of wiggle room to help with the final fitting. The box is finished with a beeswax/mineral oil finish.
This project was a great challenge for me–definitely the most difficult piece I’ve built so far. I enjoyed trying out new techniques like adding the splines and creating the lipped lid, and there were two or three instances where I had to stretch my mind a bit and do some problem solving along the way. I have to say that the best was getting a text from my dad, who is a long-time woodworker himself, saying that he got “outclassed” in the woodworking gift department this year! Now it’s on to my next gift project for my wife–an oak sewing desk.
Advertisers


