The mortise and tenon joint is fundamental to good woodworking. There are lots of variations of the mortise and tenon including what I’m going to show you today: the double mortise and tenon joint. The concept is simple. Instead of having one giant mortise and tenon joint, we split it into two.
Is It Stronger?
Maybe. For thicker workpieces such as 8/4 stock, I personally believe a double tenon can be stronger than a single massive tenon. My logic comes from the fact that the double tenon sports twice as much surface area as the single tenon. And more surface area typically equates to increased strength. Admittedly, I haven’t done the testing myself so I have no numbers to back up my opinion. If anyone can recommend a joint strength test that we can reference, please feel free to mention it in the comments below.
Start With the Mortise
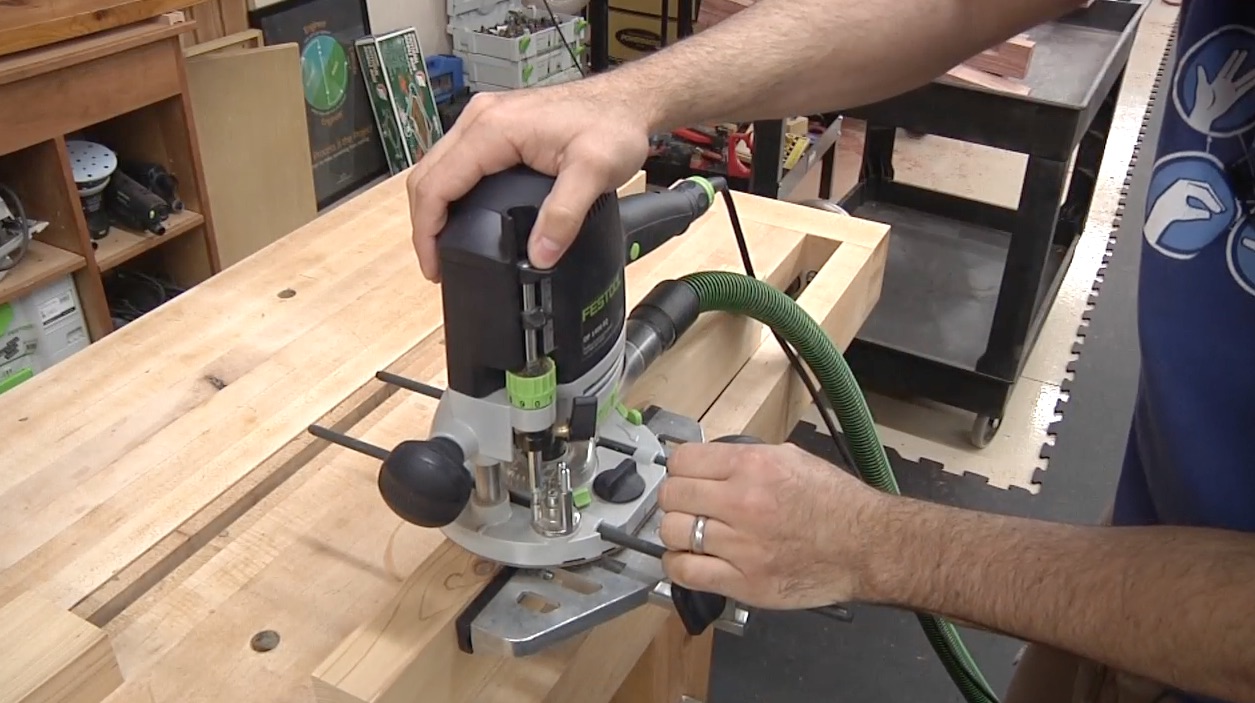 Just like a regular mortise and tenon joint, I like to start with the mortise. I use a router with an edge guide and a 3/8″ router bit to do the work. By making a pass on each side of the board, I can produce perfectly symmetrical twin mortises, each the exact same distance from the edge of the workpiece.
Using a piece of scrap, I make a sample mortise that starts off just like the others. But to help us with our tenon setup, I’ll remove the middle piece of stock between the mortises to produce one full width mortise. This is what we’ll use to setup for the outer cheek tenon cuts.
The Tenons
Using the large mortise, I make marks on the end of the tenon board that represent where we need to cut the outer cheeks. It’s also a good ides to use a cutting gauge to establish the shoulder. At the table saw, I use a miter gauge and the rip fence to cut the 3/8″ shoulder on all four sides of the workpiece.
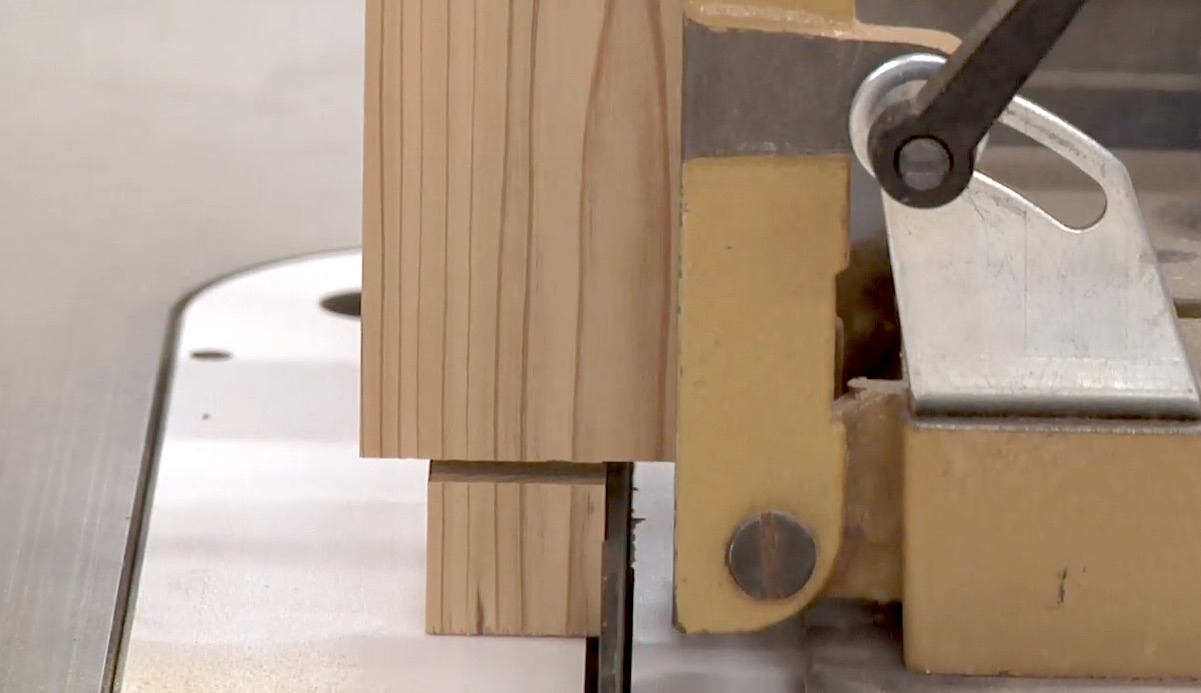
Next, using a tenon jig, I raise the blade and cut the cheeks. It’s a good idea to intentionally make the tenon just a little fat. Check the tenon against the large mortise and adjust the jig as necessary, sneaking up on the perfect slip fit. Once the wide cheeks are established, cut the short cheeks as well using the same setting at the table saw.

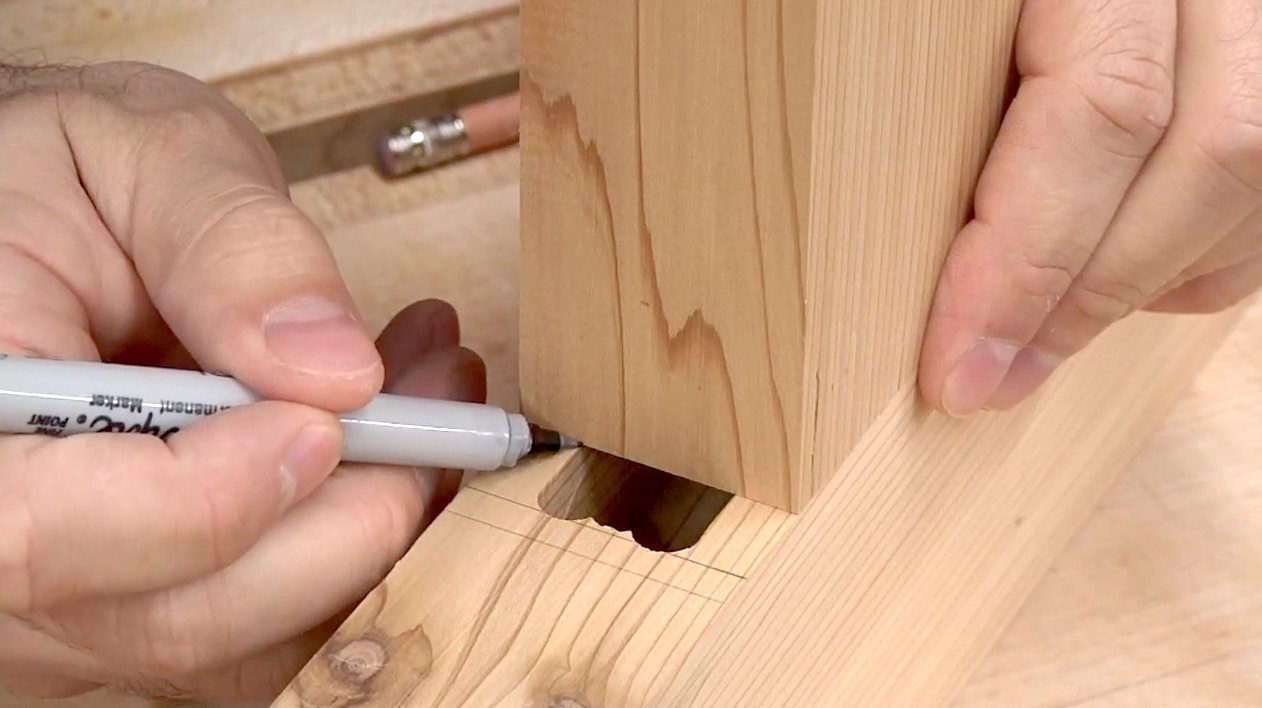
With the tenon resting on one of the true double mortises, mark the location of the center mortise wall. Rest the tenon jig as needed to remove stock from the middle producing two equal-sized tenons. This is another case where you’ll want to be cautious and sneak up on the fit. In all likelihood, you’ll need to do a little chisel cleanup after the operation if you want the shoulders of your tenon to meet up perfectly with the mortise board. While the initial setup takes a few minutes, you can batch out a bunch of these joints in no time flat!
Stuff to Think About
Consider using a square-tooth blade. Some rip blades feature a square tooth that results in a nice square cut. Box joint blades and blades with a deliberate square tooth grind are also good choices. Here’s the one I use. If you have to use a blade with alternating bevels, it isn’t the end of the world though. You’ll just have a little more cleanup to do with the chisels.
Although I didn’t show it in the video, you’ll need to be concerned about the square tenon/round mortise issue. To get the perfect fit, you’ll either need to square up your mortises or round over your tenons. I prefer to round over the tenons since it’s generally faster and it allows me to easily finesse how much slack I have in my joint.
If a tenon jig is a little rich for your blood consider making your own:
Shop-Made Tenon Jig – Woodsmith
Table Saw Tenon Jig – Popular Woodworking
How to Make a Tenon Jig (VIDEO) – Austin DenHerder


