Developing a Basic Design
Article - January 5, 2009
This week’s question comes from Tom, who writes:
I am planning a display case for a shotgun (grandfather’s) and a putter (dad’s), and perhaps a smaller case for two pocket watches (grandfathers’). I was thinking simple boxes at first, then I started considering adding some detail that could represent my contribution when I give them to my son (he’s 28).
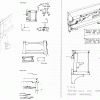
I’ve been playing with G&G type joints you are using on your gadget station but I seem to be hitting a stumbling block (sketches attached). I think I need a face frame to add some thickness to hold glass, but the top/side/front intersections get a little clumsy and busy. They need to be a little light, since the pieces are fairly small. The face frames are typically wider and fit inside the case on bigger cabinets, and I haven’t been successful at finding examples of more delicate 3-way jointing. I was wondering If you could offer any suggestions.
One way to solve the problem is to “change the question” and build a single cabinet for all four pieces, but I would really prefer a “set” of smaller wall mounts. But I’m open to any reaction or ideas you may offer. Thank you in advance.
And here was my reply:
Hey Tom. Sometimes we can over think things to the point that we make them more complicated then they need to be. And communicating this via email is going to be tricky. So I will do the best I can to explain. Worse case scenario, I can always get on the live cam and show you examples of what i mean.
First off, I would start designing the piece as a basic box. That will serve as your empty canvas and you can simply add things or take things away as needed in order to arrive at the final design. So in your mind, start with 4 sides and simple butt joints. Then add in the back panel, which is set about 3/4″ in from the back in order to allow for the french cleat. The panel has to be at least 1/2″ ply and will sit in grooves that are cut all around the inside edges of the box. The front has a simple face frame with a rabbet for the glass. The face frame can be glued directly to the body since its a long-grain to long-grain joint. Use biscuits or dowels for alignment purposes if you need to. OK so now you have the template for the basic box. Let’s start making it fancy. Start with the corner joints. Instead of butt joints, we upgrade them to Greene & Greene style joints. Although these are a lot cooler looking, they don’t really change much in terms of our basic box design. How about the face frame? Lets have the face frame joined with mortise and tenon joints and lets have them pegged, just as you do in your sketch. The face-frame is then glued to the front of the box, and trimmed flush on all four sides. No need to inset the frame itself into the box. Hopefully you see where I am going with this. This is how I start all of my box designs. I just find it much easier to adorn a simple box than to reverse engineer a complicated design. Hopefully that will help you get rolling. Let me know if you have any questions and good luck!


