Karen’s Workbench – Week of Workbenches
Let’s check out this workbench submitted by Karen:
I just had to write to you. I am fairly new to woodworking, although I started a few years ago. My time has been limited and my progress slow. I made an out feed table for the table saw. It was never intended to serve as a workbench but space issues led to it being drafted into that role. The more I tried to work with it, the more I realized that I needed a surface that would stand still and one that would allow for a vise. Then FWW came along with their Getting Started in Woodworking series. I had found the workbench that fit both my skills and my garage/shop.
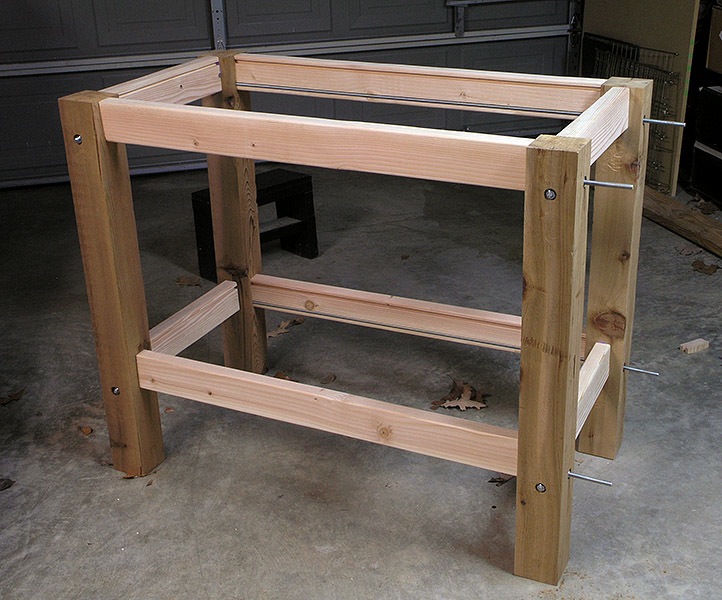
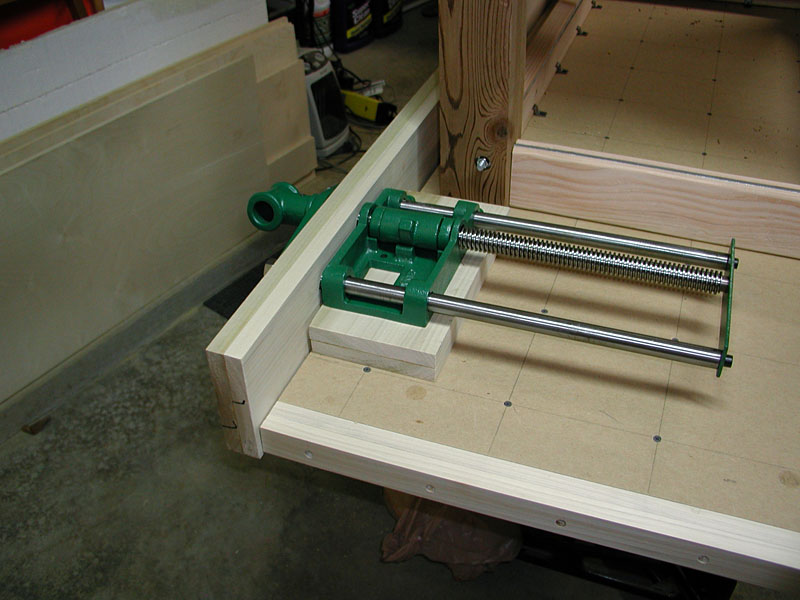
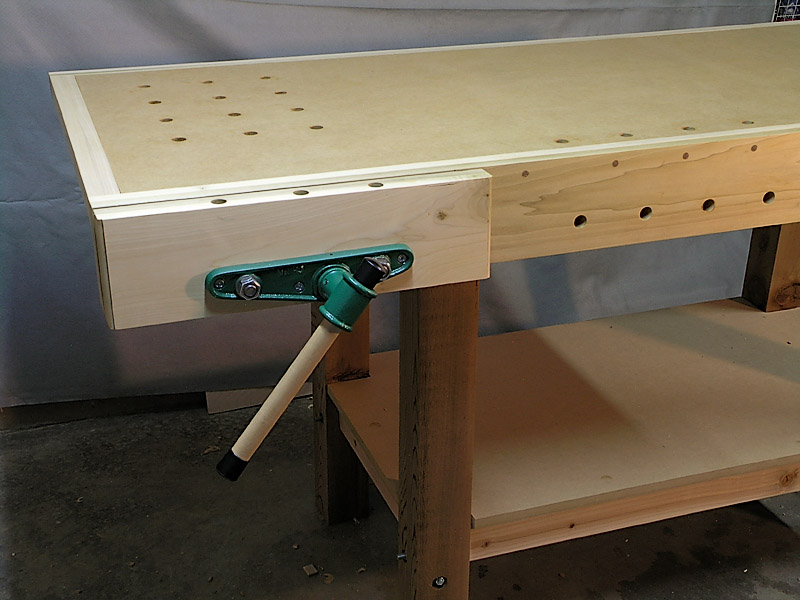
The base was built according to the original plan. The legs are 4×4 cedar and the stretchers are pine 2x4s. Everything was assembled with 3/8†threaded rod. I had never used my router and ran into trouble getting it into the plunge base. Then after I routed the grooves for the rod, I had trouble getting the bit out of the router. Both situations were resolved with quick visits to the chat room. I took more liberties with the top. It started out with two layers of ¾†MDF glued and screwed together as called for in the plan. At that point, I decided to use a different vise. I created a post on the forum and was directed to a vise that fit my needs. Then I added poplar around the edges attached with screws. The screw holes were filled with oak dowels. Yes, using dowels to fill screw holes was new to me too. Again, I popped into the chat room for a quick answer. Then it was time for dog holes. I was hesitant to try to use a forstner bit to drill a 1 ½†deep hole with a hand held drill. The chat room came through again and I was off to buy an Auger bit. After lots of dog holes and three coats of paste wax, I pronounced it finished. My shop built bench dogs are almost finished too.

There are lots of things that didn’t turn out perfectly. In fact, when I pushed it up behind the table saw, I found it was just about ¼†too tall to serve as an out feed table. It is way too heavy for me to turn over. In fact I had to pay a couple of high school boys to turn it over at one point. After a bit of consideration, I decided that if lowering the bench was not possible why not raise the saw? A couple of pieces of ½†plywood under the legs inside the mobile base did the trick. Thanks Marc for creating such a warm, friendly, and helpful community.


Nice execution of the FWW design. I am working on my own update to that design myself. I am not sure I get what the holes in your apron there are for though. Is that for Board Jacks?
You might want to cut that all thread before you hook a shin on it. That REALLY hurts…
It’s easy to cut with a hacksaw and a metal cutting blade, both are CHEAP at the hardware store… Lacking that, if you have a rotary tool and cut off wheel, that will work too…
If Board Jacks are what I think they are (something to hold a long board across the front of the bench) then YES that is what those holes across the front are for. I have some extra 3/4″ dowel that works just fine for that.
As for the threaded rod sticking out, I have a plan for that. The right end of the bench sits up close to some shelves and I don’t go in that space much. I left it long so that I can use it to attach some removable storage. I don’t have that part planned out yet except for a piece to hold my electrical strip and a safety switch. I may cut some of the length off after I work out the storage though.
Nice job! I want one! You can always trim the legs a bit if you want to use it as an outfeed table.
Since I raised the saw a bit the height is just fine for an outfeed table.
looks fantastic. this is the same design I used for my first bench, and it served me VERY well!.
seems like this bench has done what it’s supposed to: 1. give you a sturdy work area, and 2: take you through new woodworking experiences.
congrats!
Thanks, it does just what I need it to do.
Karen, what a great riff on our Getting Started bench. I LOVE the wide hardwood trim around the bench top. That will make it tougher and more versatile.
Here’s a link for anyone interested in the plans and step by step video instructions: http://www.taunton.com/finewoodworking/getting-started/season-two.asp
whoops! Dropped the ball on that one. I just added the link to the video series into Karen’s writeup. Thanks Matt!
Matt, thanks for your kind comments and your wonderful video series. I was so excited when I saw this workbench. It was just the right combination of function (with a vise), sturdy, and simple to build. There is no telling how many times I went back to watch those videos over and over to get the details as I went along.
I added the wood edge so that I wouldn’t tear up the MDF over time. The front piece sits in front of the front apron so there is a space that allows for clamping to it.
Thanks again and for taking time to comment.
I like it! I made something similar but I recessed the MDF and covered it with a .25″ layer of hardboard screwed down on the corners. That allows me to change the top if (when) I damage it.
I thought about doing a replaceable top skin but decided against it. I already had several new things I was trying out. Maybe someday if I wear out this top I will do one like that. One good thing about this bench is that the top and legs can be easily separated to replace either one without having to rebuild the other.
Karen,
I too am fairly new to woodworking, and I am building the same bench from the same plans! Yours looks great! I still have a little work to complete it, but yours gives me some ideas! Interesting you went with cedar for your legs. I ended up laminating mine from two 2x4s and a 1/2″ ripped piece from another 2×4.
Looks great!
Sam
Great work! I’m hoping to build a similar table soon. I’ve been a bit of a price junkie lately – can I ask where you got the wood, and how much it cost you?
Sorry I didn’t see your comment until now. I got all the wood from my local big box store except the cedar posts for the legs. I found the cedar 4x4s a the lumbar yard. They were 8 feet long and they cut them in the middle for me.